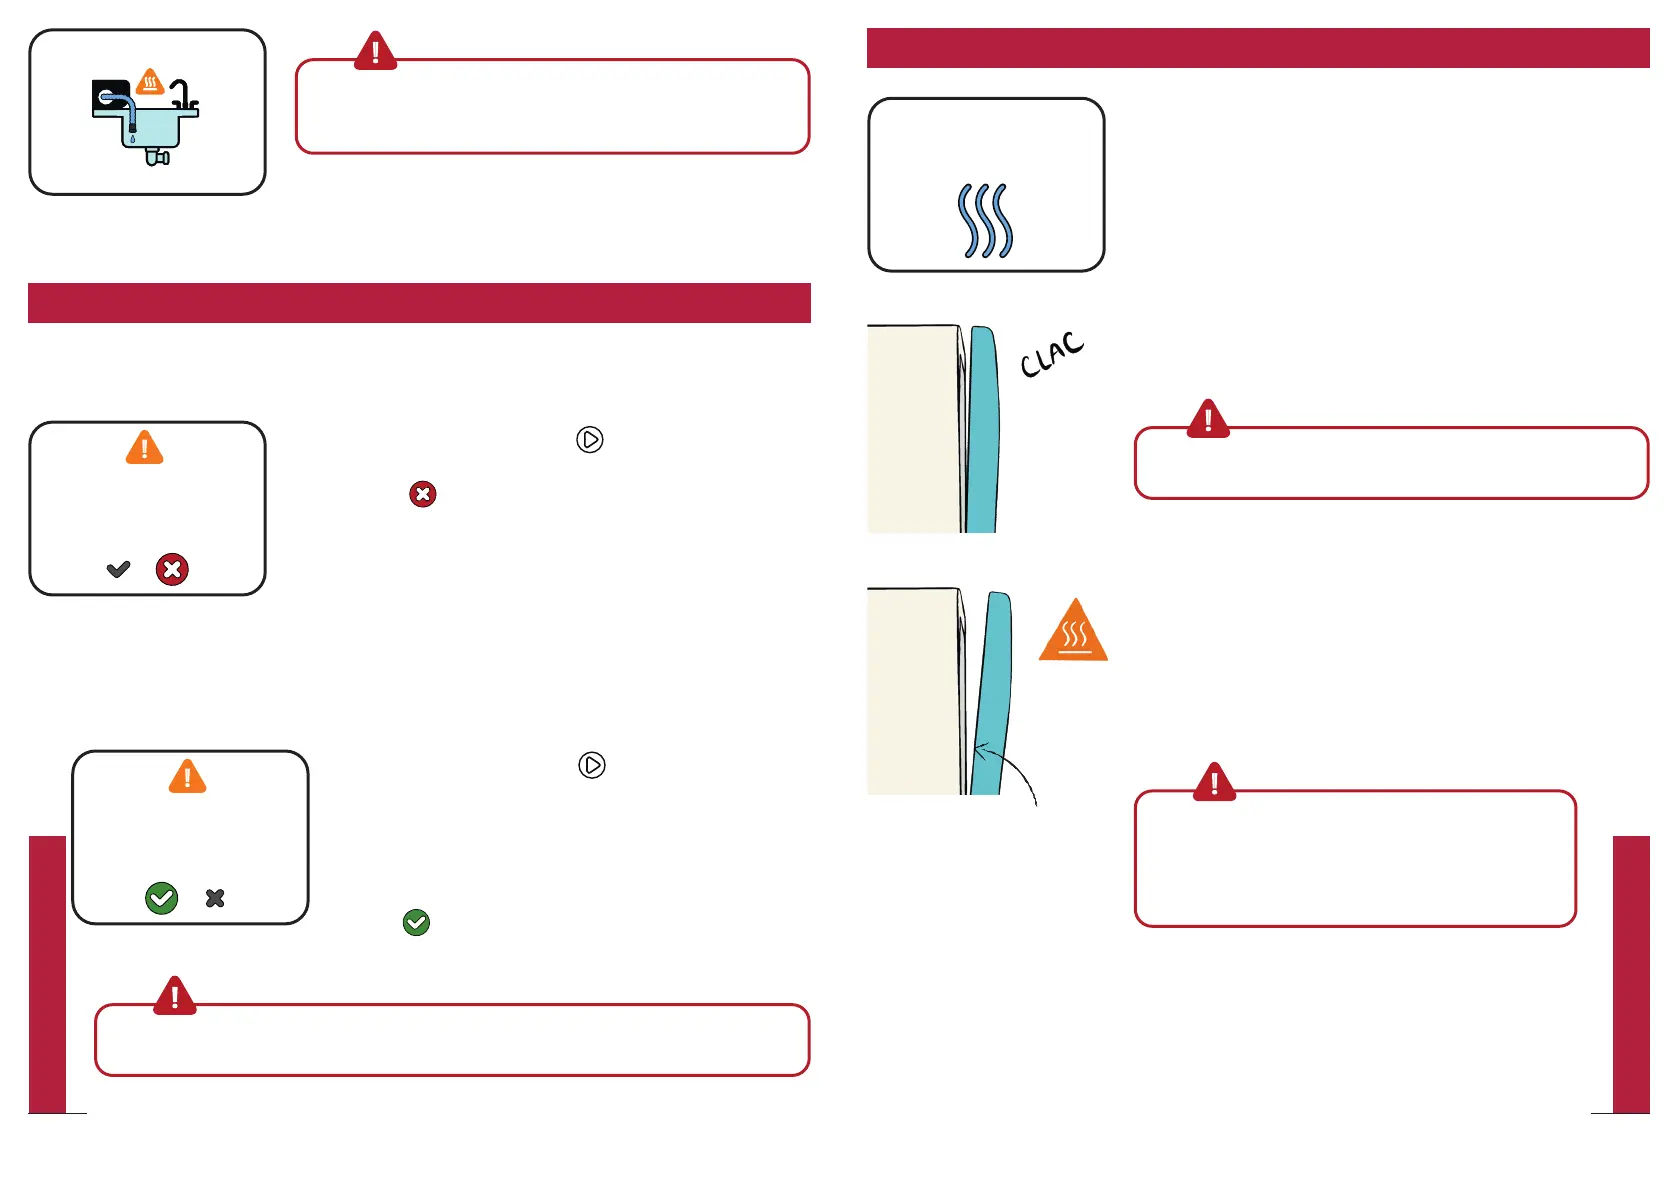
When the timer is close to zero, the “Drying in
progress” screen is displayed.
At this point, the door opens automatically and
remains half-open with a 10 degree angle.
WarningPlease note that hot steam is released when door
opens
Depending on the program, drying might take
several minutes and will not consume additional
energy.
The program is not completed yet; please wait a few
minutes for the drying to finish before removing
your dishes.
Warning Please note that some items are very
hot and could cause skin burns if removed too
soon. Daan Tech shall not be responsible for such
incidents, which occur when dishes are removed
before the offical end of the cycle.
When the program is completed, a signal sound occurs (unless you
have turned off the sound in “Settings”) and Bob will automatically go
into standby mode.
Upon completion of the program, leave Bob’s door open (10°) to prevent
unpleasant smell. This also reduces the energy consumption in the
standby mode.
Please note that some water
residue may remain on your
dishes if you do not wait for the
drying to nish.
At the end of the wash cycle
Drying in progress
Wait for sound signal for
cycle end
Warning: Ensure that the drain hose is correctly positioned at
a water drain or a container during the entire cycle. Water is
drained several times during a cycle.
Let’s go! The cycle is running now!
y Press the central button to pause the current
cycle.
y Select to abort the current cycle and to
initiate a drain.
y You will automatically be redirected to the
home screen.
Adding extra items during an ongoing cycle
Cancelling an ongoing cycle
y
Press the central button to pause the current
cycle.
y Open the door and pay attention to the escaping
hot steam
y Place the additional item in the basket
y Close the door
y Select to continue the cycle
Warning: If you want to cancel a cycle or add additional items, you must press the
central button to interrupt the program.
During a wash cycle
Emptying
Check on the drain hose
Cycle on pause
Resume cycle?
Cycle on pause
Resume cycle?
41
QUICK UTILIZATION GUIDE
40
QUICK UTILIZATION GUIDE