17
Assembly &
Installation
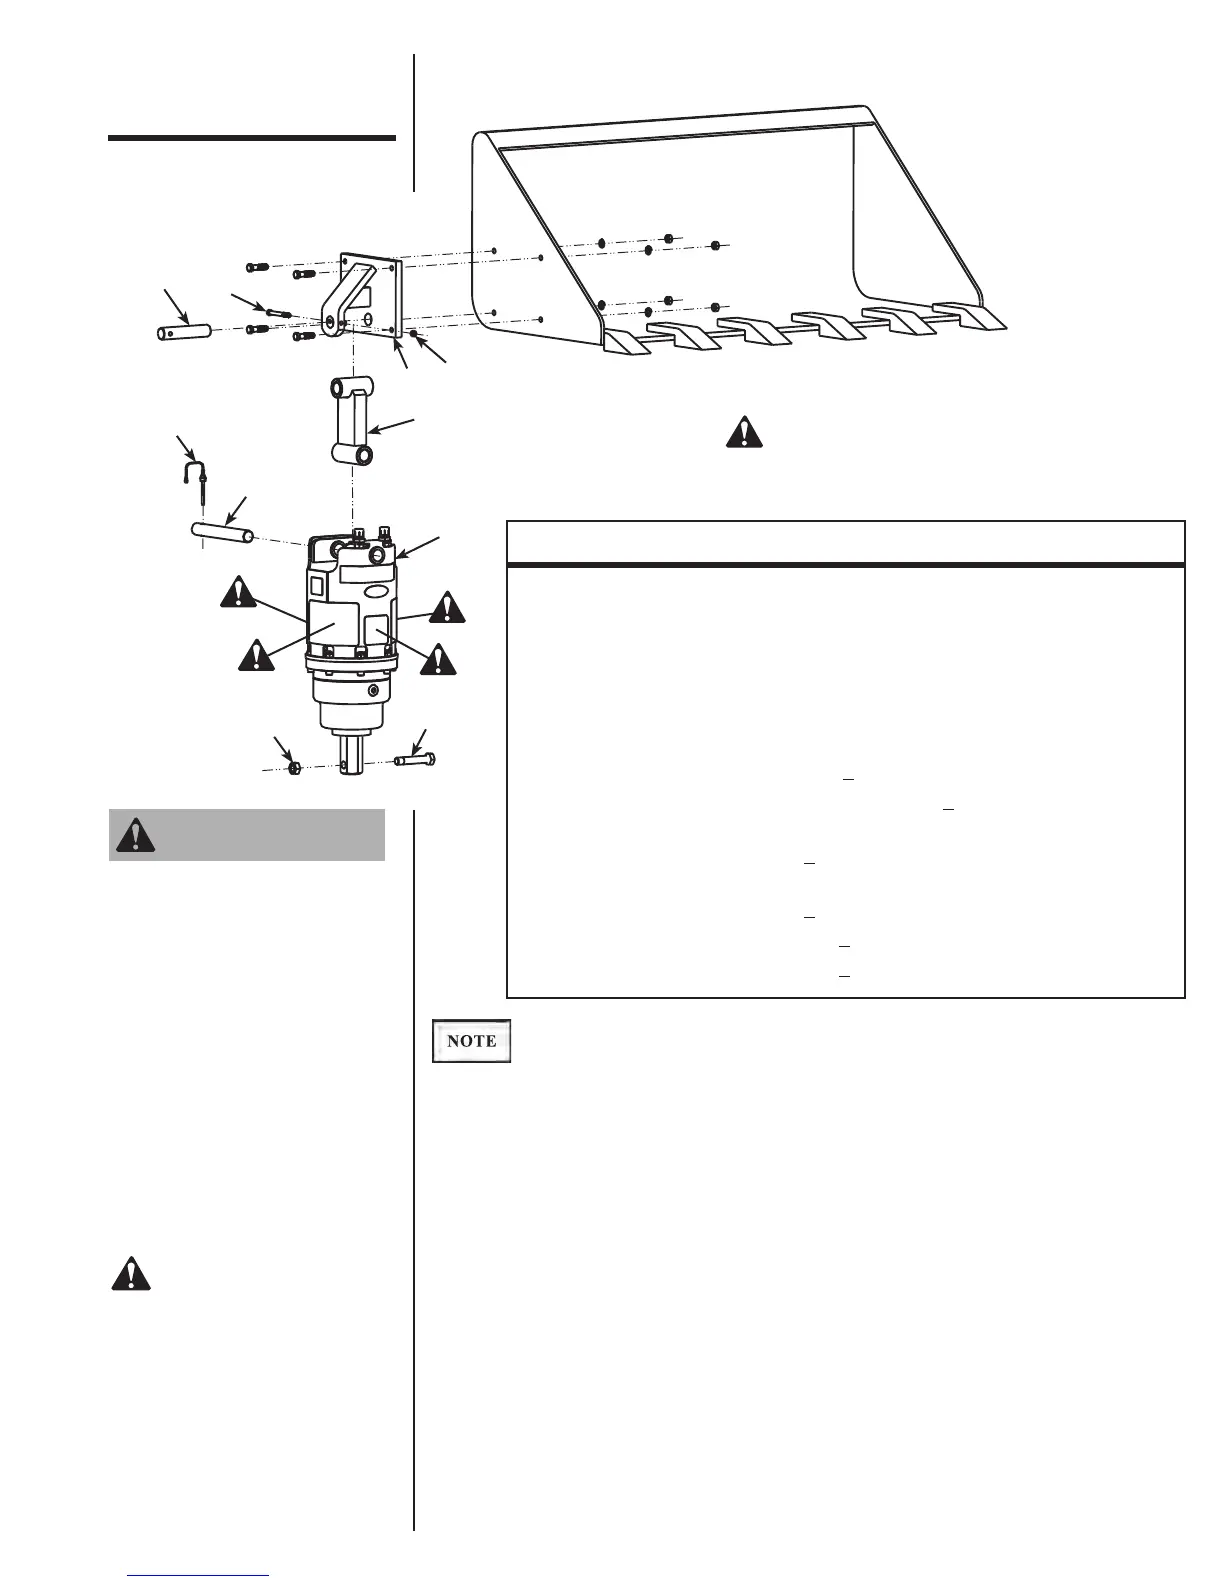
Bolt-on Bucket Mount
Drive unit and auger
exploded views and part lists
are detailed on separate pages
in this manual.
6
7
8
2
5
4
3
9
10
1
= Safety Sign
Location
REF. NO. PART NO. DESCRIPTION QTY.
1 9591B Bucket Mount Assembly 1
2 10976 Knuckle Assembly 1
3 ----- Drive Unit 1
4 10193 Pin (1-1/4" x 9-1/2") 1
5 20012 Lock Pin 1
6 9595 Pin (1-1/4" x 6") 1
7 3041 Bolt (3/8"
16 x 3-1/2", Gr. 8) 1
8 2805 Self-locking Nut (3/8"
16) 1
9 10038 Special Retaining Bolt - 2" Hex
(3/4"
10 x 4", Gr. 8, 3/4" of thread)
1
10039 Special Retaining Bolt - 2-9/16" Rd.
(7/8"
9 x 4-1/4", Gr. 8, 3/4" of thread)
10 10041 Nut (3/4"
10) - 2" Hex 1
10042 Nut (7/8"
9) - 2-9/16" Round
STEP 1:
STEP 2:
STEP 3:
STEP 4:
Consideration must be given to the installation location of the bolt-on bucket
mount kit. The drive unit should be able to swing during normal operation with-
out interference from the bucket. The bucket must be constructed with sufficient
strength to safely handle the loads generated during drilling. Position the drive
unit to allow space for the hydraulic hose connections and routing of hoses.
Drill four holes in the loader bucket to accommodate bucket mount assembly (1).
Bolt bucket mount assembly (1) to the left or right outside vertical surface of the
bucket. (See figure above.) Hardware to attach the mount assembly is not
included in the kit. You will need the following:
4 bolts (1/2" diameter, Grade 5 or greater)
4 lock washers (1/2")
4 nuts (1/2")
Attach knuckle assembly (2) to the drive unit (3) using pin (4). Secure pin (4)
with lock pin (5).
Attach knuckle assembly/drive unit to mount assembly (1) using pin (6). Secure
pin (6) with bolt (7) and nut (8).
Personal protection
equipment including
hard hat, safety glasses,
safety shoes, and gloves
are recommended during
assembly, installation,
operation, maintenance,
service, removal, or
movement of the earth
auger. Do not allow long
hair, loose fitting
clothing, or jewelry to be
around moving and/or
rotating parts.
WARNING
Because of the weight of
some components, and
because some
components are difficult
to balance, two people
are required for safe
assembly and installation
of this equipment.
CAUTION