www.datamax-oneil.com C-1
The printer makes IP requests at power-up, so before making a network connection to the printer consider
how your IP addressing needs to be assigned. The IP addressing of the printer can be configured in one of
two ways: Using a static IP Address or Using IP Discovery (DHCP, BootP or RARP).
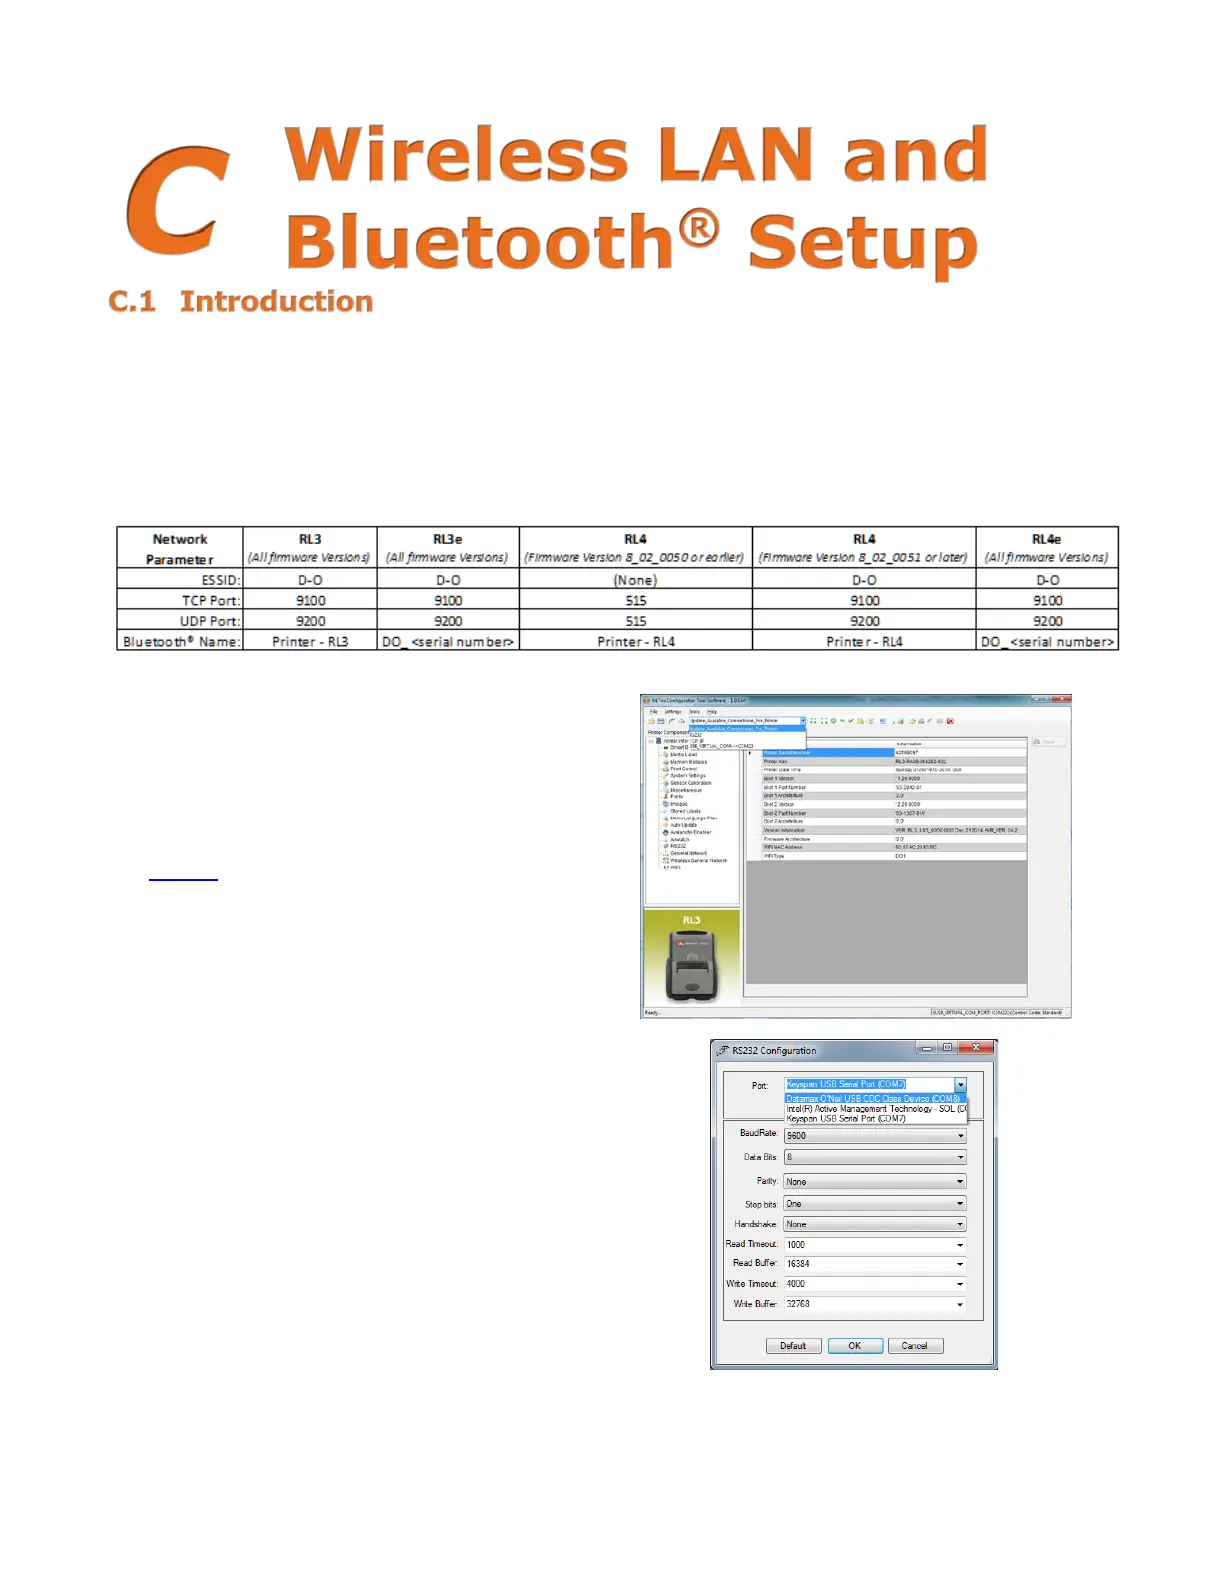
Default Network Settings:
The following table lists some of the printer’s default network settings. Any of these parameters can be
modified using the NETira
™
CT Printer Configuration Utility program. )See Section 3.4 for more information
on NETira
™
CT.)
1) Turn the printer ON and connect it to the
computer using the USB cable.
Refer to
Section
3.3 - Establishing Printer Connection
.
2) Install and Open the NETira
™
CT Printer
Configuration Utility application on your PC (see
Section 3.4 for more information). This
configuration utility can be downloaded from our
website
.
3) Query the printer by using the “Update Available
Connection For Printer”. This will look for the
“USB Virtual COM Port.” Once it is completed,
reopen the dropdown menu and select the
assigned port. If the printer fails to detect the
USB Virtual COM port, check “Click on Settings”
and select the COM port that is assigned to the
Datamax-O’Neil USB CDC Class Device COM port.
NOTE: The message “Done query printer”
confirms that the communication process was
successfully executed.