Chapter 3 - Printer Operation 20
NETira CT Usage
1) Once installed launch the NETira CT configuration utility:
2) Be sure the printer is ‘ON’. Connect the host to the printer (see Section 2.1.2).
For Serial Connections:
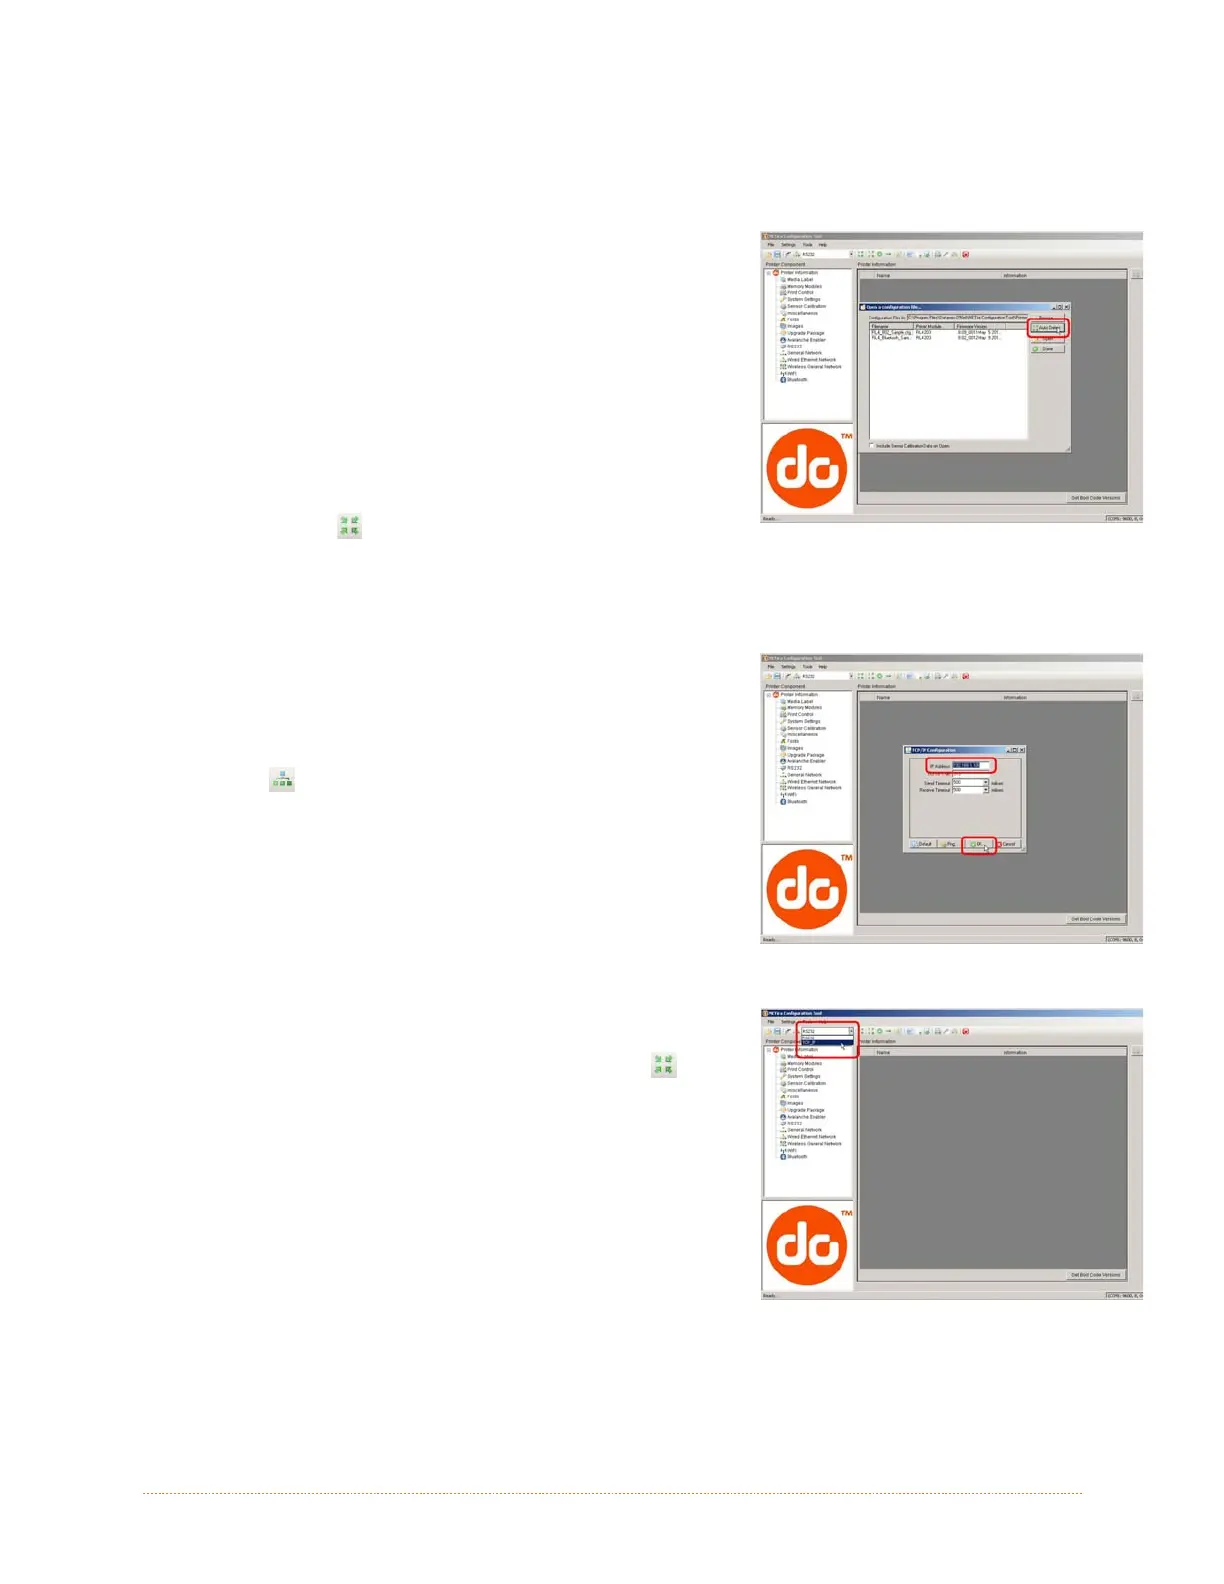
a) Query the printer by using the ‘Auto Detect’ button.
This will connect to the printer and retrieve the
setting currently stored in the printer.
For USB and Parallel Connections:
Close the ‘Open a configuration file…’ dialogue box.
a) In the toolbar, from the drop down menu box,
select the appropriate port Then click on the Query
Printer Icon
.
For Ethernet Connections
Close the ‘Open a configuration file…’ dialogue box.
a) In the toolbar, Click on the ‘ TCP/IP Configuration’
Icon
.
b) In the ‘TCP/IP Configuration’ dialogue box enter the
IP address of the printer and click ‘OK’. (The IP
address should be displayed on the printers LCD).
c) In the toolbar, from the drop down menu box, select
“TCP_IP”. Then click on the Query Printer Icon
.

 Loading...


