Chapter 5 – Maintenance and Adjustments 60
5
5
5
.
.
.
3
3
3
M
M
M
e
e
e
d
d
d
i
i
i
a
a
a
W
W
W
i
i
i
d
d
d
t
t
t
h
h
h
A
A
A
d
d
d
j
j
j
u
u
u
s
s
s
t
t
t
m
m
m
e
e
e
n
n
n
t
t
t
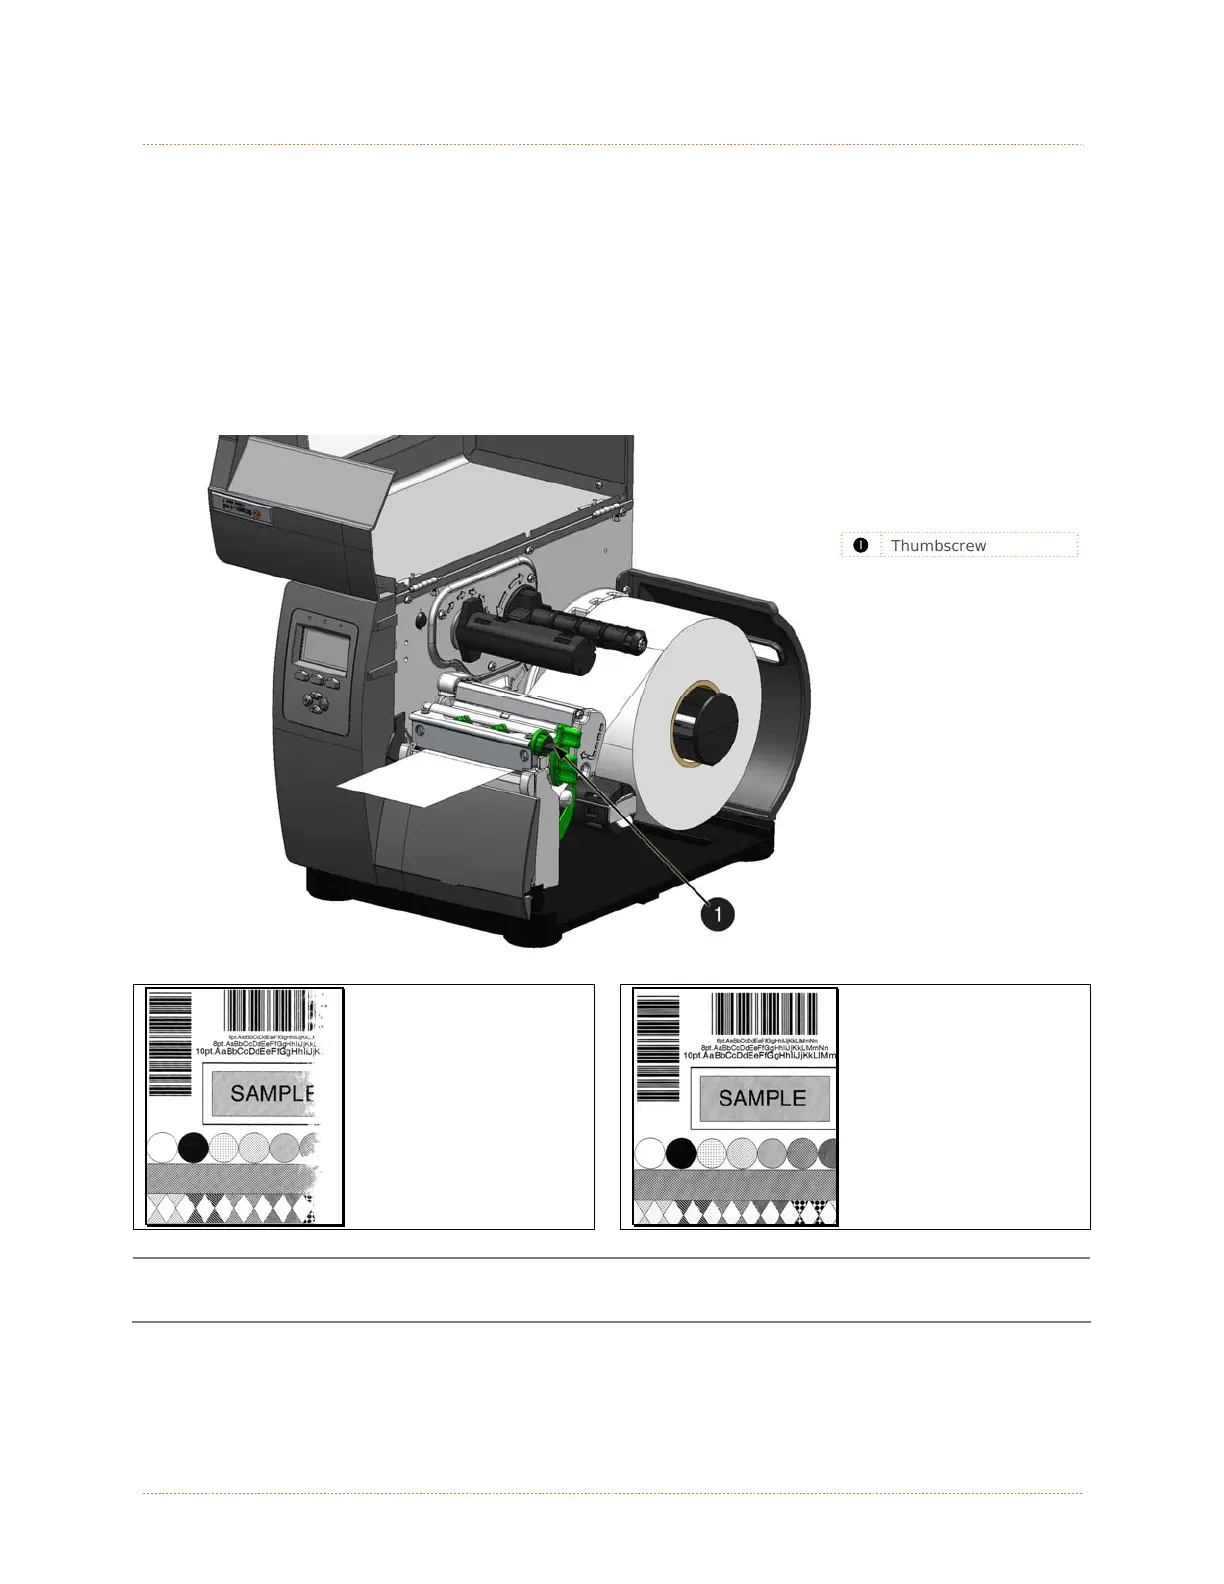
Whenever using narrow media (sizes that are less than the width of the printhead), adjust the
Leveling Cam for even pressure distribution. Adjust the Printhead Leveling Cam as follows:
1. With media loaded, download your label format (or use a Test Menu format) then begin
printing a small batch of labels.
2. While observing the printed output, rotate the Leveling Cam counter-clockwise until the image
fades across the label, as shown in Example 1 (below).
3. While observing the printed output, rotate the Leveling Cam clockwise until the image is
complete, with even contrast, as shown in Example 2 (below).
Thumbscrew
Example 1 – Over
adjustment:
Too much adjustment
produces an image
that fades across the
label. To correct this,
move the Thumbscrew
to the right.
Example 2 – Correct
adjustment:
The proper adjustment
produces a complete
image with even print
contrast across the
label (see note below).
Under-adjustment can also cause problems including ribbon wrinkling, label tracking, and platen
roller and printhead wear. When changing to a different width of label, always perform this
adjustment.

 Loading...


