Operation
15
Chapter 7 - Operation
This chapter will cover:
Setting up
Switching on the Fx4
Conguring the Fx4 using a USB connection
Conguring the Fx4 over a Network
7.1 Setting up the Fx4
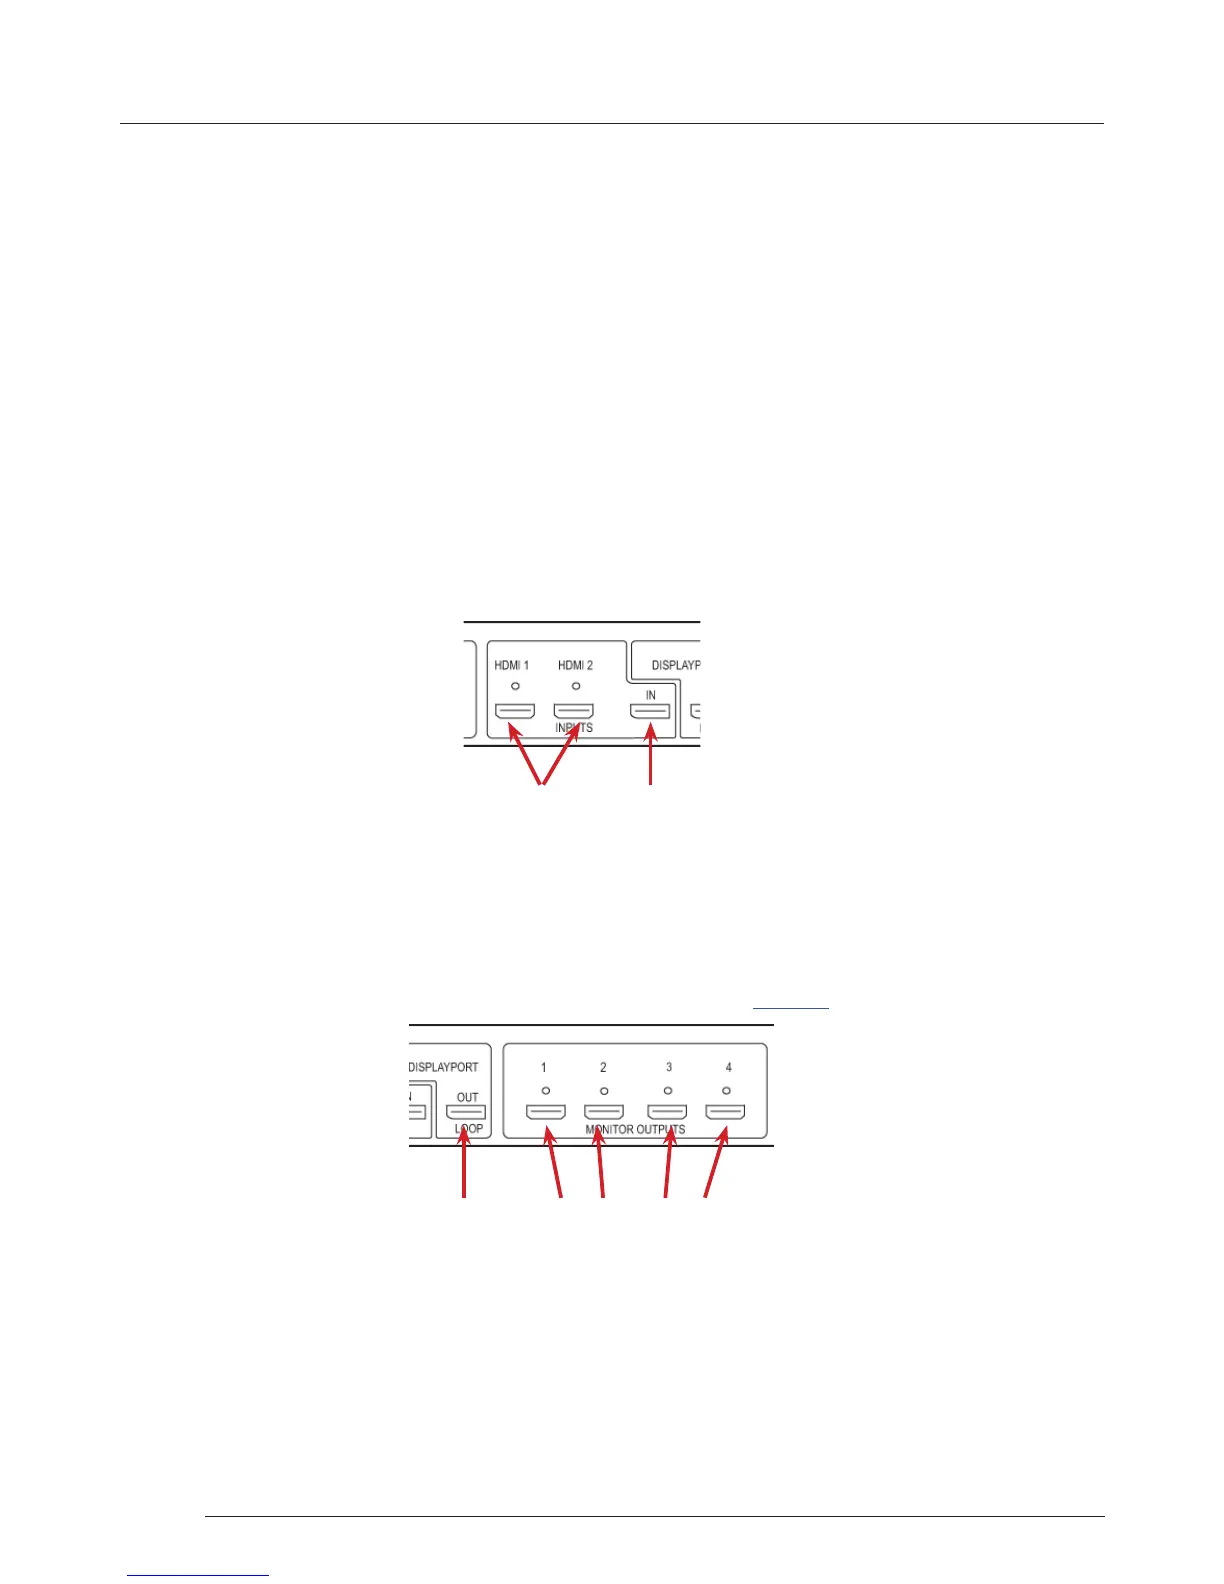
7.1.1 Connecting an Input
Firstly, ensure you have all the relevant input and output cables you need for your project:
• Begin by connecting your input source to one of the 3 input connectors on the rear of the Fx4. You can connect up to 3
input sources, 2 x HDMI and 1 x DisplayPort. If using more than one Fx4, the DisplayPort Input connector will act as the
loop through input on the additional devices. Ensure the input cables are inserted correctly, it is recommended that locking
cable connectors are used.
HDMI DisplayPort
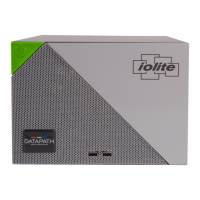
7.1.2 Connecting Outputs
Depending on the Fx4 model ordered, either HDMI or DisplayPort cables are required (not supplied). The Fx4 has 5 output
connectors, 4 x monitor outputs and 1 x DisplayPort loop through.
• Connect the monitor cables to the monitor output connectors on the rear of the Fx4, you can connect up to 4 monitors to a
single Fx4 unit. Ensure the cables are inserted correctly, it is recommended that locking connectors are used.
• The DisplayPort Out Loop is used to when connecting multiple Fx4 units. See Chapter 6 for cabling requirements.
HDMI or DisplayPort
Output Connectors
DisplayPort
Out Loop
7.2 Switching On the Fx4
The Fx4 has a built in power unit which is controlled using the power switch on the rear panel. Connect in the power cable
supplied with your Fx4 and plug in to a mains supply. Switch on the power on the rear of the Fx4 as shown in the following
illustration: