Reassembling the Radiation Shield Page 15
If the LED flashes repeatedly but your console isn’t picking up a signal any-
where in the room, it could be related to one of the following causes:
1. You changed the transmitter ID on the ISS but didn’t change it at the console/receiver.
2. Reception is being disrupted by RF (radio frequency) interference.
Interference has to be strong to prevent the console from receiving a signal
while in the same room as the ISS! In high-interference environments, it may
be preferable to install the Cabled Vantage Pro.
3. There is a problem with the console/receiver.
See “Contacting Davis Instruments” on page 25.
Note:Remember to set the Test DIP switch to OFF when you’re finished testing wireless transmis-
sion. If it is left ON, the blinking LED will reduce battery life significantly.
REASSEMBLING THE RADIATION SHIELD
1. Slide the two open plates over the threaded studs.
2. Slide the single closed plate back over the threaded studs.
On wireless version, ease the antenna through the antenna deployment hole.
3. Place the flat washers, lock washers and plastic wing nuts over the studs.
4. Finger-tighten the wing nuts until they hold the radiation shield plates firmly in place.
PREPARING THE RAIN COLLECTOR
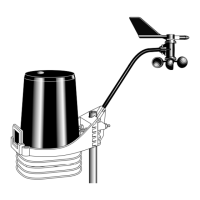
See the illustration on the following page.
1. Remove the rain collector cone from its base by rotating the cone counter-clockwise
until its latches line up with openings in the base and you can lift it off. (The cone fits
in the base tightly and may require extra pressure to remove it the first time. Tip:
steady the base between your knees.)
On Vantage Pro Plus, the UV and solar radiation sensor cables are routed
through the base of the rain collector. Please make sure they do not get
moved. Use care to ensure they do not interfere with the tipping bucket
mechanism or with your ability to get the cone latched back onto the base.
2. Carefully cut and remove the plastic cable tie (usually black in color) that holds the
two-sided tipping bucket mechanism in place during shipping.
 Loading...

