Page 8 Integrated Sensor Suite
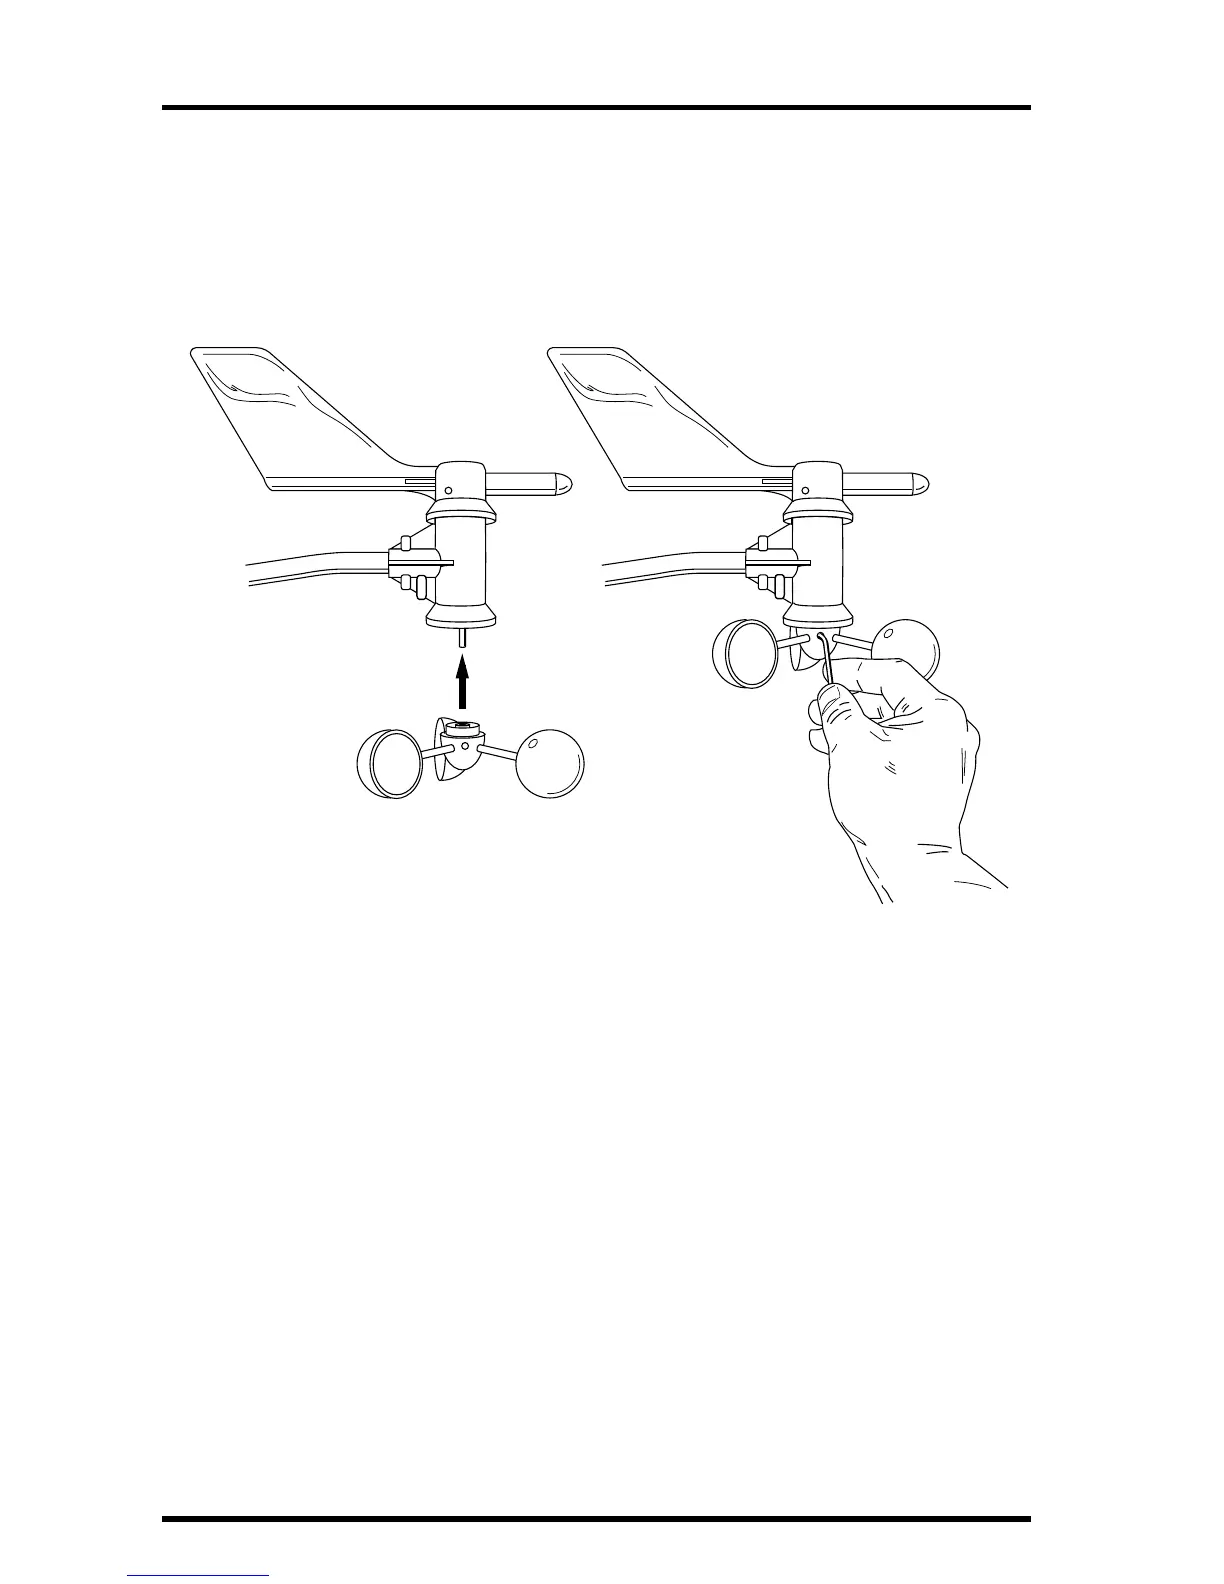
3. Push the wind cups up onto the stainless steel shaft that is protruding downward.
4. Slide the wind cups up the shaft as far as possible.
5. Use the Allen wrench provided to tighten the set screw on the side of the wind cups.
When you let go of the wind cups, they should drop slightly.
6. Spin the wind cups.
A
TTACHING
W
IND
C
UPS
TO
A
NEMOMETER
A
RM
Wind Vane Must Be Correctly Oriented
The wind vane rotates 360
° t
o display current and dominant wind directions on
the compass rose of your console screen. To display this information, the vane
must be
correctly oriented
when you mount the anemometer outside.
Ensure correct orientation of the wind vane in one of two ways:
1. Mount the anemometer so that the arm points north.
The wind vane will be ready for use immediately if you do this.
2. (If you want to mount your anemometer so that it aims toward a direction other than
north, you will need to remove the wind vane and re-attach it aiming toward the pre-
ferred direction. But don’t do this just yet — after you complete the remaining prep-
arations and mount the anemometer, follow the instructions in “Appendix C: Re-
orienting the Wind Vane” on page 29.)
The anemometer is now ready to be mounted,
you can set it aside while pre-
paring the rain collector side of the ISS.
Push cups onto
stainless steel
shaft
Tighten set screw
with Allen wrench