12
ASSEMBLY
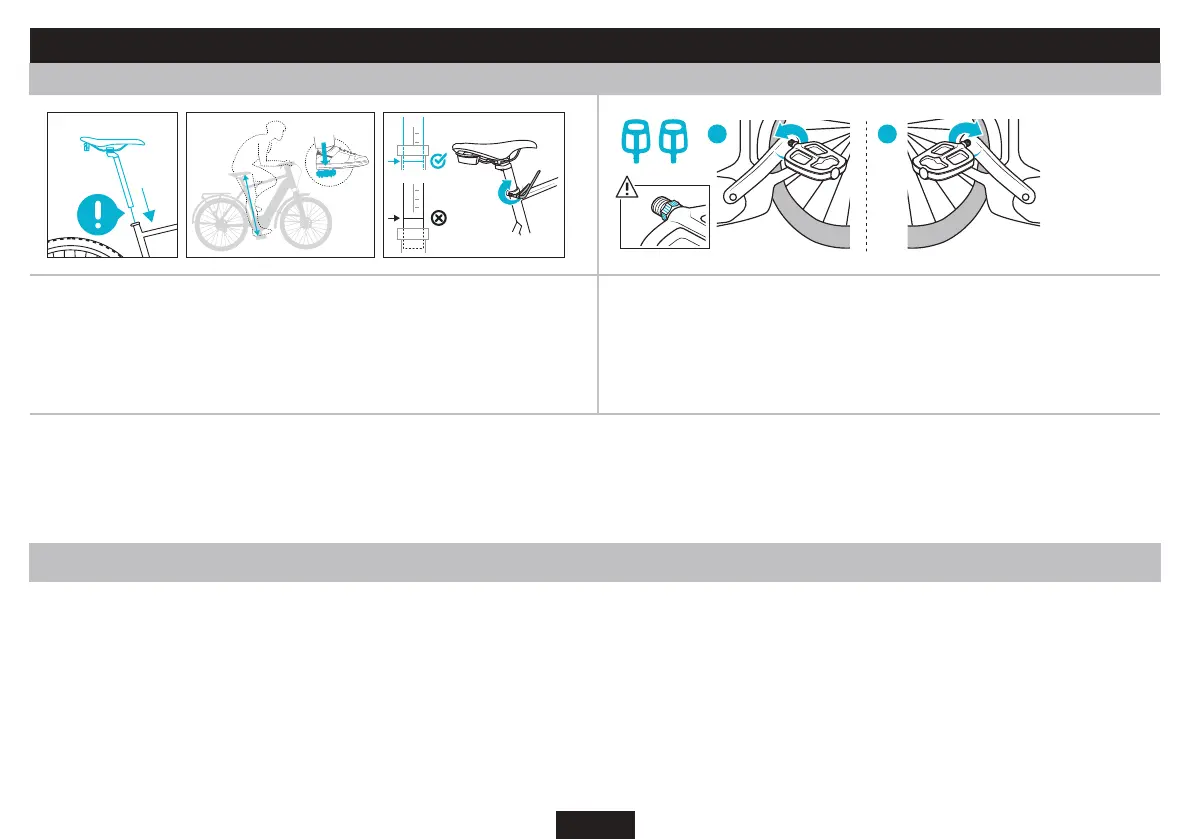
Saddle Assembly Guidelines: Pedal assembly guidelines:
6 Nm
1
2
3
1
2
3
L
R
LEFT
1. Insert the seat po into the seat tube. Adju the height according to your height:
To determine it, sit on the bike with your heel reing on the pedal in the low position. The crank arm
should be parallel to the seat po. When your leg is almo raight with a slight bend in the knee, the
saddle height is correct.
2. The seat tube minimum insertion mark should never be visible.
3. Tighten your seat po to your frame to the recommended torque.
4. Refer to the ASSEMBLY section of this manual.
The bike is equipped with a right pedal (noted R or Right) and a left pedal (noted L or Left).
Before inalling the pedals on the bike, put some grease on the threads of the pedals.
Screw the right pedal clockwise onto the right crank (chain side).
The left pedal is screwed counter-clockwise onto the left crank.
Inall the front wheel of the bicycle in the fork and tighten by screwing the nuts to the recommended torque.
To ensure proper attachment of the handlebars, em, saddle, seatpo, and wheels, it is recommended to use appropriate tools and apply clamping force in accordance with specic tightening torques for each
of the components (in N.m).
Refer to the COMPONENT TIGHTENING TORQUE section of this manual.
Before using your bike, check that the wearing parts are in good condition, in particular the rims, brakes, tyres, eering and transmission of your bike. In the event of abnormal wear or any deformation, have
your bike checked by a Decathlon workshop.
Safety and adjument of the brakes:
For your safety, check the front and rear brakes before each use of your bike. They mu be in perfect condition.
• Regularly check all brake faeners. Disc brakes should be checked regularly. In the event of a brake uid leak, contact a Decathlon workshop. New disc brakes need a break-in period. Braking force will gradually increase as the break-in progresses. Be sure
to account for these increases when using the brakes during this break-in period.
• Regularly check the chain tension. A chain that is not tight enough can cause derailments and falls. A chain that is too tight aects the performance of the bike. The bike chain is automatically tensioned since the latter is equipped with a chain tensioner.
• Regularly check the wheels. Refer to the wear indicators if the rims have any and replace them if necessary. Make sure the wheels are tight.
• Regularly check the tires and check the pressure. The pressure is indicated on the sidewalls of the tire and/or rim. If the pressure is indicated on both the rim and the tire, inate the tires with the maximum pressure indicated on the rim independently of the
maximum pressure indicated on the tire. The rims may have a dierent and lower maximum pressure than the tires.
In order to benet from the electric assiance, before setting o to ride, make sure that all the connectors of the bike are properly connected and that your battery is charged.

 Loading...