INSTALLATION INSTRUCTIONS
STEP 1 - UNPACK AIR CONDITIONER
Excessive Weight Hazard
Use two or more people to move and install air condoner.
Failure to do so can result in back or other injury.
Remove packaging materials. Save the carton and the foam packaging for storing the air condoner when not in use.
NOTE: There are NO packing materials inside the air condioner to remove—Do Not open the cabinet.
Properly dispose of/recycle all packing material.
Handle the air condoner gently.
Keep the air condoner upright and level. Do not set the air condoner on its side, front, back or upside down.
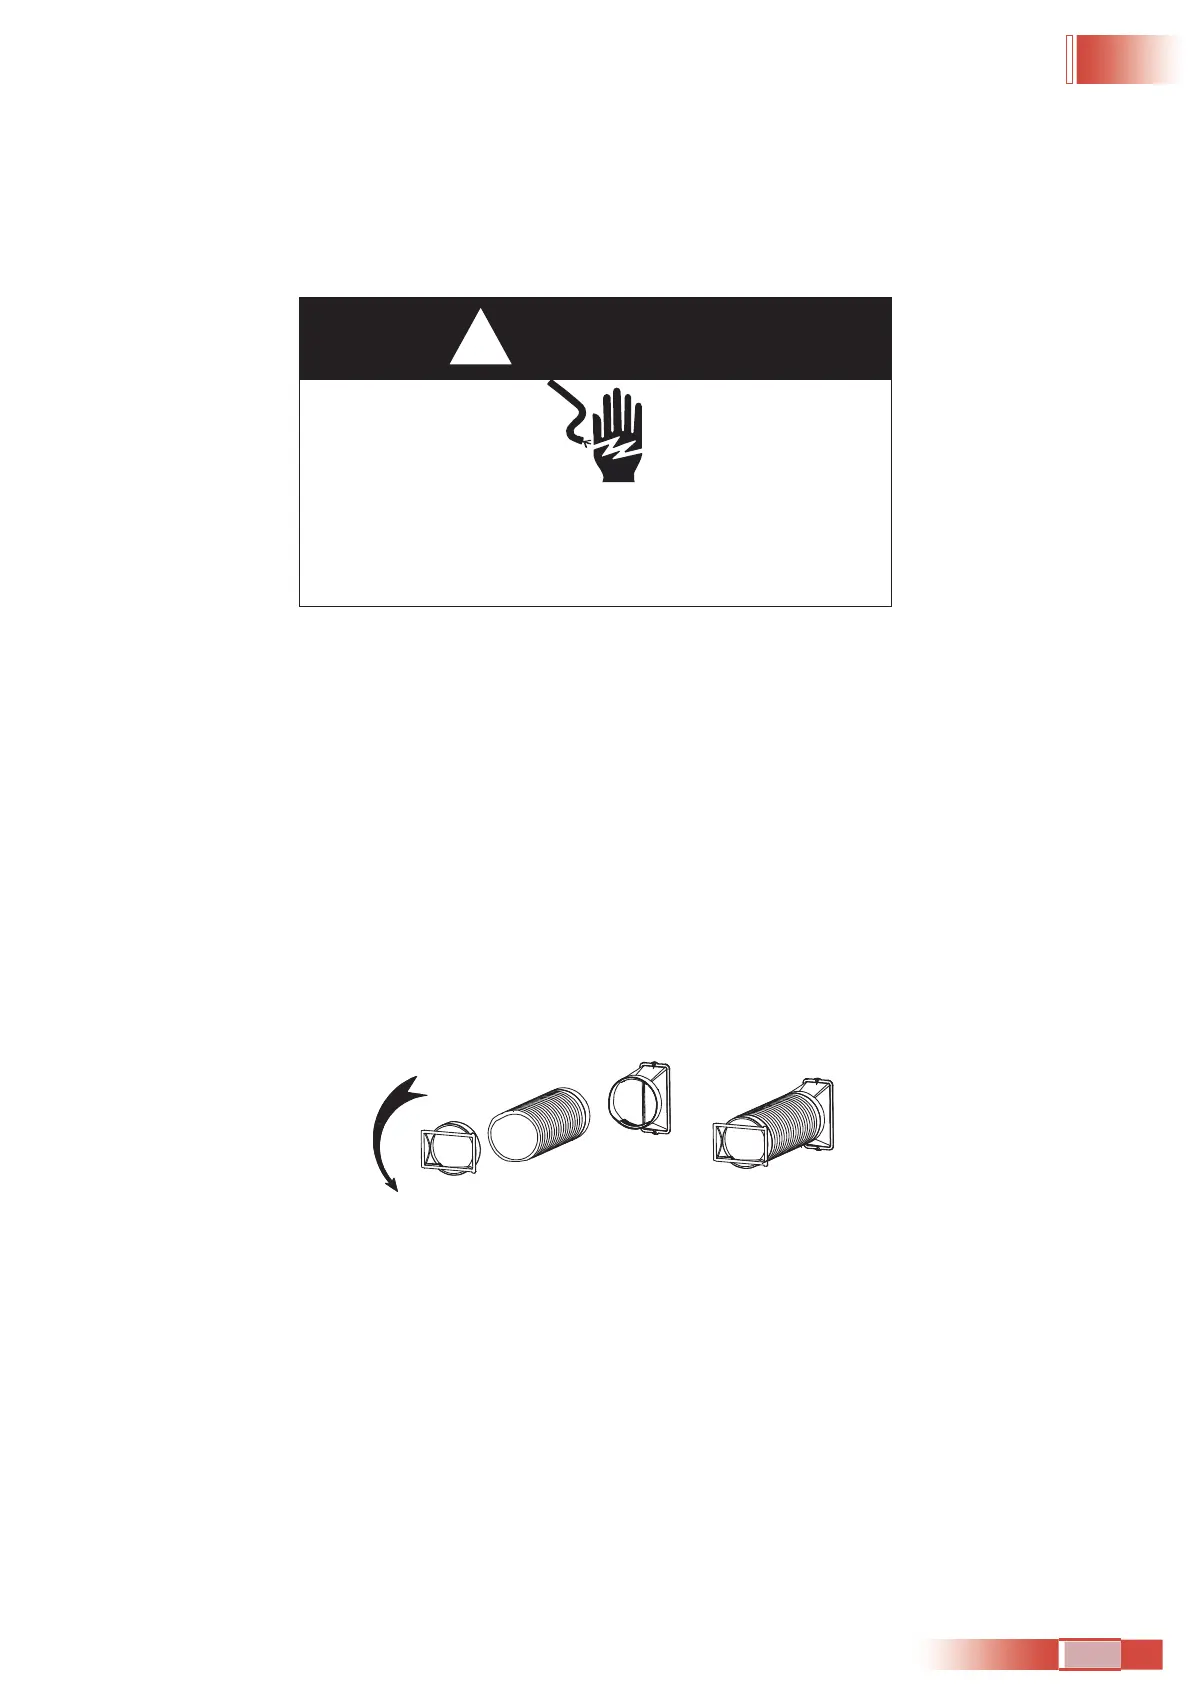
STEP 2 - TWIST THE EXHAUST HOSE CONNECTOR ONTO EXHAUST HOSE
A. Grasp b
oth ends of the exhaust hose and gently pull to expand the hose.
NOTE: Do not ach addonal hoses to extend the length. This would decrease cooling eiency and may damage the
air condoner.
B. Using a counter clockwise moon, aach the open end of the exhaust hose to the exhaust nozzle.
STEP 3 - CONNECT EXHAUST HOSE TO THE AIR CONDITIONER
IMPORTANT: When conneng the hose, the air condoner must be close enough to the window that you will not di slodge
the window
seal plate. Once the hose is connected, move the air condoner 20” (51 cm) from the wall.
!
WARNING
01 02 03 04 05 06 07 08 09 10 11 12 13 14 15 16 17 18 19 20 21 22
23 24 25 26 27 28
29 30 31 32 33 34 35 36 37 38 39 40 41 42 43
44 45 46 47 48 49 50 51 52 53 54 55 56 57 58 59 60 61 62 63 64 65