DRAIN THE INTERNAL WATER
You will need a small pan to catch the water coming out of the water tank. Once the water tank is empty, the unit will resume
operaon within a few minutes.
MANUAL DRAINAGE:
1. Once the unit shuts down upon water-full, turn o the unit and then unplug.
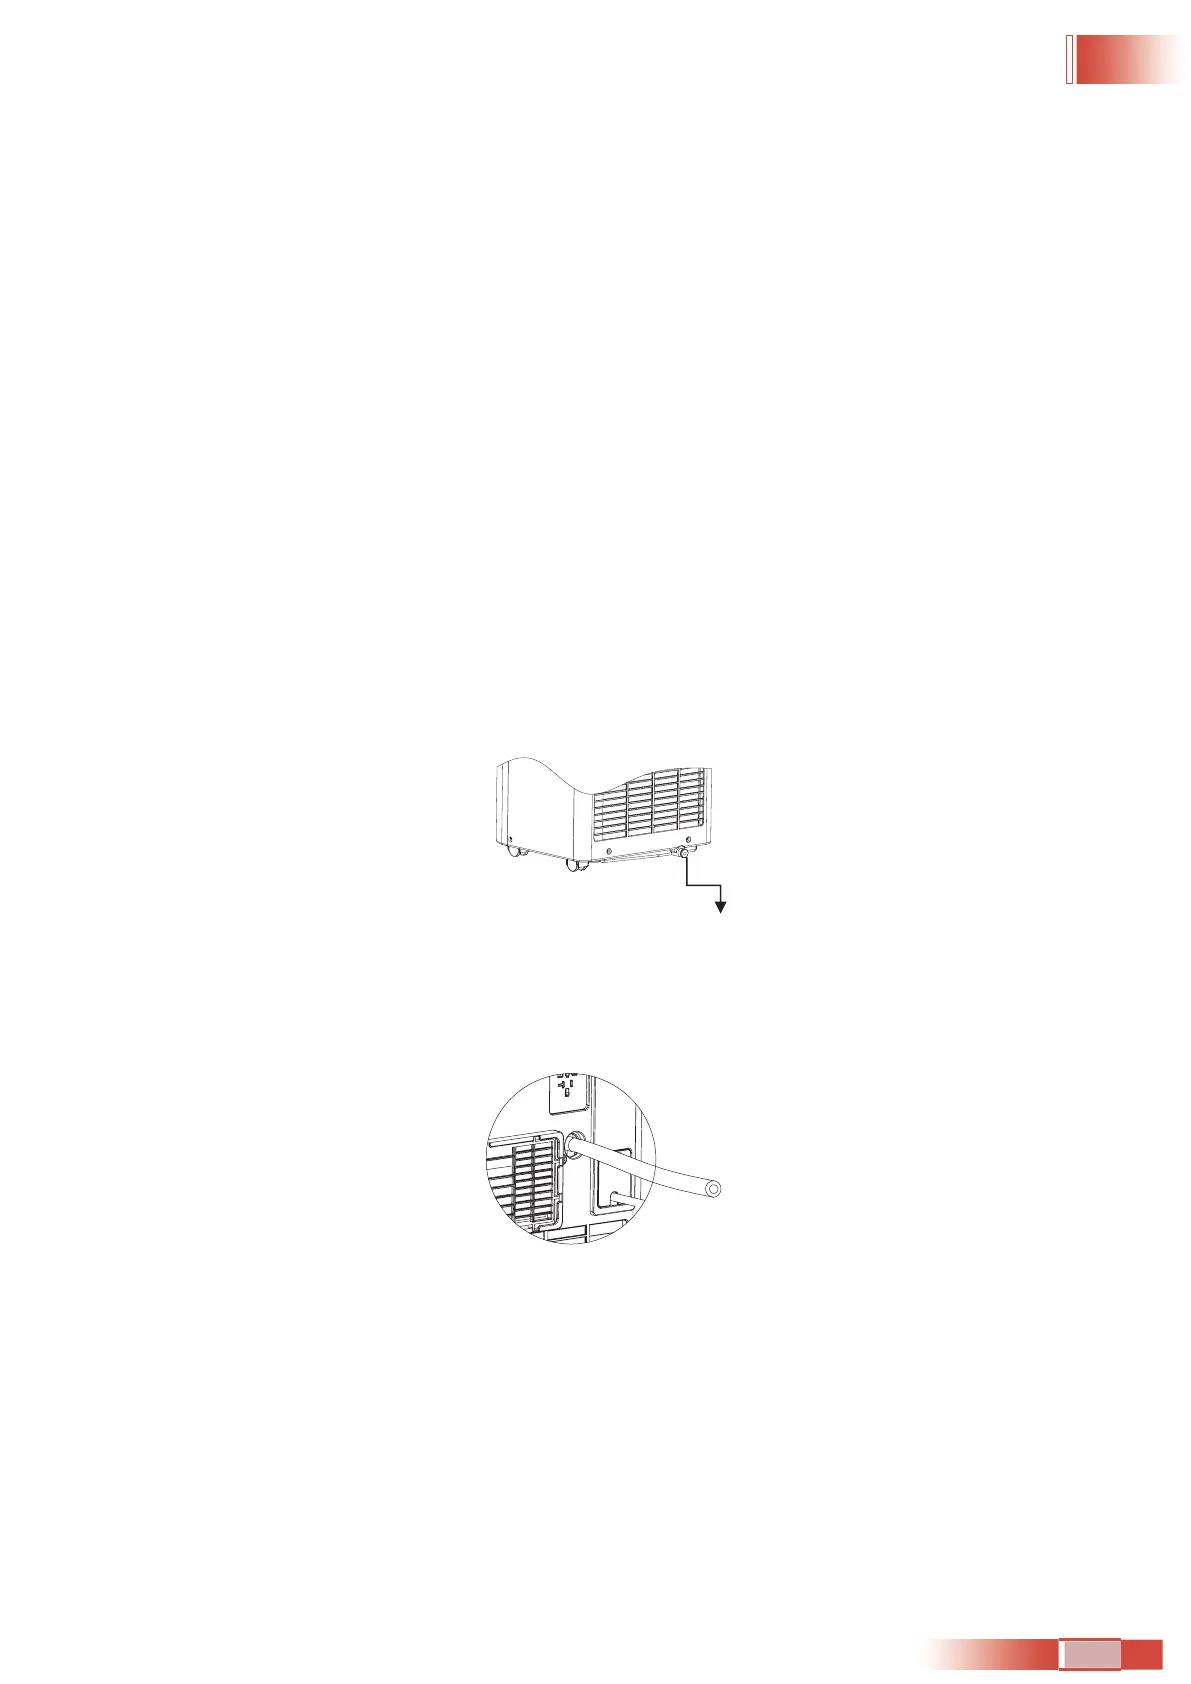
2. Put the tray below the water outlet at the back of the unit.
3. Screw o the drain cover, unplug the water stopper for water ow into the tray.
4. Plug in stopper and screw the drain co
ver ghtly onto water outlet aer drainage.
Notes:
- Protect the drain cover and water stopper properly.
- Move the unit carefully to avoid the leakage it is necessary.
- Tilt the unit slightly backwards when draining.
- Block the drain hole as soon as possible before the tray is full if it cannot hold all water in the unit to prevent the water
leakage and wet theor or carpet.
- Water stopper and drain cover must be htly installed, to avoid new condensate to wet
the or or carpet when the unit
re-starts working.
CONTINUOUS DRAINAGE
1. Screw o the drain-cover & unplug the water stopper.
2. Connect drain-hole with 13mm drain hose, as deep as possible to avoid leakage.
3. Pull the drain hose to bathroom or outdoor.
Notes:
- Drain hose must be installed when there’s no water in the tray.
- It is suggested that not to use connuous drainage when unit is in COOL mode, to ensure enough water recycle in the unit
to enhance
the system cooling eects.
- It is suggested that to adopt connuous drainage when unit is in HEAT mode, to avoid frequent drainage.
- Put the drain hose in an inaccessible place, not higher than drainage hole and keep drain hose straight without any exure.
- Keep the drain cover and its stopper properly when connuous drainage is adopted.
Drain Port
01 02 03 04 05 06 07 08 09 10 11 12 13 14 15 16 17 18 19 20 21 22
23 24 25 26 27 28 29 30 31 32 33 34 35
36 37 38 39 40 41 42 43
44 45 46 47 48 49 50 51 52 53 54 55 56 57 58 59 60 61 62 63 64 65