Page 11
Additional protection by a residual
current circuit breaker is
recommended.
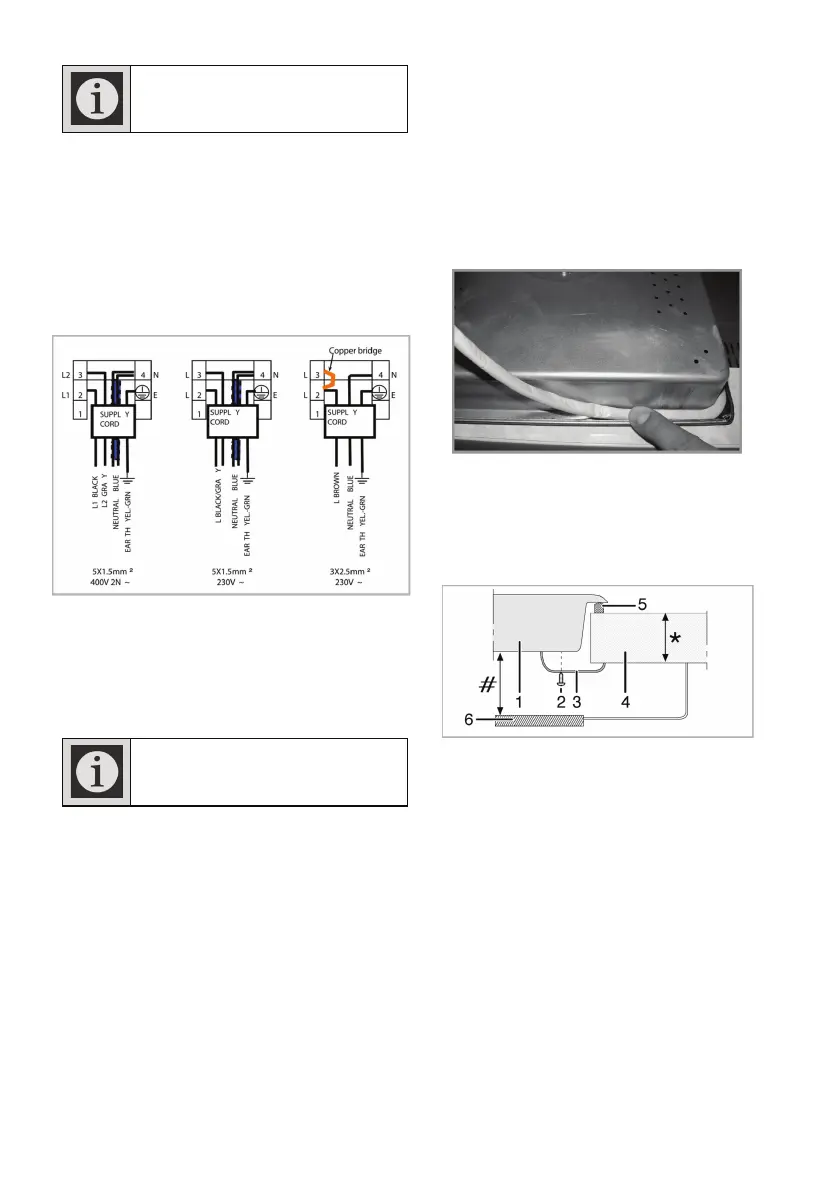
2. Open the terminal block cover with a
screwdriver.
3. Insert the power cable through the cable
clamp below the terminal and secure it to
the main body with the integrated screw
on cable clamping component.
4. Connect the cables according to the
supplied diagram.
5. After completing the wire connections,
close the terminal block cover.
6. Route the power cable so that it will not
contact the product and get squeezed
between the product and the wall.
The power cable must not be
longer than 2m due to safety
reasons.
Installing the product
1. Turning the hob upside down, place it on a
flat surface.
2. In order to avoid foreign substances and
liquids penetrating between the hob and
the counter, please apply the putty
supplied in the package to the contours of
the lower housing of the hob. Ensure that
the putty does not overlap.
3. Turning the hob correct side up again,
align and place it on the counter.
4. You can secure your hob to the counter by
using the clamp and the screws supplied.
* min. 20 & max. 40 mm
# min. 50 mm
1 Hob
2 Screw
3 Installation clamp
4 Counter
5 Putty
6 Separator plate