248 Installing Blade Components
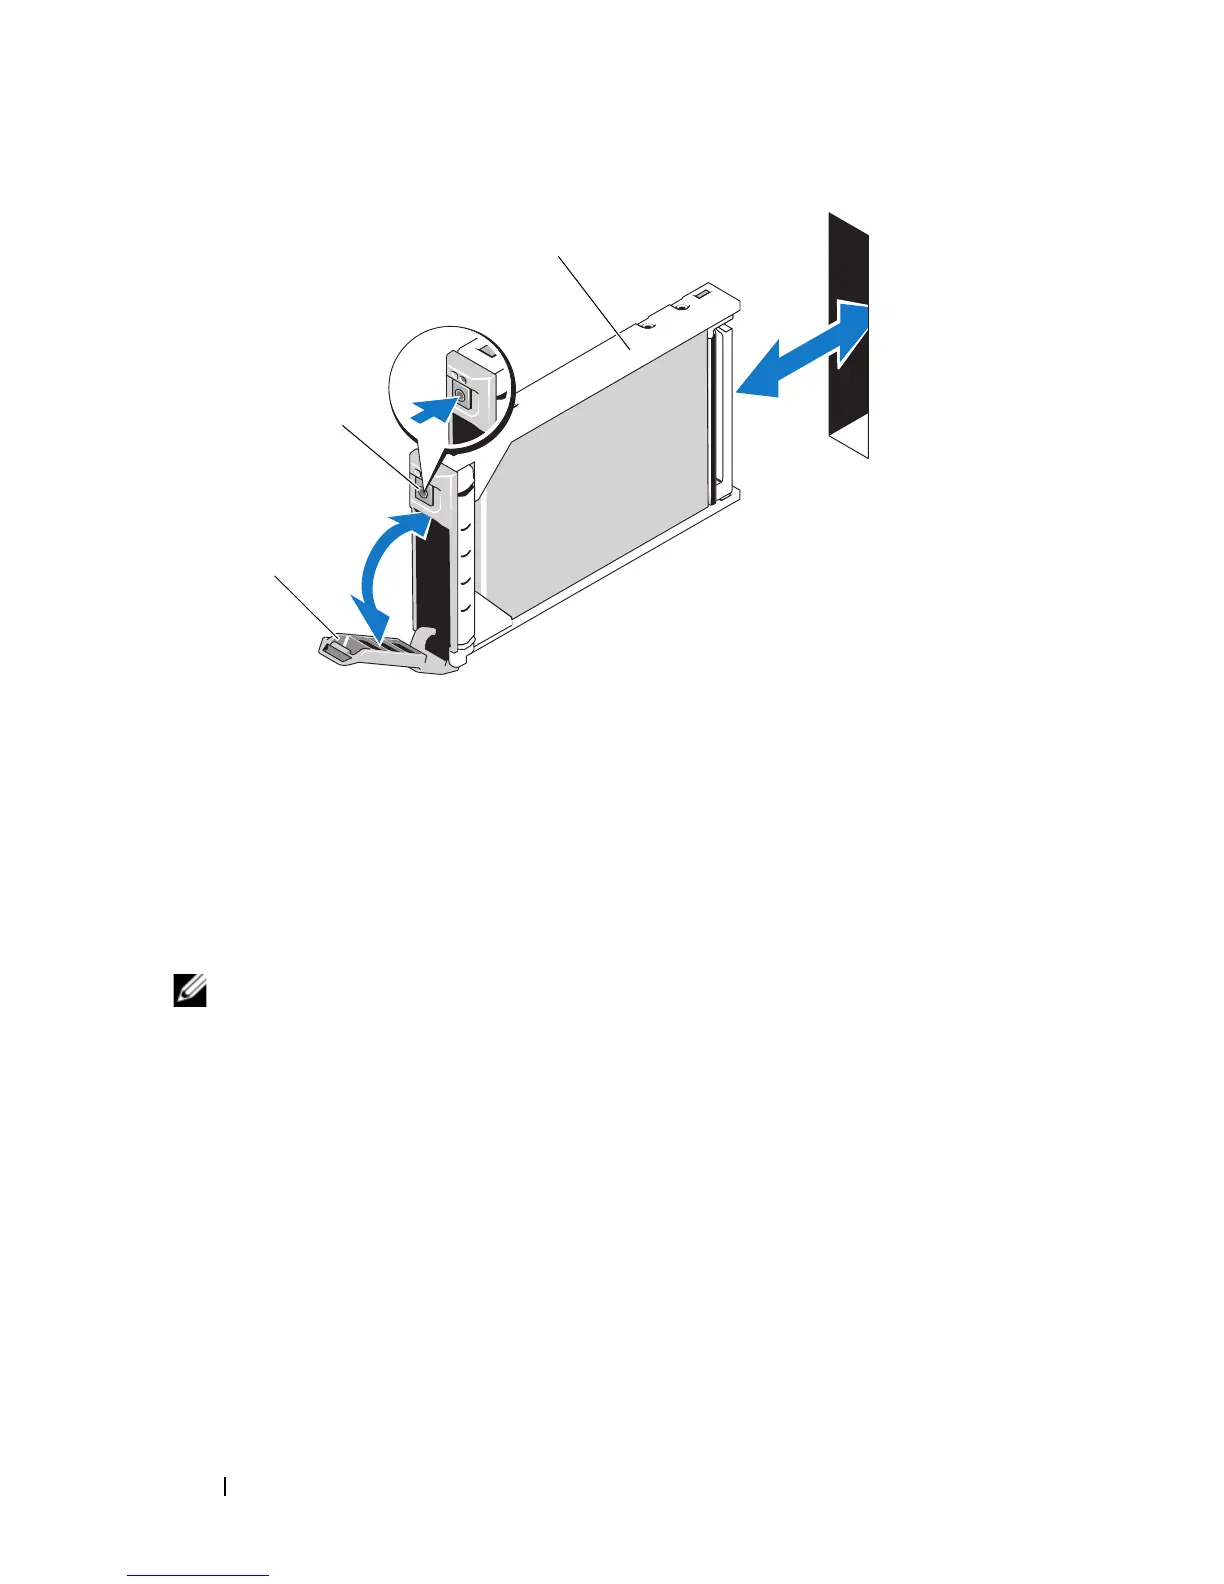
Figure 3-53. Installing a Hard Drive
2
Insert the hard-drive carrier into the drive bay.
3
Close the hard-drive carrier handle to lock it in place.
Removing a Hard Drive
NOTE: Not all operating systems support hot-plug drive installation. See the
documentation supplied with your operating system.
1
Take the hard drive offline and wait until the hard-drive indicator codes on
the drive carrier signal that the drive may be removed safely. See
Figure 1-13.
When all indicators are off, the drive is ready for removal.
See your operating system documentation for more information on taking
the hard drive offline.
2
Open the hard-drive carrier handle to release the drive. See Figure 3-53.
3
Slide the hard drive out until it is free of the drive bay.
If you are permanently removing the hard drive, install a blank insert.
1 hard drive 2 release button
3 carrier handle