10
About your monitor
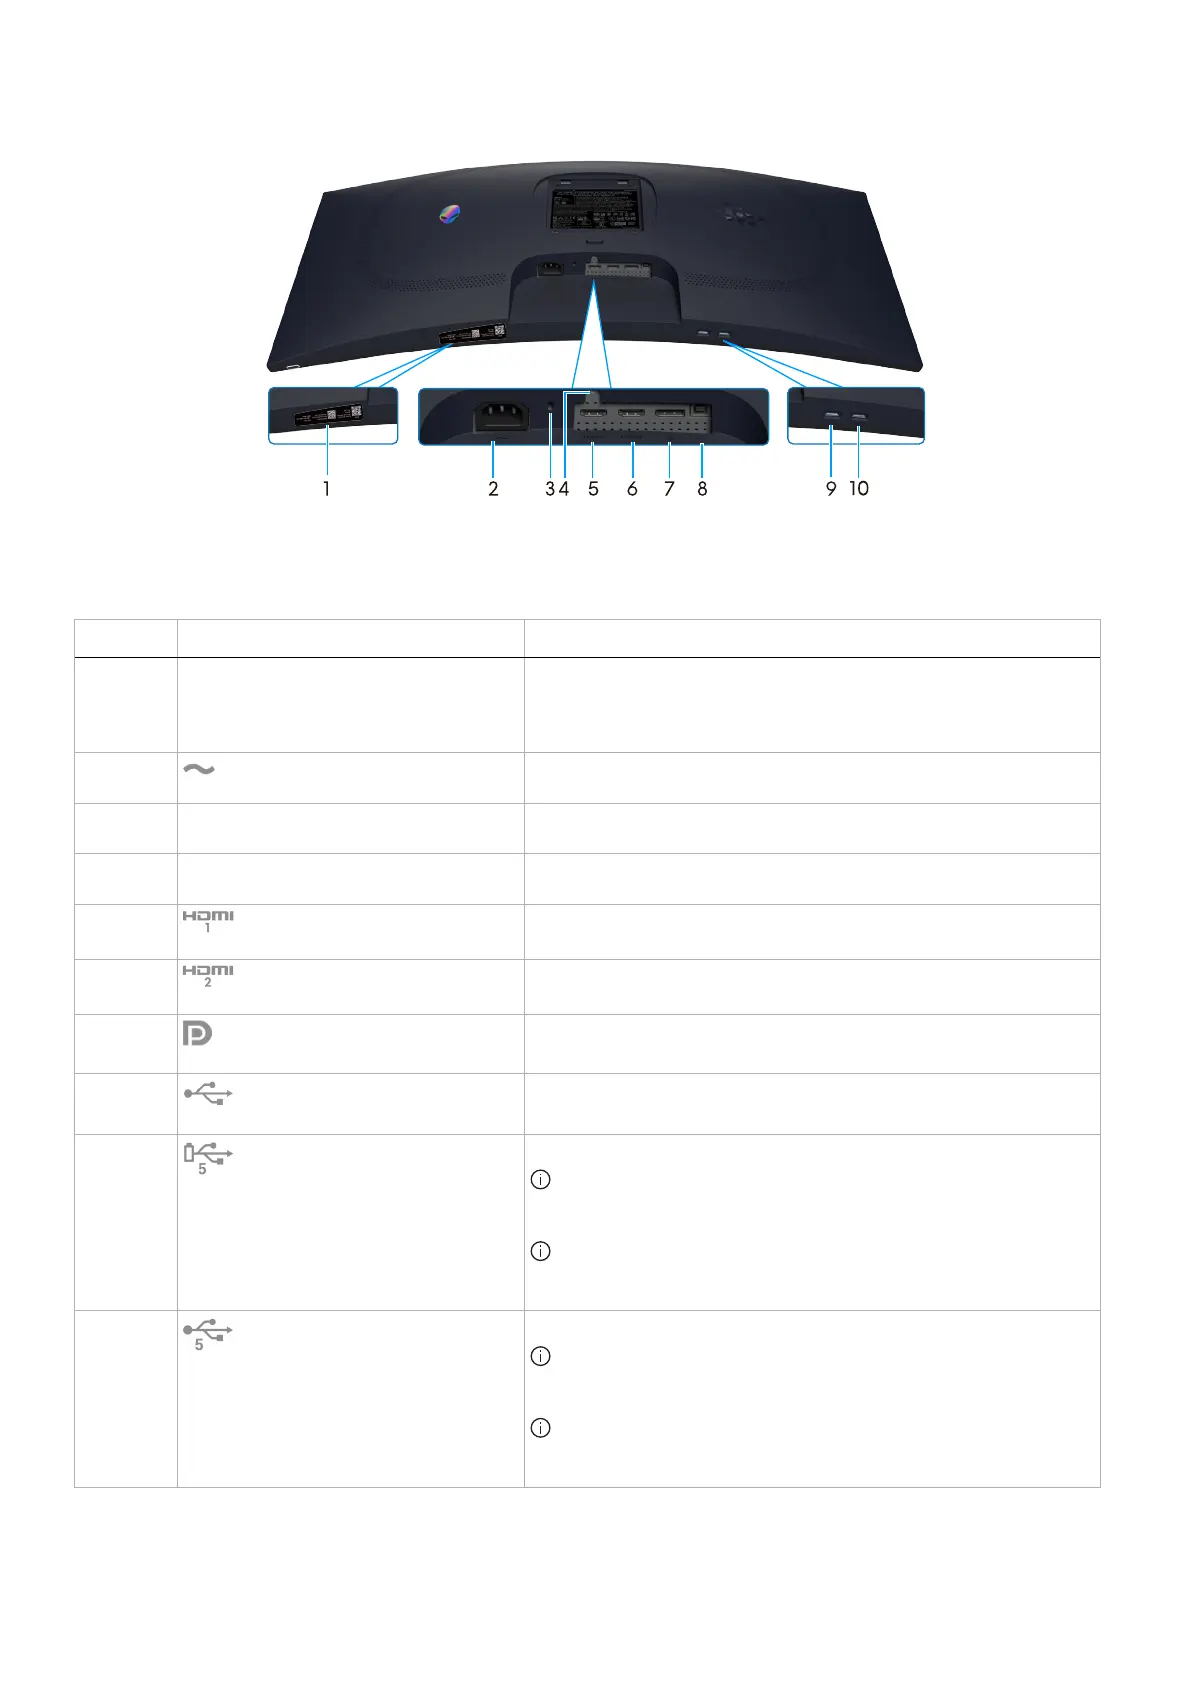
Bottom view
Figure 3. Bottom view of the monitor
Table 4. Components and descriptions.
Label Description Use
1
My Alienware QR code, serial number, and
Service Tag label
See this label if you need to contact Dell for technical support. The
Service Tag is a unique alphanumeric identifier that enables Dell service
technicians to identify the hardware components in your monitor and
access warranty information.
2
Power connector
Connect the power cable (shipped with your monitor).
3
Security-lock slot
(based on Kensington Security Slot)
Secure your monitor using a security lock (purchased separately) to
prevent unauthorized movement of your monitor.
4
Stand-lock feature Lock the stand to the monitor using a M3x6 mm screw (screw not
included).
5
HDMI 1 port
Connect your computer with the HDMI 2.1 cable (shipped with your
monitor) to this port.
6
HDMI 2 port
Connect your computer with the HDMI 2.1 cable (shipped with your
monitor) to this port.
7
DisplayPort
Connect your computer with the DisplayPort-DisplayPort cable (shipped
with your monitor) to this port.
8
USB Type-B upstream port
Connect the USB cable (shipped with your monitor) to this port and
your computer to enable the USB ports on your monitor.
9
USB Type-A downstream port
Connect to charge your USB device.
NOTE: To use this port, you must connect the USB cable (shipped
with your monitor) to the USB upstream port on the monitor and to
your computer.
NOTE: To prevent signal interference, avoid connecting other USB
devices to the adjacent port when using a wireless USB device on a
downstream USB port.
10
USB Type-A downstream port
Connect your USB Type-A device.
NOTE: To use this port, you must connect the USB cable (shipped
with your monitor) to the USB upstream port on the monitor and to
your computer.
NOTE: To prevent signal interference, avoid connecting other USB
devices to the adjacent port when using a wireless USB device on a
downstream USB port.