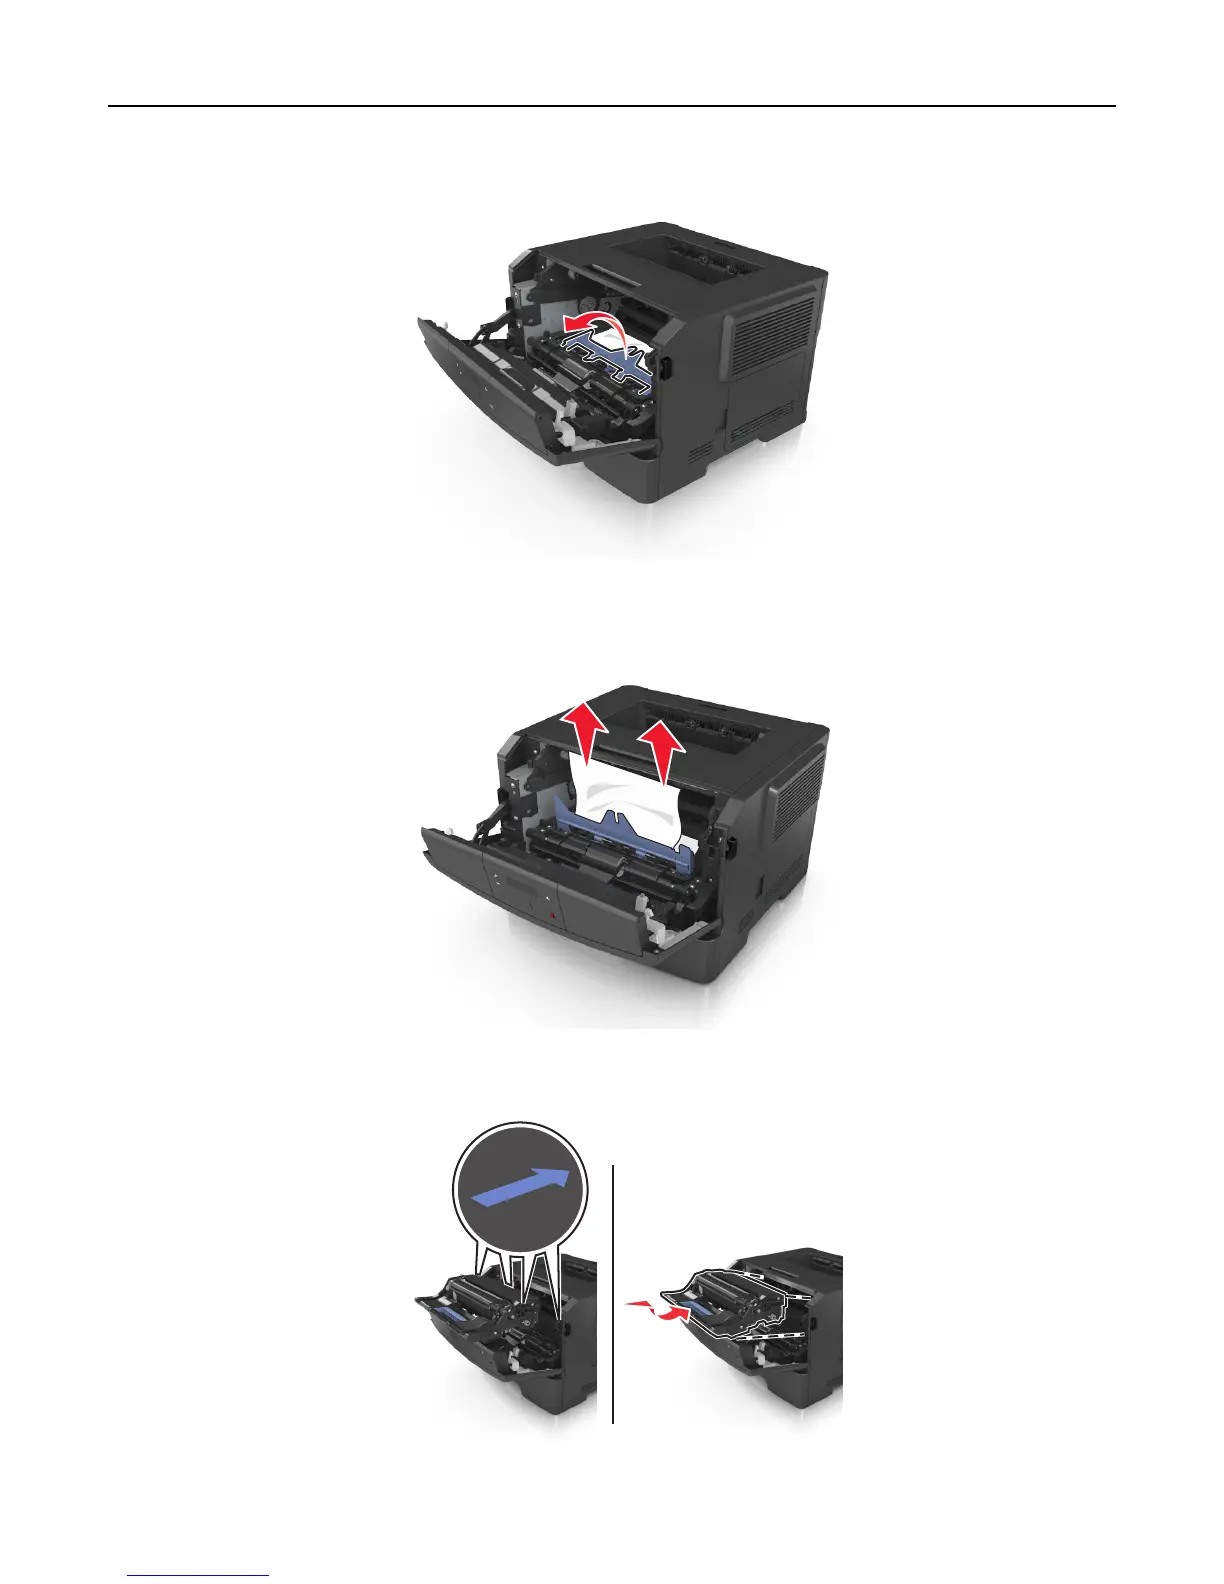
5 Lift the blue flap in front of the printer.
6 Firmly grasp the jammed paper on each side, and then gently pull it out.
Note: Make sure all paper fragments are removed.
7 Insert the imaging unit by aligning the arrows on the side rails of the unit with the arrows on the side rails inside
the printer, and then insert the imaging unit into the printer.
Clearing jams 106