Removing and Installing Parts: Dell Dimension E520 Service Manual
file:///T|/htdocs/systems/dimE520/en/SM_EN/parts.htm[10/16/2012 1:05:24 PM]
5. Set the drive panel aside.
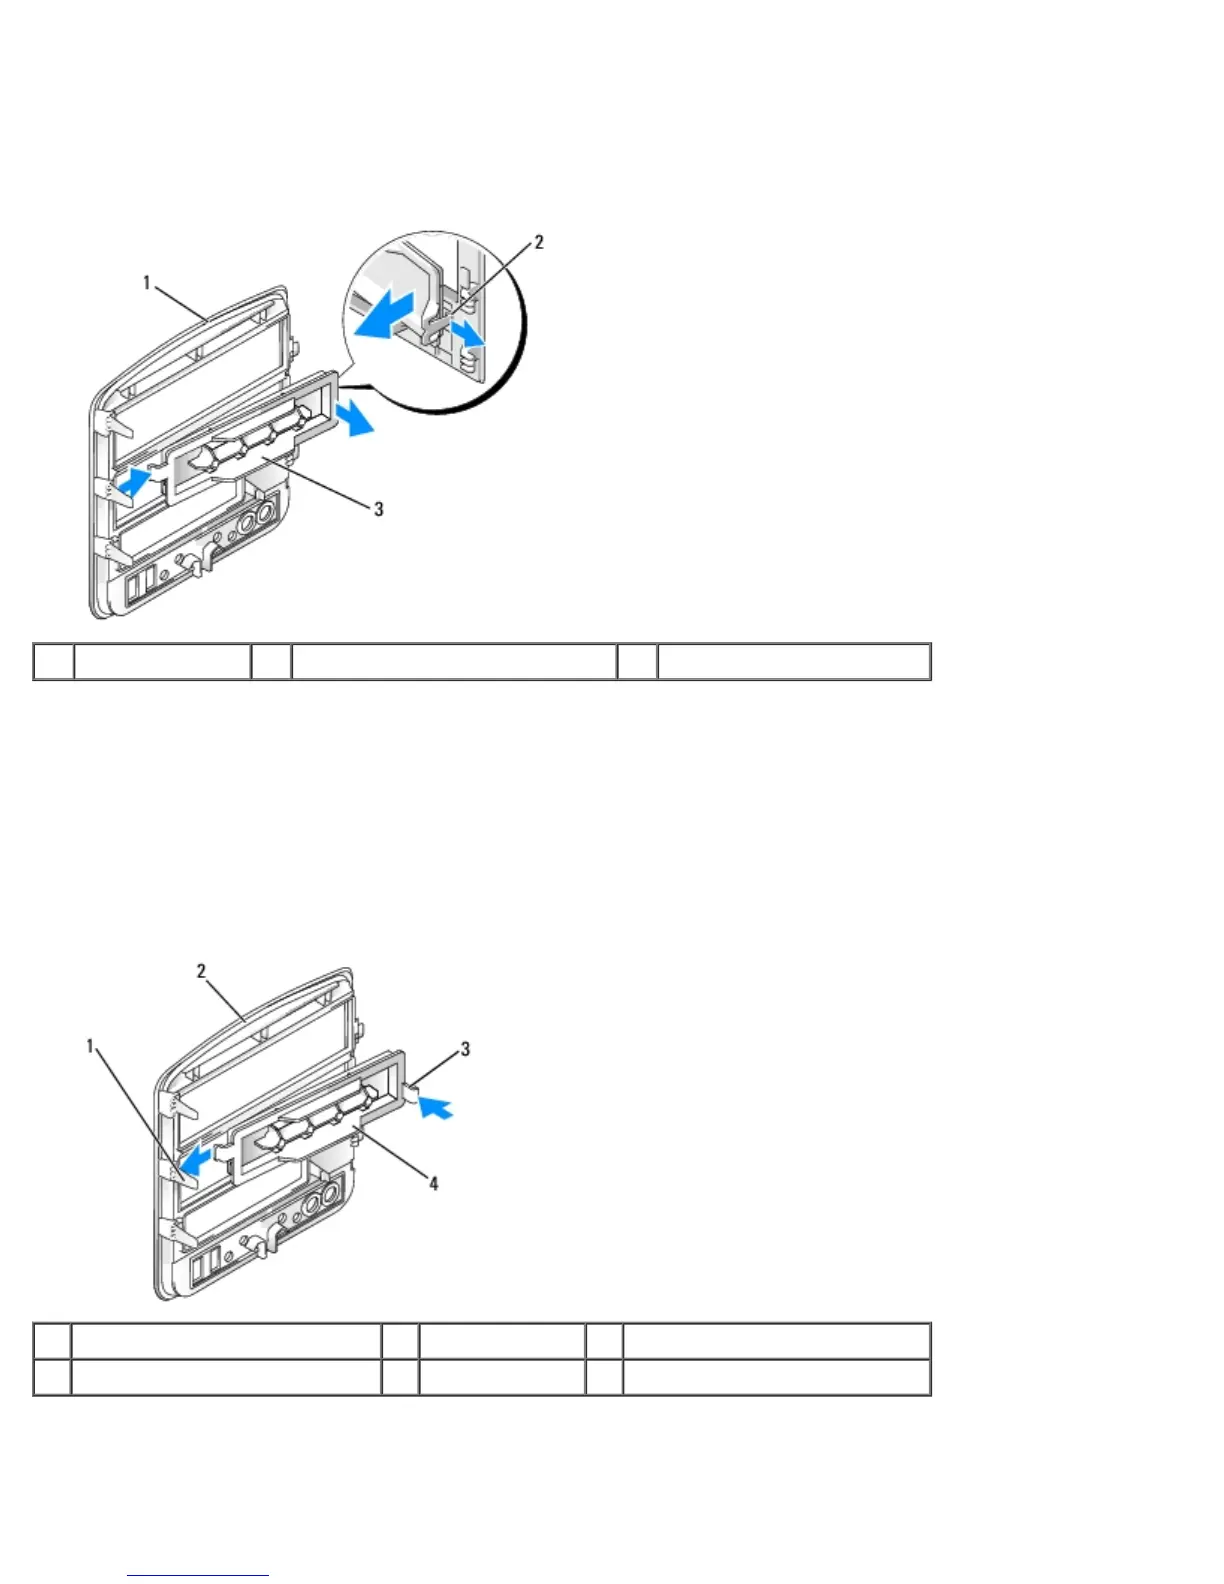
Removing the Drive-Panel Insert
1 drive panel 2 drive-panel insert tab 3 drive-panel insert
1. Press the drive-panel insert tab towards the center of the drive-panel insert to disengage the insert from the drive
panel.
2. Without releasing the tab, pivot the drive-panel insert out and away from the drive panel.
3. Set the drive-panel insert aside.
Installing the Drive-Panel Insert
1 center drive-panel tab 2 drive panel 3 drive-panel insert tab
4 drive-panel insert
1. Slide the tab on the left side of the drive-panel insert under the center drive-panel tab.
2. Rotate the drive-panel insert into place and snap the drive-panel insert tab over the corresponding tab on the drive
panel.