EasyManuals Logo

Dell Dimension E520 Service Manual

Dell Dimension E520
79 pages
To Next Page IconTo Next Page
To Previous Page IconTo Previous Page
Page #65 background imageLoading...
Page #65 background image
Removing and Installing Parts: Dell Dimension E520 Service Manual
file:///T|/htdocs/systems/dimE520/en/SM_EN/parts.htm[10/16/2012 1:05:24 PM]
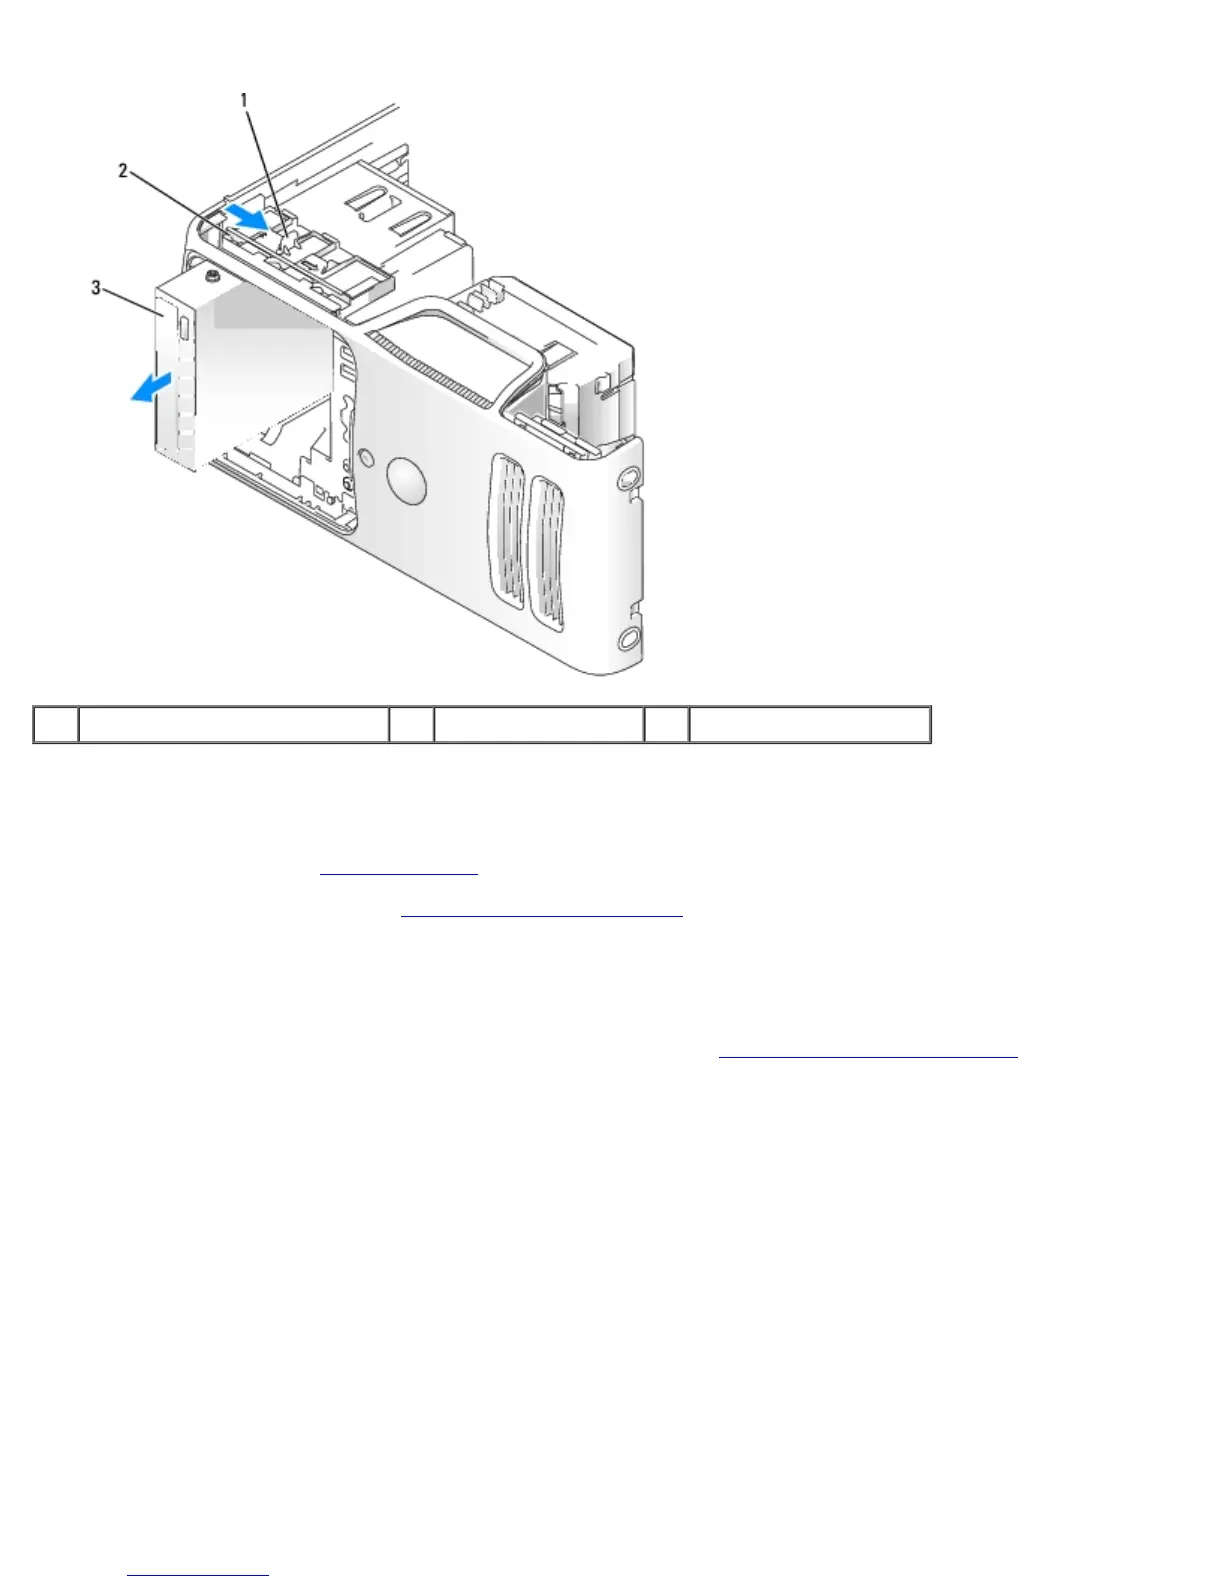
1 drive release latch 2 sliding plate 3 CD/DVD drive
Installing a CD/DVD Drive
1. Follow the procedures in Before You Begin.
2. Remove the computer cover (see Removing the Computer Cover
).
3. If you are installing a new drive, unpack the drive and prepare it for installation.
Check the documentation that accompanied the drive to verify that the drive is configured for your computer.
4. If you are installing a new drive, remove the drive panel insert (see Removing the Drive-Panel Insert
), then remove
three shoulder screws from the inside of the drive-panel insert and attach the screws to the new drive.
5. Slide the drive into the drive bay until the drive clicks into position.

Table of Contents

Other manuals for Dell Dimension E520

Questions and Answers:

Question and Answer IconNeed help?

Do you have a question about the Dell Dimension E520 and is the answer not in the manual?

Dell Dimension E520 Specifications

General IconGeneral
MemoryUp to 4GB DDR2 SDRAM
NetworkingIntegrated 10/100 Ethernet
Power Supply305W
ProcessorIntel Pentium D, Intel Core 2 Duo
StorageUp to 500GB SATA HDD
Optical DriveDVD-ROM, DVD+/-RW
GraphicsIntegrated Intel GMA 950
AudioIntegrated 7.1 channel audio
USB Ports8 USB 2.0 ports
Operating SystemWindows XP, Windows Vista
PortsVGA, serial, parallel, PS/2, audio in/out
Expansion Slots1 PCI-e x16, 2 PCI

Related product manuals