Removing and Installing Parts 89
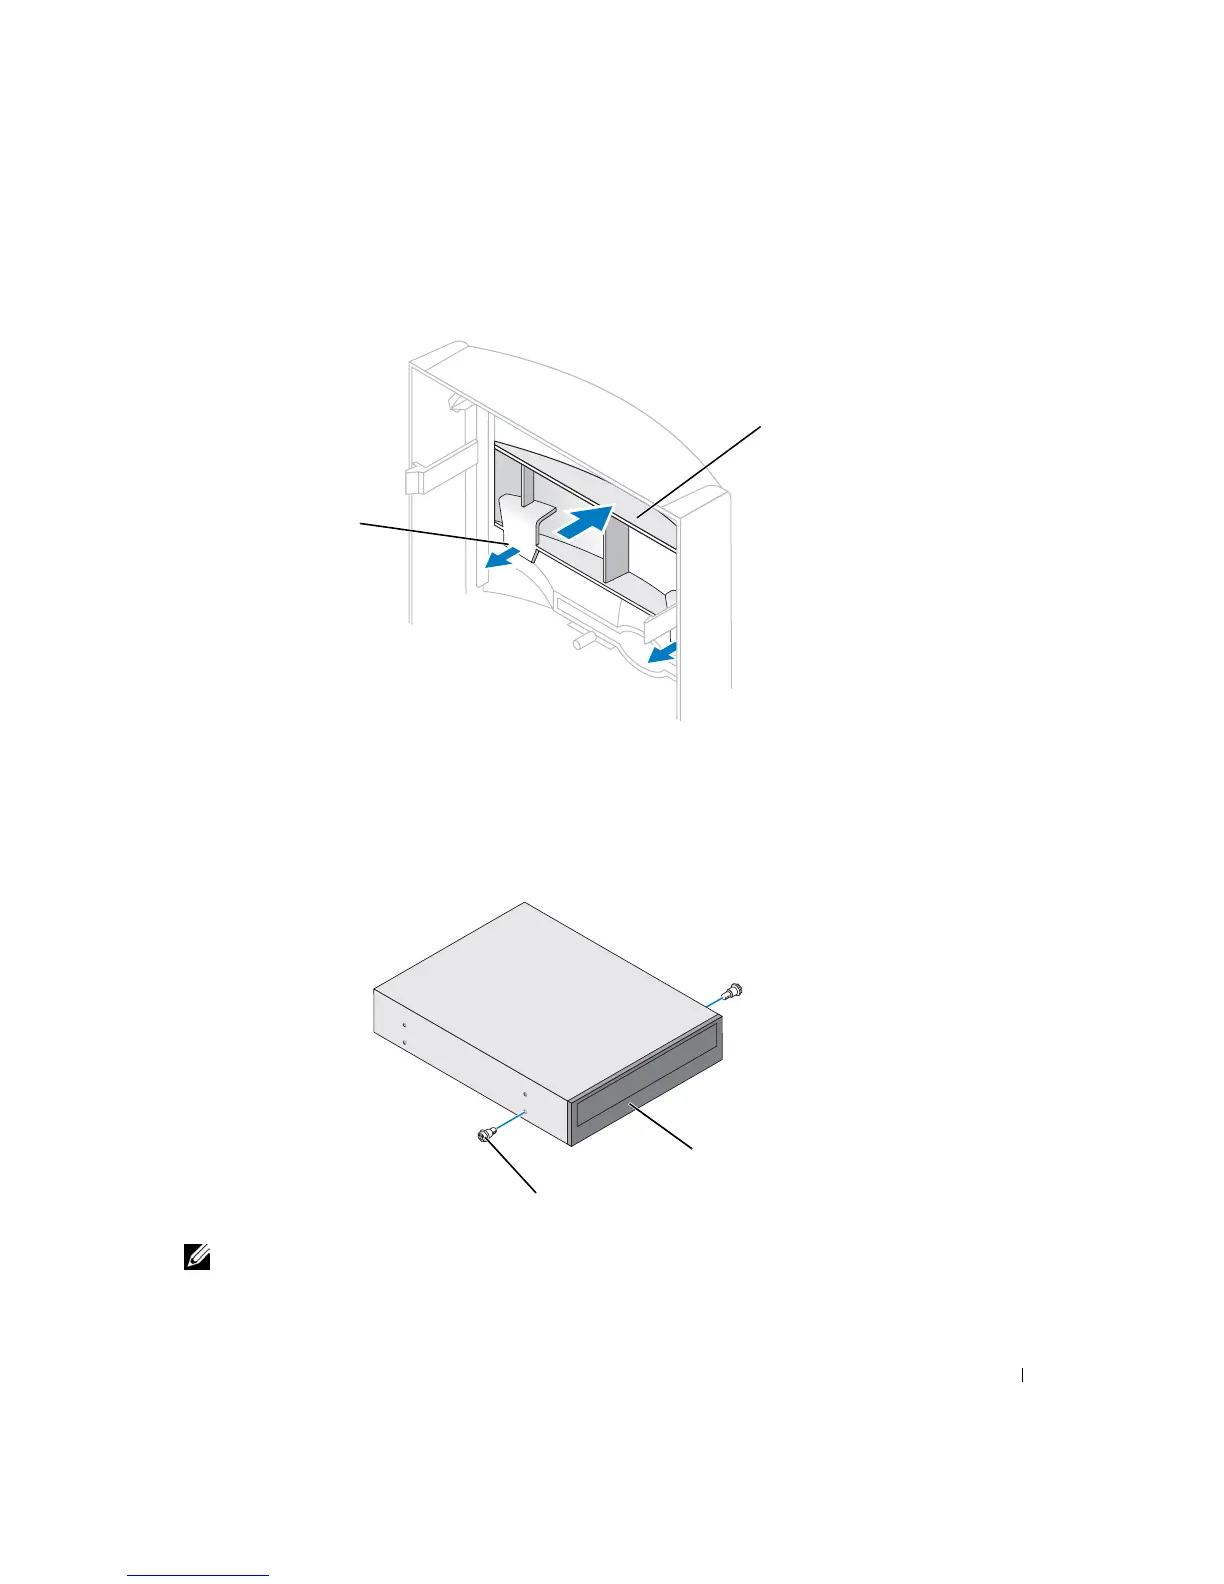
7 Pull the two front-panel tabs towards you, and then push out the front-panel insert.
8 Ensure that the jumper setting on the new drive is set for "cable select" (see the
documentation that came with the drive for information).
9 Remove two extra alignment screws, shown in the illustration on page 90, from the
front of the computer and insert them into the drive.
NOTE: Some computers come with only two extra alignment screws; others come with four. You
only need two alignment screws for this procedure.
tabs (2)
insert
drive
alignment screws (2)