About this task
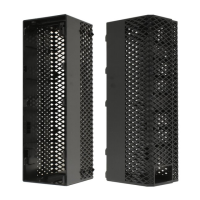
The following images indicate the location of the 2.5-inch hard drive assembly and provide a visual representation of the removal
procedure.
Steps
1. Disconnect the hard drive data and power cables from the connectors on the 2.5-inch hard drive module.
2. Press the release tabs on both the sides of the hard drive cage to release it from the slots on the computer chassis.
3. Lift the hard drive assembly from the computer.
NOTE: Note the orientation of the hard drive so that you can replace it correctly.
Removing the 2.5-inch hard drive
Prerequisites
1. Follow the procedure in before working inside your computer.
2. Remove the side cover.
3. Remove the 2.5-inch Hard-disk drive assembly.
42
Removing and installing Customer Replaceable Units (CRUs)