other to form a shelf, secure one rail to each side of the rack in your chosen
rack location. Secure both the front and back of each rail to the rack. The
narrow end of each rail goes to the rear of the rack. The rails extend to fit a
variety of rack depths. Each rail requires 2U of rack space (1 in Figure 1-6).
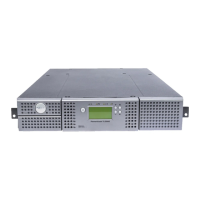
4. Using the Torx wrench included in your shipment, remove the screws (
1
) as
shown in Figure 1-7. Screw locations on the 4U library are similar.
5. Install the library rack anchors (2) as shown in Figure 1-8 on page 1-8 on
each side of your library using the longer counter-sunk screws included in the
rack kit.
1
a77ug009
Figure 1-6. Rear view of a rack showing the narrow part of the rail
a77ug011
1
Figure 1-7. 2U library side screws to remove
Installation 1-7
 Loading...