98 Adding and Replacing Parts
3
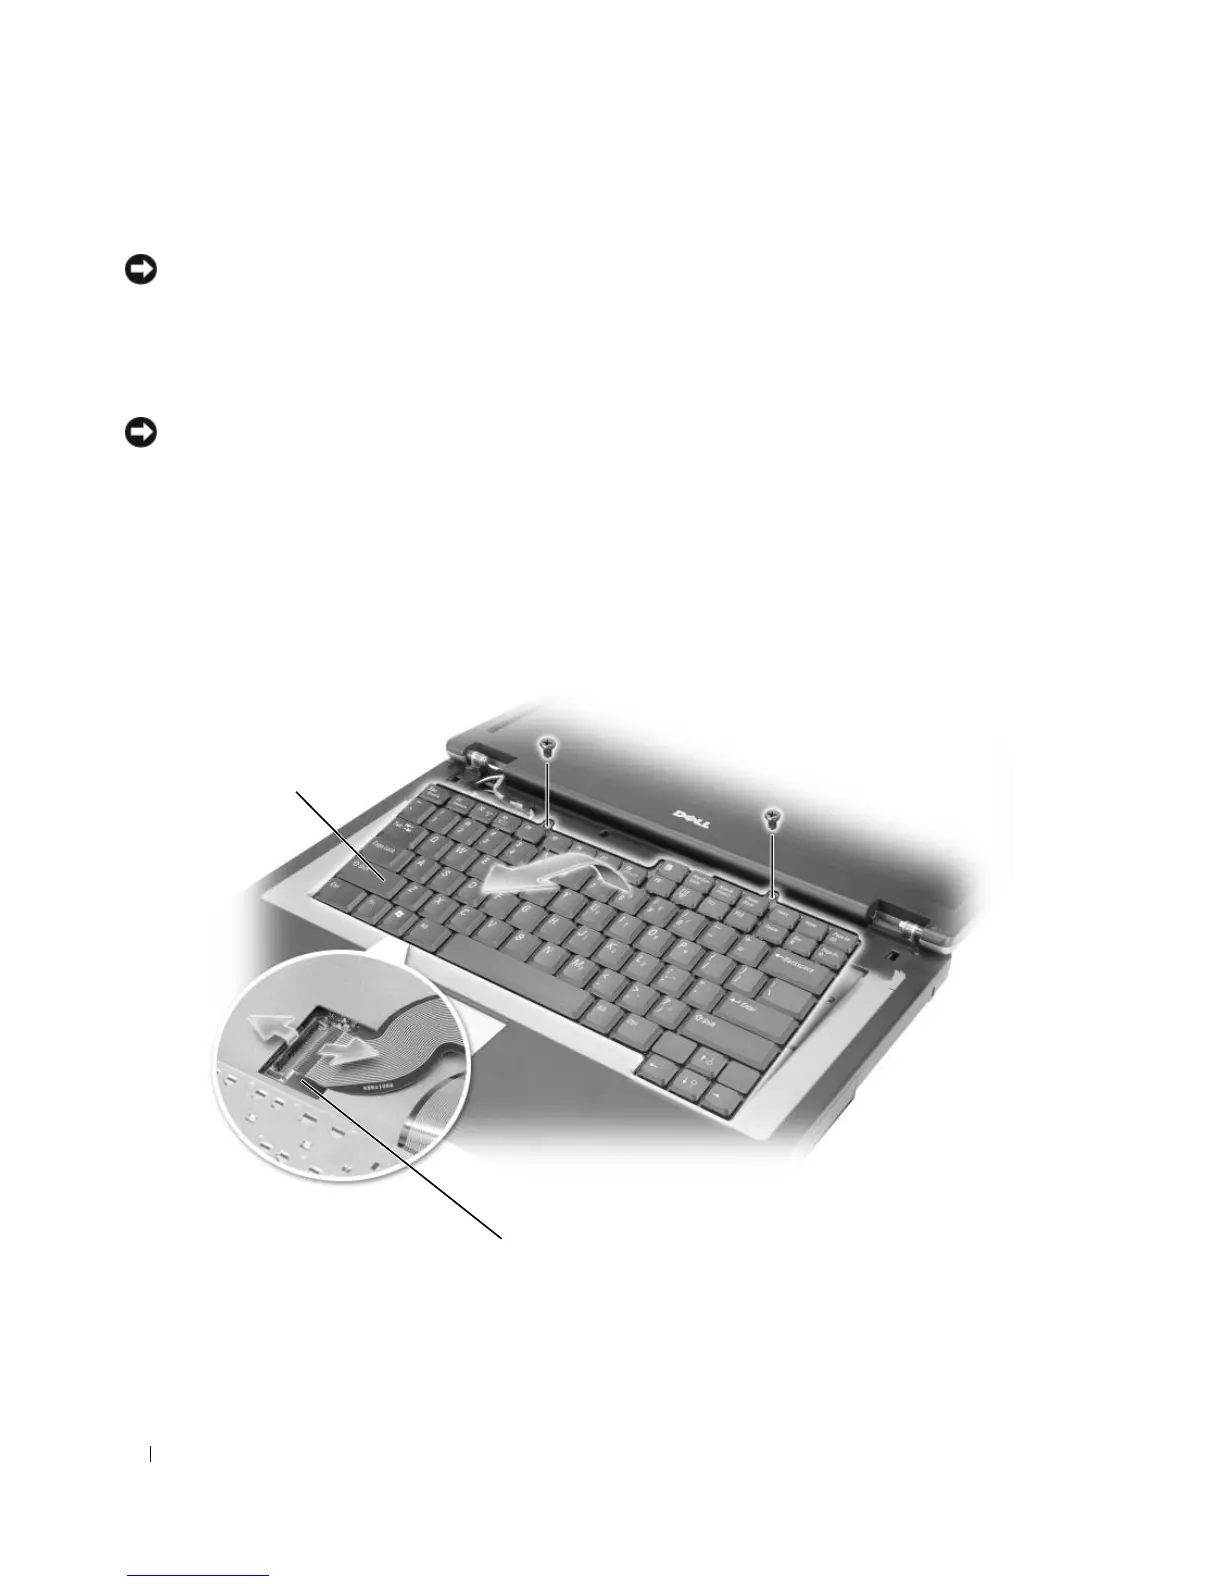
Remove the two screws at the top of the keyboard.
NOTICE: The keycaps on the keyboard are fragile, easily dislodged, and time-consuming to replace. Be careful
when removing and handling the keyboard.
4
Lift the keyboard, and hold it up and slightly forward to allow access to the keyboard connector on the
system board.
5
Lift the keyboard connector and slide out the keyboard cable.
NOTICE: To avoid scratching the palm rest when replacing the keyboard, hook the tabs along the front edge of the
keyboard into the palm rest, and then secure the keyboard in place.
6
To replace the keyboard, connect the keyboard connector to the system board.
7
Place the tabs along the front edge of the keyboard into the palm rest and lay the keyboard down on
the palmrest.
8
Replace the two screws at the top of the keyboard.
9
Replace the hinge cover. See “Hinge Cover” on page 96.
1 keyboard 2 system board connector
2
1