3. Remove the three screws (#6-32) that secure the power-supply unit to the chassis.
4. Press the securing clip and slide the power-supply unit away from the back of the chassis.
5. Lift the power-supply unit off the chassis.
Installing the power-supply unit
Prerequisites
If you are replacing a component, remove the existing component before performing the installation procedure.
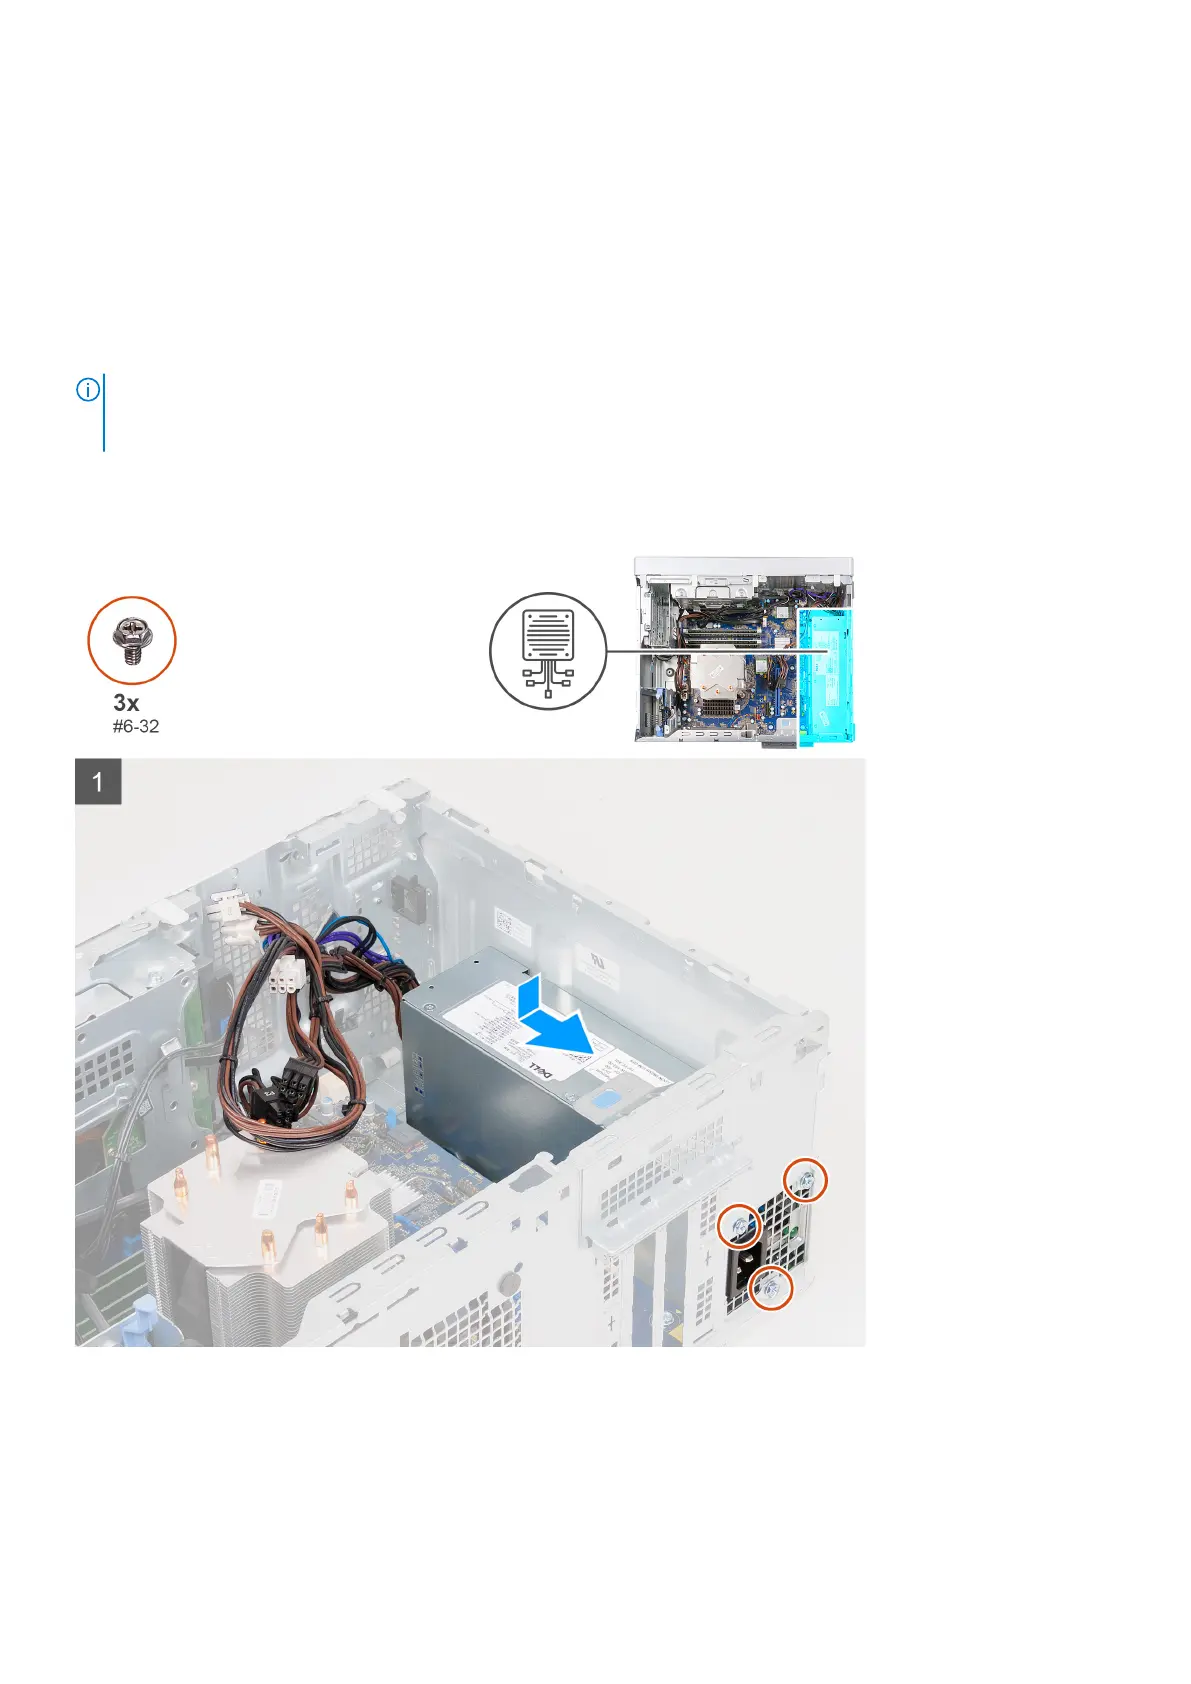
NOTE: The cables and ports on the back of the power-supply unit are color-coded to indicate the different power
wattage. Ensure that you plug in the cable to the correct port. Failure to do so may result in damaging the power-supply
unit and/or computer components.
About this task
The following images indicate the location of the power-supply unit and provide a visual representation of the installation procedure.
Removing and installing components 43

 Loading...