Steps
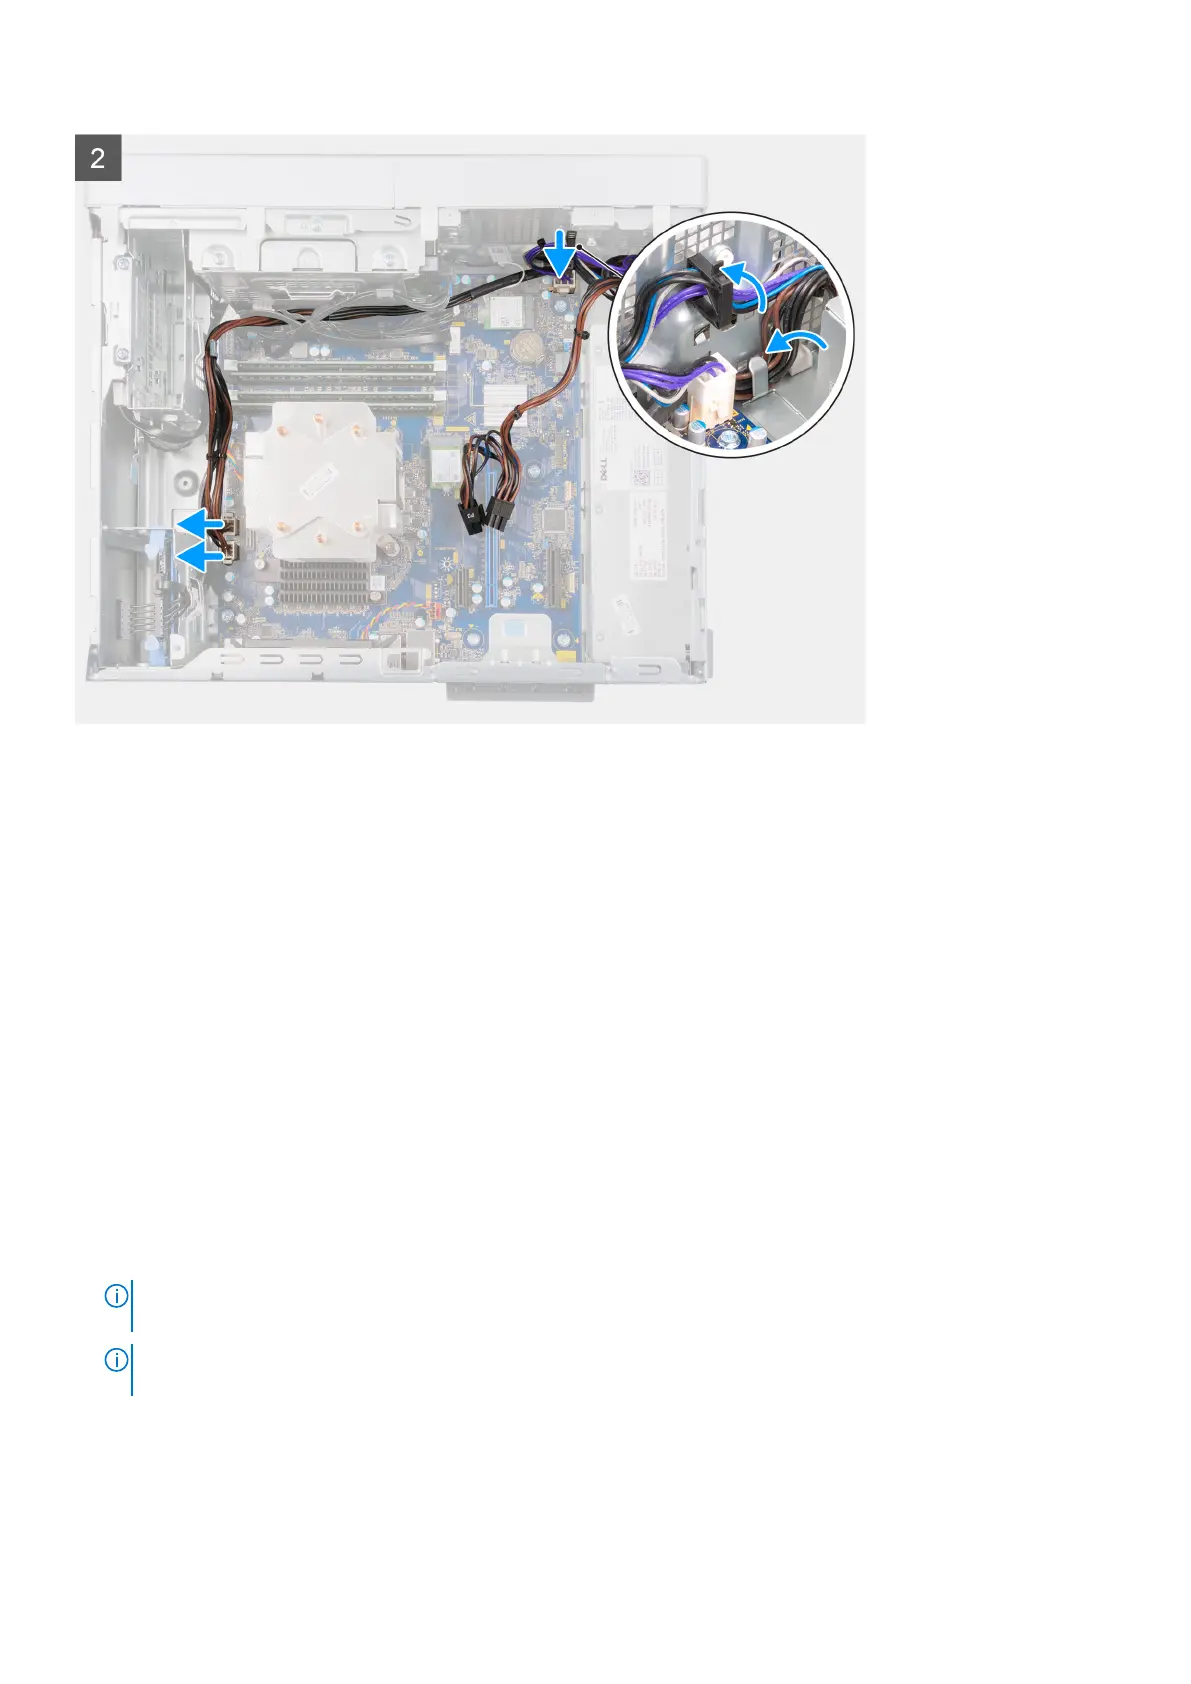
1. Slide the power-supply unit into the chassis until the securing tab snaps into position.
2. Replace the three screws (#6-32) that secure the power-supply unit to the chassis.
3. Route the power cable through the routing guides on the chassis and connect the power cables to their respective connectors on the
system board.
Next steps
1. Install the 3.5-inch hard drive.
2. Install the graphics card.
3. Install the left-side cover.
4. Follow the procedure in After working inside your computer.
Processor fan and heat-sink assembly
Removing the processor fan and heat-sink assembly
Prerequisites
1. Follow the procedure in Before working inside your computer.
NOTE:
The heat sink may become hot during normal operation. Allow sufficient time for the heat sink to cool before
you touch it.
NOTE: The heat sink may become hot during normal operation. Allow sufficient time for the heat sink to cool before
you touch it.
2. Remove the left-side cover.
About this task
The following images indicate the location of the processor fan and heat-sink assembly and provide a visual representation of the removal
procedure.
44
Removing and installing components