Steps
1. Lay the computer on the right side.
2. Remove the screw (#6-32) that secures the front I/O-bracket to the chassis.
3. Rotate and remove the front I/O-bracket from the chassis.
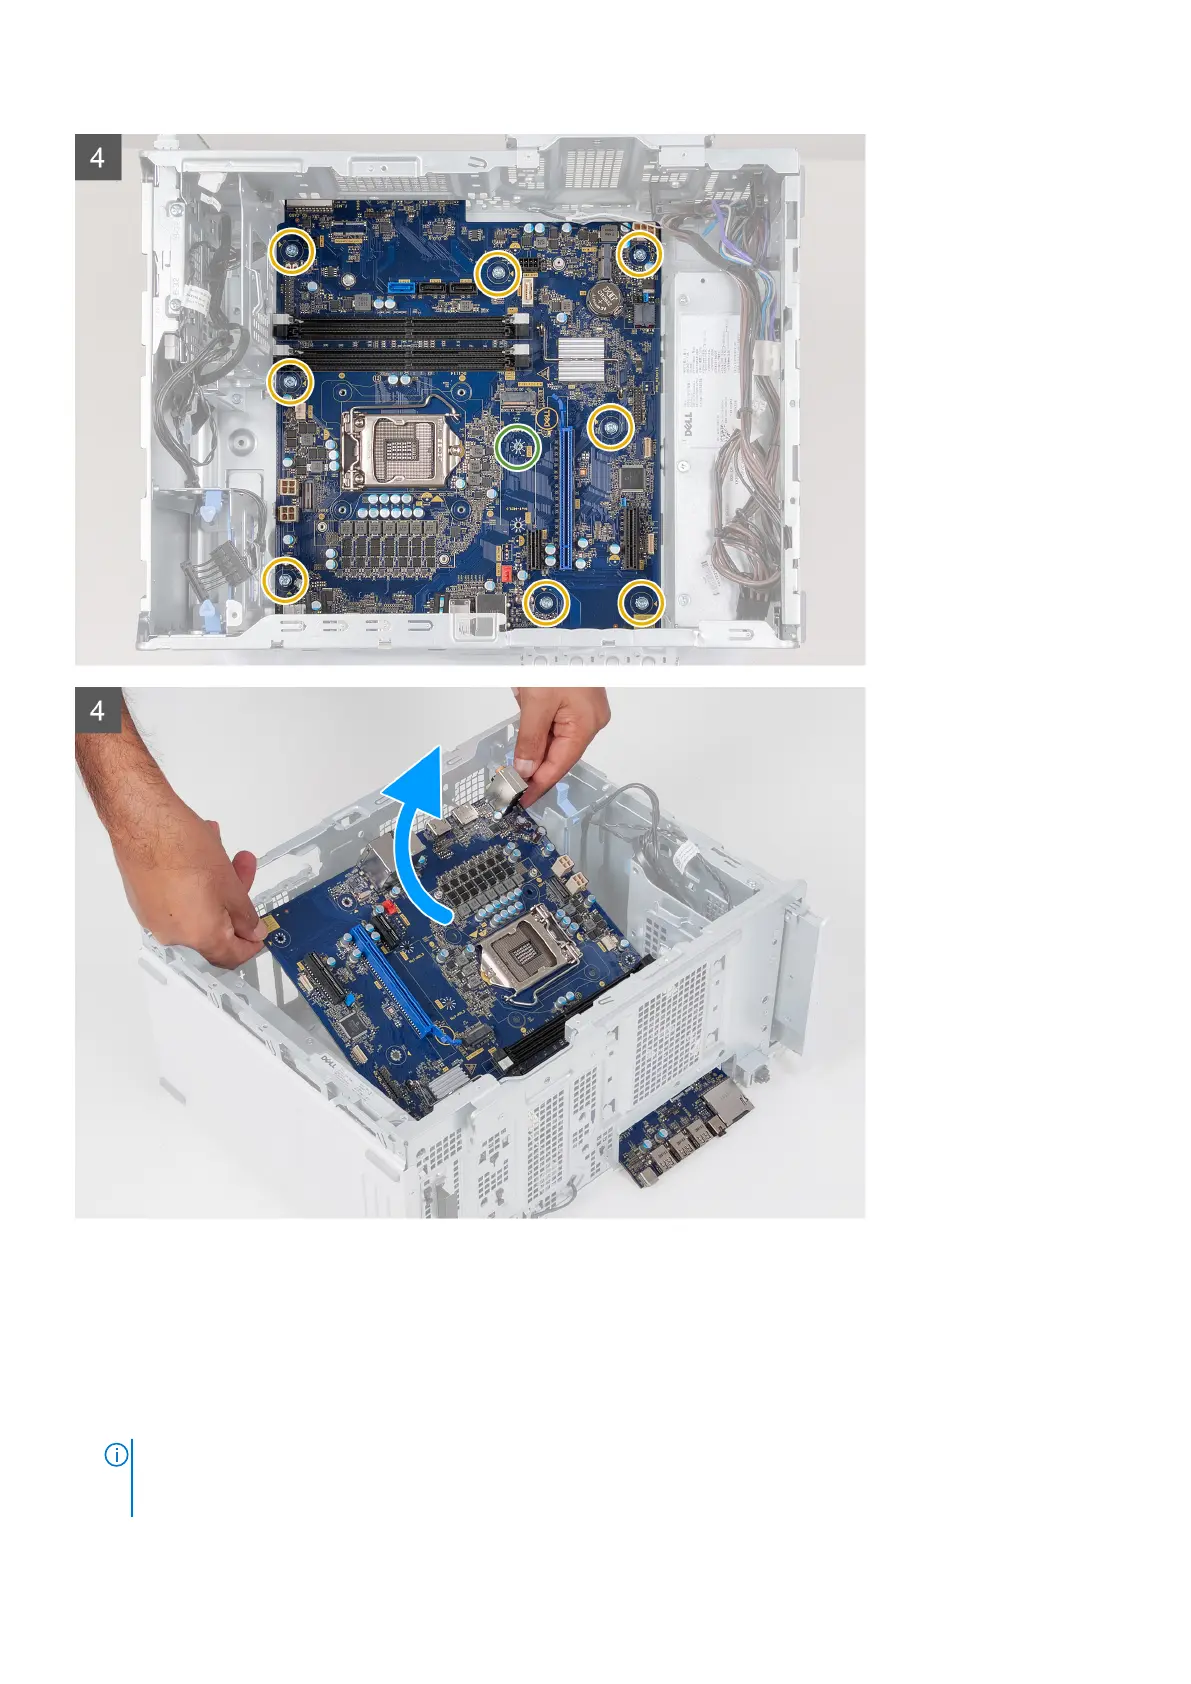
4. Disconnect all the cables that are connected to the system board.
5. Remove the eight screws (#6-32) that secure the system board to the chassis.
6. Remove the voltage regulator heat sink.
NOTE:
The voltage regulator heat sink is shipped as a separate unit and it does not ship along with the system board.
If reusing the voltage regulator heat sink, remove it from the old system board and transfer it to the new system
board.
Removing and installing components 53

 Loading...