Steps
1. Thread the power-button cable through the slot on the power-button bracket.
2. Press down on the securing tabs to push the power button into the slot on the power-button bracket.
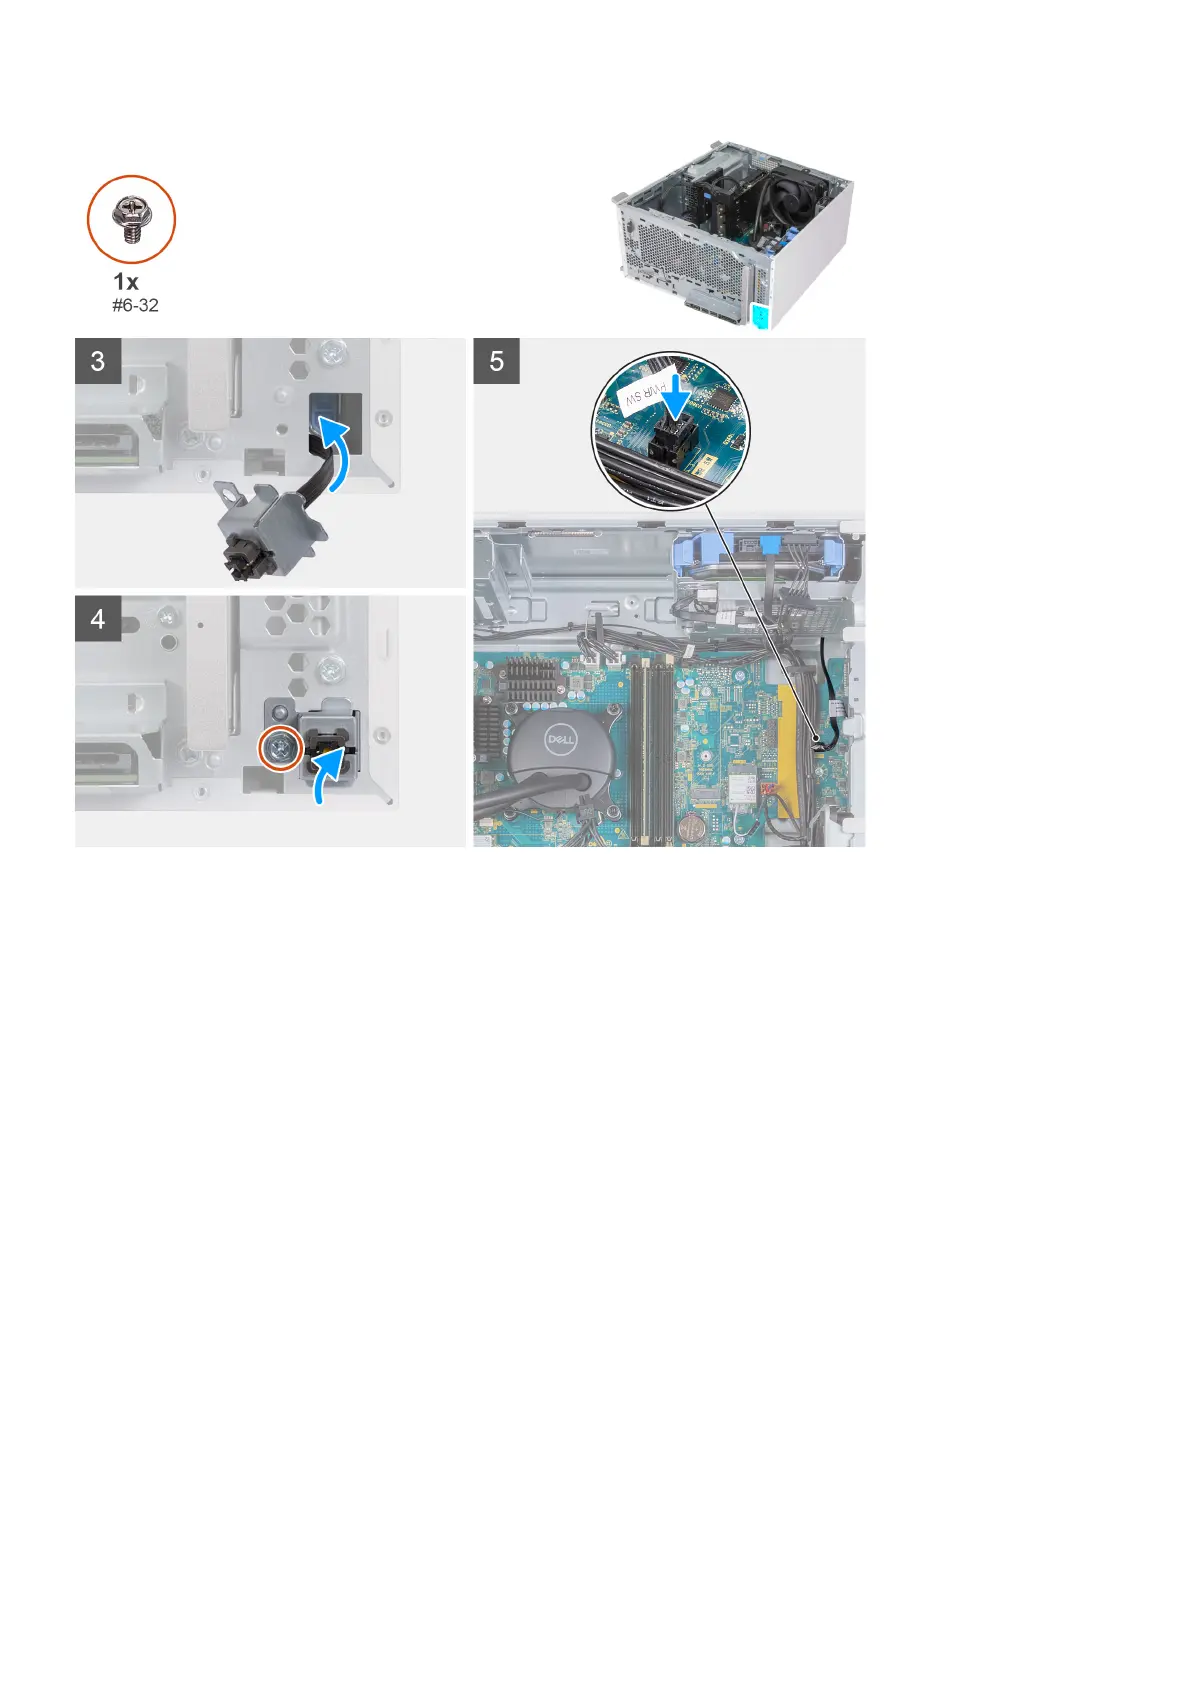
3. Thread the power-button cable through the slot on the chassis.
4. Using the alignment post, align the screw hole on the power-button bracket to the screw hole on the chassis.
5. Replace the screw (#6-32) that secures the power-button bracket to the chassis.
6. Connect the power-button cable to the system board.
7. Place the computer in an upright position.
Next steps
1. Install the front cover.
2. Install the left-side cover.
3. Follow the procedure in After working inside your computer.
3.5-inch hard drive
Removing the 3.5-inch hard drive
Prerequisites
1. Follow the procedure in Before working inside your computer.
2. Remove the left-side cover.
22
Removing and installing components

 Loading...