Do you have a question about the DeLonghi DFS 903 and is the answer not in the manual?
Instructions for assembling the backguard, including locating parts and fixing it to the cooker.
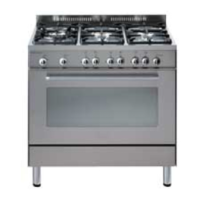
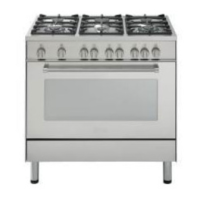
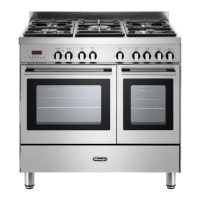
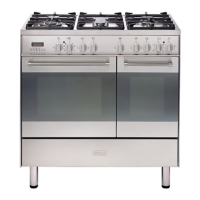
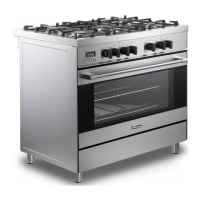
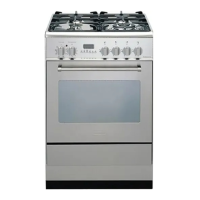
Details the types, names, and power outputs (kW) of the gas burners on the cooker.
Lists the power ratings for oven elements, fan motor, and lamp, along with usable oven volume.
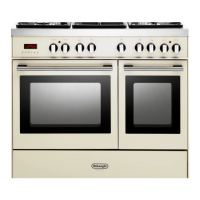
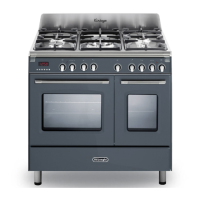
Identifies and describes the function of each control knob and the electronic clock/alarm on the control panel.
Guides on setting the clock time, handling mains failures, and prerequisites for oven operation.
Explains how to set a cooking time for automatic switch-off, display indicators, and cancellation procedures.
Details how to select from three sound possibilities for the alarm function.
Instructions for using the programmer as an alarm, setting time, and handling buzzer notifications.
Explains the three positions for each hob burner control knob: tap closed, high, and low.
Describes the process of igniting hob burners using electric sparks and alternative methods during mains failure.
Step-by-step guide on how to ignite the hob burners using the control knob and electric ignition.
Provides guidance on matching burner size to pan diameter for optimal energy use and stability.
Offers safety advice on pan placement, handle positioning, and precautions for deep fat frying.
Explains the various heating methods used in the oven, including convection, forced convection, and radiation.
Details how to rotate the function knob clockwise to select one of the oven's operational modes.
Describes setting the cooking temperature by rotating the thermostat knob clockwise, noting it does not switch the oven on.
Explains how to activate the oven light and that it remains on during all cooking modes.
Describes using upper and lower heating elements for natural heat dispersion, requiring preheating for even cooking.
Details the use of the infrared grill element, recommending the oven door remain closed for browning and au gratin dishes.
Outlines using only the fan for thawing, without heat, suitable for quick defrosting of frozen items.
Utilizes a circular element and fan for forced convection, ideal for dishes needing external crispness and internal softness.
Combines infrared grill and fan for heat distribution; requires closed door and preheating for browning.
Uses upper element, circular element, and fan for forced convection to keep food warm or slowly heat items.
Employs upper/lower elements and fan for heat distribution, suitable for large dishes requiring even cooking throughout.
Details the method for sterilizing foods in jars, involving specific oven temperatures and preheating.
Describes reheating food, particularly bread, using moisture and high temperatures for fragrance.
Explains how to cook different foods together by managing temperature differences and staggered dish introduction.
Instructions for grilling using hot air circulation, preheating, door closure, and achieving an 'au gratin' effect.
Provides recommendations for classical roasting, including optimal temperature ranges and timing considerations.
Steps for using the grill, focusing on preheating, rack placement, and catching cooking juices.
Clarifies that installation and demonstration are not part of the warranty; emphasizes qualified installation.
Warns about high oven door temperatures and suggests a safety guard accessory for child protection.
Provides contact information for obtaining after-sales service and technical assistance.
Lists essential do's and don'ts for using the cooker, including preheating, cleaning, and avoiding certain actions.
Stresses using the product only for intended cooking purposes and highlights safety during servicing.
Instructions for cleaning the hob using soapy cloths or mild cleaners for stains.
Advises on checking gas taps for stiffness and the condition of the flexible gas supply tube.
Details cleaning the oven interior and shelves with soapy cloths and non-abrasive pads.
Recommends using only soap and warm water for stainless steel to avoid damaging the protective lacquer.
Guides on removing and washing burner caps and bodies with soapy water, emphasizing correct re-assembly.
Explains the correct positioning of the triple ring burner, its rib, cap, and ring for proper function.
Details how to remove the inner glass door panel for cleaning by unscrewing four screws.
Mentions the storage compartment is accessible via a pivoting panel.
Provides steps for replacing the oven light bulb, including safety precautions and bulb specifications.
Instructions for hanging wire racks on oven walls and sliding grids or trays into guides.
Describes the correct method for placing the oven tray on the wire shelf and inserting it into side runners.
Step-by-step instructions on how to safely detach the oven door by disengaging hinge sections.
Guidance on refitting the oven door by reversing the removal procedure.
Specifies requirements for installing the cooker near furniture, material resistance, room type, and curtain placement.
Instructions for fitting the adjustable feet to the cooker base before positioning, with warnings on handling.
Explains how to level the cooker by adjusting the lower ends of the feet IN or OUT.
Emphasizes using only Natural Gas or LPG with a conversion kit, and the need for qualified installation.
Outlines mandatory British Standards and regulations for gas connection by qualified engineers.
Details compliance with codes of practice and the required supply pressure for Natural Gas.
Covers LPG connection after fitting a conversion kit, required supply pressures for Butane and Propane.
Guides on connecting the gas supply to the inlet, using spanners, and checking for leaks with a soapy solution.
Instructions for replacing gas injectors to convert the cooker for LPG use, referencing nozzle diameters.
Details how to adjust the minimum flame length for LPG burners using a screwdriver on the tap rod.
A table specifying injector types and sizes for different gas types (G30/G31, G20) and burner sizes.
Provides data on the increase of air necessary for gas combustion per burner type.
States that gas tap lubrication operations must be performed by a qualified technician.
Outlines safety information, earthing requirements, and the need for a qualified electrician for wiring.
Step-by-step instructions for connecting the mains cable to the terminal block, securing covers, and clamps.