5
Before using the appliance for the rst time, be
sure to read the safety warnings.
1. INTRODUCTION
Take a few minutes to read these Instructions for Use. This will
avoid all risks and damage to the appliance.
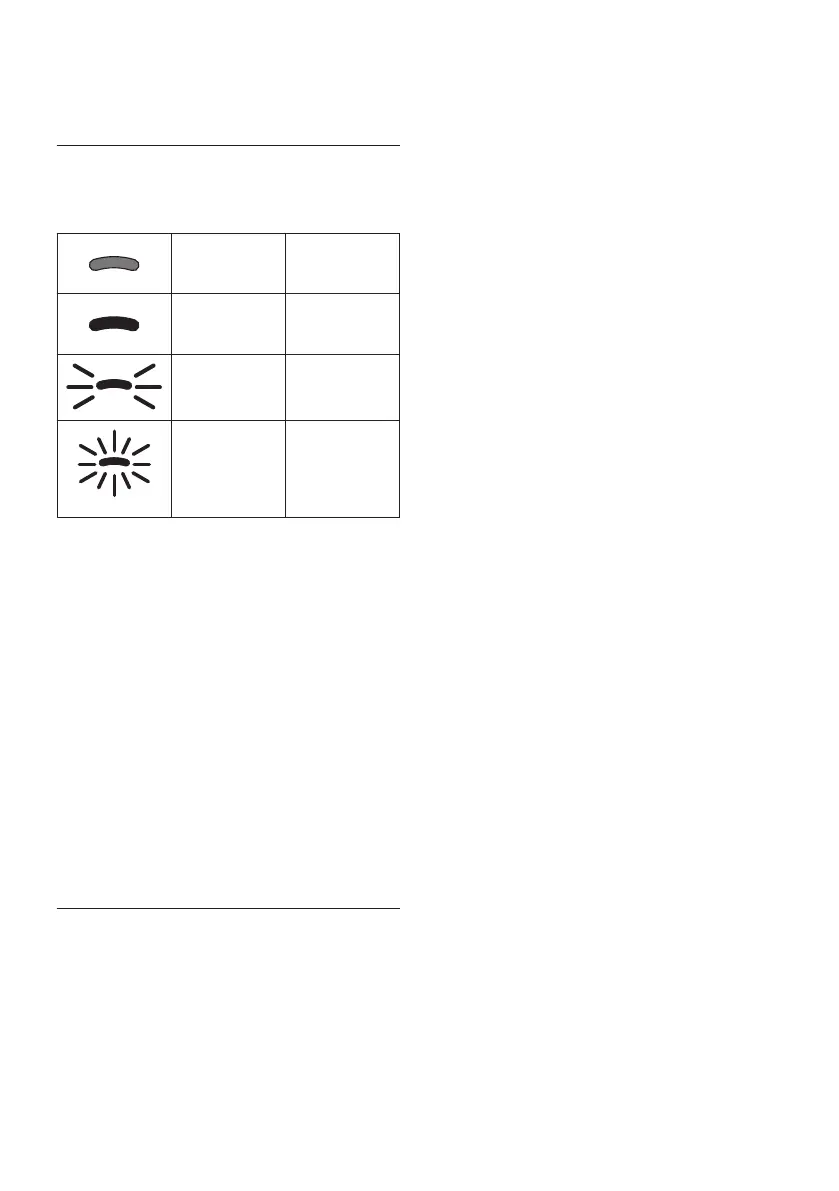
The Leds and indicator lights on the panel will help in ensuring
correct interaction with the machine:
O --
Permanently
alight
Function
available
Blinking
Function in
progress
Blinking rapidly
User action
required
The same symbols are also used in the Quick Guide provided
with the product.
1.1 Letters in brackets
The letters in brackets refer to the description of the appliance
on pages 2- 3.
1.2 Troubleshooting and repairs
In the event of problems, rst try and resolve them by reading
the information given in sections “17. Explanation of lights”
and “18. Troubleshooting”.
If this does not resolve the problem or further information is
required, consult the customer services department at the
numbers indicated on the website www.delonghi.com.
If repairs are required, contact De’Longhi customer services
only. Addresses can be found on the website www.delonghi.
com.
2. DESCRIPTION
2.1 Description of the appliance - A
A1. Beans container lid
A2. Coee mill adjustment dial
A3. Beans container
A4. Pre-ground coee funnel
A5. Infuser ap
A6. Removable infuser
A7. Power cord
A8. Water tank lid
A9. Water tank
A10. Coee grounds container
A11. Cup tray
A12. Drip tray grille
A13. Drip tray water level indicator
A14. Drip tray
A15. Condensate tray
A16. Height-adjustable coee spouts
A17. Accessories connector access ap
A18. Cup shelf
2.2 Description of control panel - B
B1. ON/standby button with built-in Led
B2. X2 button with built-in Led (if pressed and held for 5 sec-
onds, accesses the settings menu)
B3. Descale cycle selection button
B4. Clean button (milk carafe) with built-in Led (if pressed
and held for 5 seconds, activates manual rinse)
B5. Intensity or pre-ground selection button
B6. Intensity selection Led
B7. Pre-ground selection Led
B8. Drink selection button (*number and type of drinks dier
according to models)
2.3 Description of indicator lights - C
C1. Filter exhausted:
Indicator permanently alight: lter must be replaced
Indicator blinking: lter installation in progress
C2. No water:
Indicator permanently alight: insucient water in the
tank (A9)
Indicator blinking: tank not in position
C3. General alarm indicator
C4. Grounds container indicator:
Indicator permanently alight: grounds container (A10)
needs emptying
Indicator blinking: grounds container not in position
C5. Descale indicator:
Indicator permanently alight: machine needs descaling
Indicator blinking: descaling in progress
2.4 Description of accessories - D*
(*number and type dier according to model)
D1. "Total Hardness Test" strip
D2. Pre-ground coee measure
D3. Descaler
D4. Water softener lter
D5. Hot water spout
2.5 Description of milk carafe - E
E1. Lid with milk frother
E2. Milk spout connector (non removable)
E3. Frothed milk spout