1) Characteristics
• Power supplied by three 1.5 V alkaline batteries of
type LR03 or AAA (last for more than 1 year)
• Battery replacement indicator
• Insulation class III
• Mode selector switch (7 positions)
• Choice of 3 permanent temperature settings - Frost
protection, Night-time temperature, Daytime
temperature - and one user-programmable cycle per
day
• The 3 temperature settings can be programmed as
follows : between 5° and 30°C for Night-time
and Daytime temperatures
and between 5° and 15°C for Frost protection
• Proportional-plus-integral control (category B), time
base 15 min
• Stand-by mode
• Transmission frequency : 433 MHz
(Standard I-ETS 300 220)
• Average range between transmitter and receiver :
100m outside, 30m inside.
• Addresses: 65536 combinations
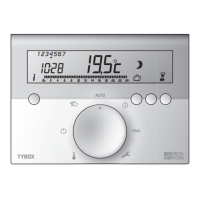
• Digital display
• Enclosure dimensions: 128 × 85 × 31 mm
• Wall mounting or on base
• Degree of protection: IP 30
This system is incompatible with items of wireless
equipment which operate on the same frequency
band (433 MHz), in permanent transmission mode
(headphones, wireless loudspeakers...) as they may
interfere with the signal.
11
11
22
22
33
33
44
44
55
55
66
66
77
77
WARRANTY
This thermostat is guaranteed for three years from its
date of delivery.
To benefit from this guarantee, a proof of purchase
bearing the date of acquisition must be enclosed with
your faulty thermostat when you return it.
The guarantee covers replacement of faulty parts,
labour, and return shipping to the customer.
The following are excluded from the guarantee :
- thermostats whose serial numbers have been
damaged, altered or erased,
- thermostats whose installation or use did not
conform to the instructions given on the device or
in the manual,
- thermostats modified without prior agreement from
the manufacturer,
- thermostats damaged by impacts.
Equipment conforming to the requirements of directives
CEE 89/335 (Electromagnetic Compatibility) and CEE 73/23
amended by CEE 93/68 (Low voltage safety).
➌ Receiver :
• If the green pilot lamp (OK) lights up continuously,
the receiver has already been programmed.
To reprogram, keep the button pressed for 10
seconds until the green "OK" lamp starts to flash
slowly, then release it.
Press the button on the receiver again.
The green "OK" lamp lights up continuously, the receiver
has been reprogrammed.
• If the green pilot lamp (OK) flashes slowly, the
receiver has not been programmed.
Press the button on the receiver again. The green
"OK" lamp lights up continuously, the receiver has
been reprogrammed.
➍ Press the key on the transmitter to leave
programming mode. The receiver's output executes the
transmitter's command.
The red pilot lamp indicates the state of the contact.
On = Contact Off = No contact
3.4 Checking the quality of transmission
➊ Turn the transmitter switch to the position.
➋ Press the button (3 sec.) until tESt appears on the
display.
The transmitter sends its
data to the receiver.
The green OK lamp flashes 3 times every time data is
received correctly.
➌ Press the button to leave transmission test mode.
3.5 A Problem?
The green "OK" lamp is flashing (the receiver has not
received any data for more than an hour).
1) Check the batteries in the transmitter
2) Enter transmission test mode
- If the green "OK" lamp does not flash (3 times) every
time data is received move the transmitter to another
position
- If the problem continues, reprogram both devices.
2) Installation
2.1Choice of location
2.1.1 Radio transmission
The location of the thermostat should be chosen carefully
as some furnishings could absorb or reflect the radio
transmissions.
We therefore advise that the mode of transmission and
the quality of reception is checked last (§ 3.4).
2.1.2 Temperature measure
The thermostat must be positioned correctly. The
recommended height is 1.5 m in an accessible place,
away from heat sources (fireplace, sunlight) and draughts
(window, door).
If the thermostat is mounted on its base, it can be used as
a real heating remote control and so you can take it with
you wherever you are.
2.2 Mounting
2.2.1 Wall mounting
In order to mount the thermostat
on the wall, it must be separated
from its base, as shown in figure 1.
The base is then fixed to the wall
using screws and plugs or on a
flush-mounting box (centre-to-
centre distance 60 mm) using the
holes ➊.
2.2.2 Base mounting
The thermostat has a foldaway base and can be used
away from its wall mounting. For example it can be placed
on a table or other furniture. It must be remembered that
its location could have an effect on the transmission of the
radio signals and that it must be kept away from direct
heat sources and draughts (§ 2.1).