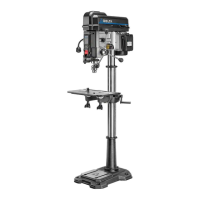
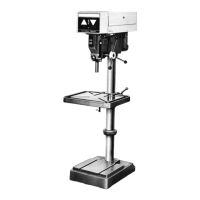
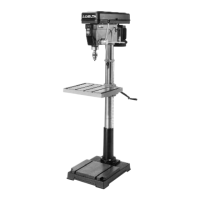
This document is the instruction manual for the DELTA 10" Bench Drill Press, Model 11-985. It provides comprehensive information on the assembly, operation, maintenance, and safety of the drill press.
Function Description:
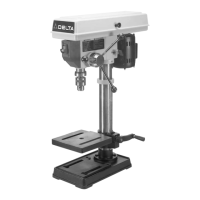
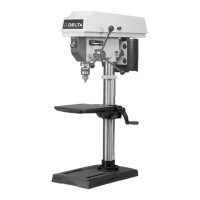
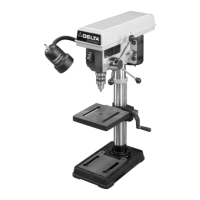
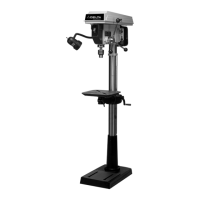
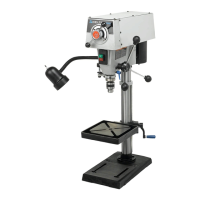
The DELTA 10" Bench Drill Press is a power tool designed for drilling holes in various materials, including wood and metal. It features a motor-driven spindle that rotates a drill bit or other cutting tool, allowing for precise and controlled hole boring. The bench-top design makes it suitable for home workshops and light industrial use. Key functionalities include adjustable spindle speeds, depth control for consistent hole depths, and a tilting table for angled drilling.
Important Technical Specifications:
- Model: 11-985
- Motor Speed: Designed to use a 1720 RPM motor. It is wired for 110-120 volts, 60 Hertz alternating current. The manual explicitly states not to use a motor that operates faster than 1720 RPM.
- Spindle Speeds: Five available spindle speeds: 620, 1100, 1720, 2340, and 3100 RPM. These speeds are achieved by positioning the belt on different steps of the motor and spindle pulleys.
- Chuck Capacity: Designed to use drill bits, cutters, sanding drums, and other accessories with a 1/2 inch shank or less.
- Electrical Circuit: Requires a separate 110-120 volt, grounded electrical circuit, not less than #12 wire, and protected with a 20 amp fuse or circuit breaker.
- Depth Scale: The depth stop scale is calibrated in both inches and millimeters.
Usage Features:
- Assembly: The manual provides detailed step-by-step instructions for assembling the drill press, including attaching the column to the base, installing the table bracket and raising rack, assembling the table raising and lowering handle, mounting the drill press head, and threading the pinion shaft handles. It emphasizes the importance of cleaning protective coating from machined surfaces before assembly.
- Chuck Installation: Instructions for carefully driving the chuck onto the spindle, ensuring the spindle taper and chuck hole are clean. It warns against using a metal hammer to avoid damage to the chuck.
- Fastening to Surface: The drill press base has two holes for securing it to a supporting surface with fasteners to prevent tipping, sliding, or walking during operation.
- Power Connections: Emphasizes the use of a separate, grounded electrical circuit and proper extension cord sizing to prevent power loss, overheating, electrical shock, and fire hazards. A minimum gauge extension cord chart is provided based on ampere rating, voltage, and cord length.
- Grounding Instructions: Details the importance of grounding the tool to protect the operator from electric shock in case of malfunction or breakdown. It specifies the use of 3-wire extension cords with 3-prong grounding type plugs and 3-hole receptacles.
- Speed Adjustment: A belt positioning and speed chart is conveniently located on the inside top cover of the drill press. Instructions are given for changing speeds by adjusting belt tension and positioning the belt on the desired steps of the motor and spindle pulleys.
- Switch Operation: The ON/OFF switch is located on the front of the drill press head. A locking switch feature allows the switch toggle to be removed to prevent unintentional operation, enhancing safety.
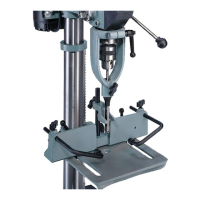
- Table Adjustments:
- Height Adjustment: The table can be raised or lowered on the column by loosening the table clamp handle and turning the table raising and lowering handle.
- Rotation: The table can be rotated 360 degrees on the column.
- Tilting: The table can be tilted right or left by pulling out a table alignment pin and loosening a locking bolt. A tilt scale indicates the degree of tilt.
- Depth Drilling: A depth stop mechanism is provided in the pinion shaft housing for drilling holes to exact, consistent depths.
- Spindle Return Spring Adjustment: The spindle return spring, pre-adjusted at the factory, automatically returns the spindle upward after drilling. Instructions are provided for adjustment if necessary.
- Operation Guidelines:
- Workpiece Support: Emphasizes clamping work securely to the table, especially when drilling metal or using large cutting tools, to prevent rotation and potential injury or damage. For long workpieces, positioning one end against the column is recommended.
- Boring in Wood: Suggests using machine spur bits for cleaner, square-bottom holes in wood and warns against hand bits with screw tips. Recommends using a scrap piece of wood as a base block to prevent splintering and protect the bit point.
- Drilling Metal: Stresses the importance of clamping metal workpieces firmly to prevent seizing, twisting, or shifting, which can lead to rough holes, drill breakage, and injury.
Maintenance Features:
- Cleaning: Instructions for removing the protective coating from machined surfaces using kerosene and warning against acetone, gasoline, or lacquer thinner.
- Tool Condition: General safety rule to maintain tools in top condition, keeping them sharp and clean, and following instructions for lubricating and changing accessories.
- Damaged Parts Check: Before further use, checking for damaged guards or parts, alignment of moving parts, binding, breakage, and mounting issues is crucial. Damaged parts should be properly repaired or replaced.
- Cord Maintenance: If the power cord is worn, cut, or damaged, it must be replaced immediately by a certified electrician to avoid electrical shock or fire hazards.
- Belt Tension Adjustment: Instructions for adjusting belt tension to prevent slipping, noting that excessive tension reduces the life of the belt, pulleys, and bearings. Correct tension allows the belt to be flexed about one inch with light finger pressure.
- Work Area: Keep the work area clean and well-lighted.
- Pre-Operation Checks: Form a habit of checking that keys and adjusting wrenches are removed from the tool before turning it on. Ensure the drill bit or cutting tool is not damaged and is properly locked in the chuck. Remove the chuck key before starting the drill press.
The manual also includes a comprehensive list of general and additional safety rules for drill presses, emphasizing eye protection, grounding, proper apparel, securing work, and avoiding dangerous environments. It advises against forcing the tool, overreaching, and standing on the tool. It also provides information on dust hazards and recommends consulting additional safety resources.