D1000 Installation and Service Manual 17
Home LAB-110073 Rev. 3
INSTALLING THE D1000
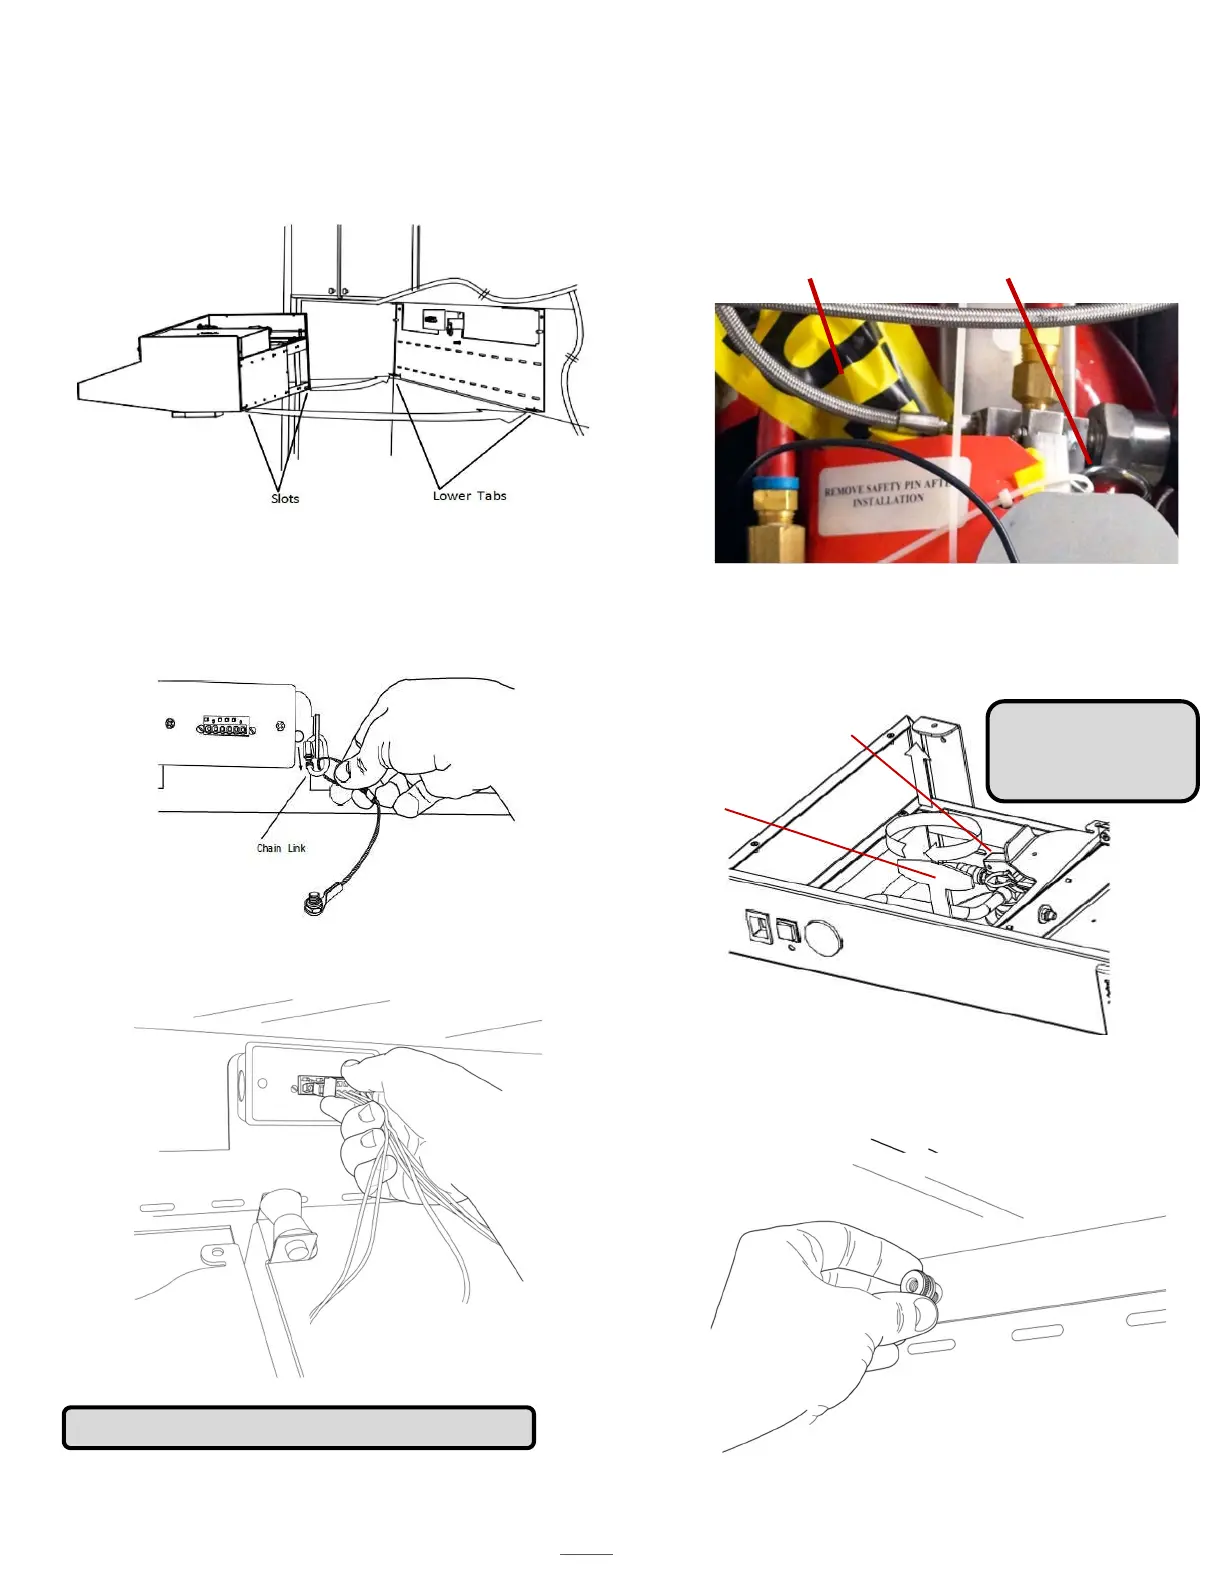
1. Line unit up to the secured D1000 mounting
bracket and seat lower tabs into slots in the back of
the hood.
3. Connect the power to the junction box.
4. On the tank, remove the safety pin-identified
with the yellow flag “caution” from the trigger
on top of the extinguisher bottle.
Safety Pin
5. Remove the safety key from the actuator arm by
rotating and lifting the key straight upwards.
THE SYSTEM WILL NOT ACTUATE
WITHOUT COMPLETING STEPS 4 & 5.
Safety Pin
NOTE: The system is
armed after steps 4
& 5 are completed.
NOTE: Install the MPK prior to arming the system.
6. Tilt the D1000 hood towards wall and thread
the three thumb nuts to the bolts in the back-
support mounting bracket. See page 24 for
location of thumb nuts.
2. While holding the unit up, hook cable to the
chain link on the mounting bracket and screw
the nut to close the link. The hood is now in
maintenance position.
Yellow Caution Flag
Safety Key