14
ENGLISH
• This setting assigns the digital input jacks of the AVR-2803 for the different input sources.
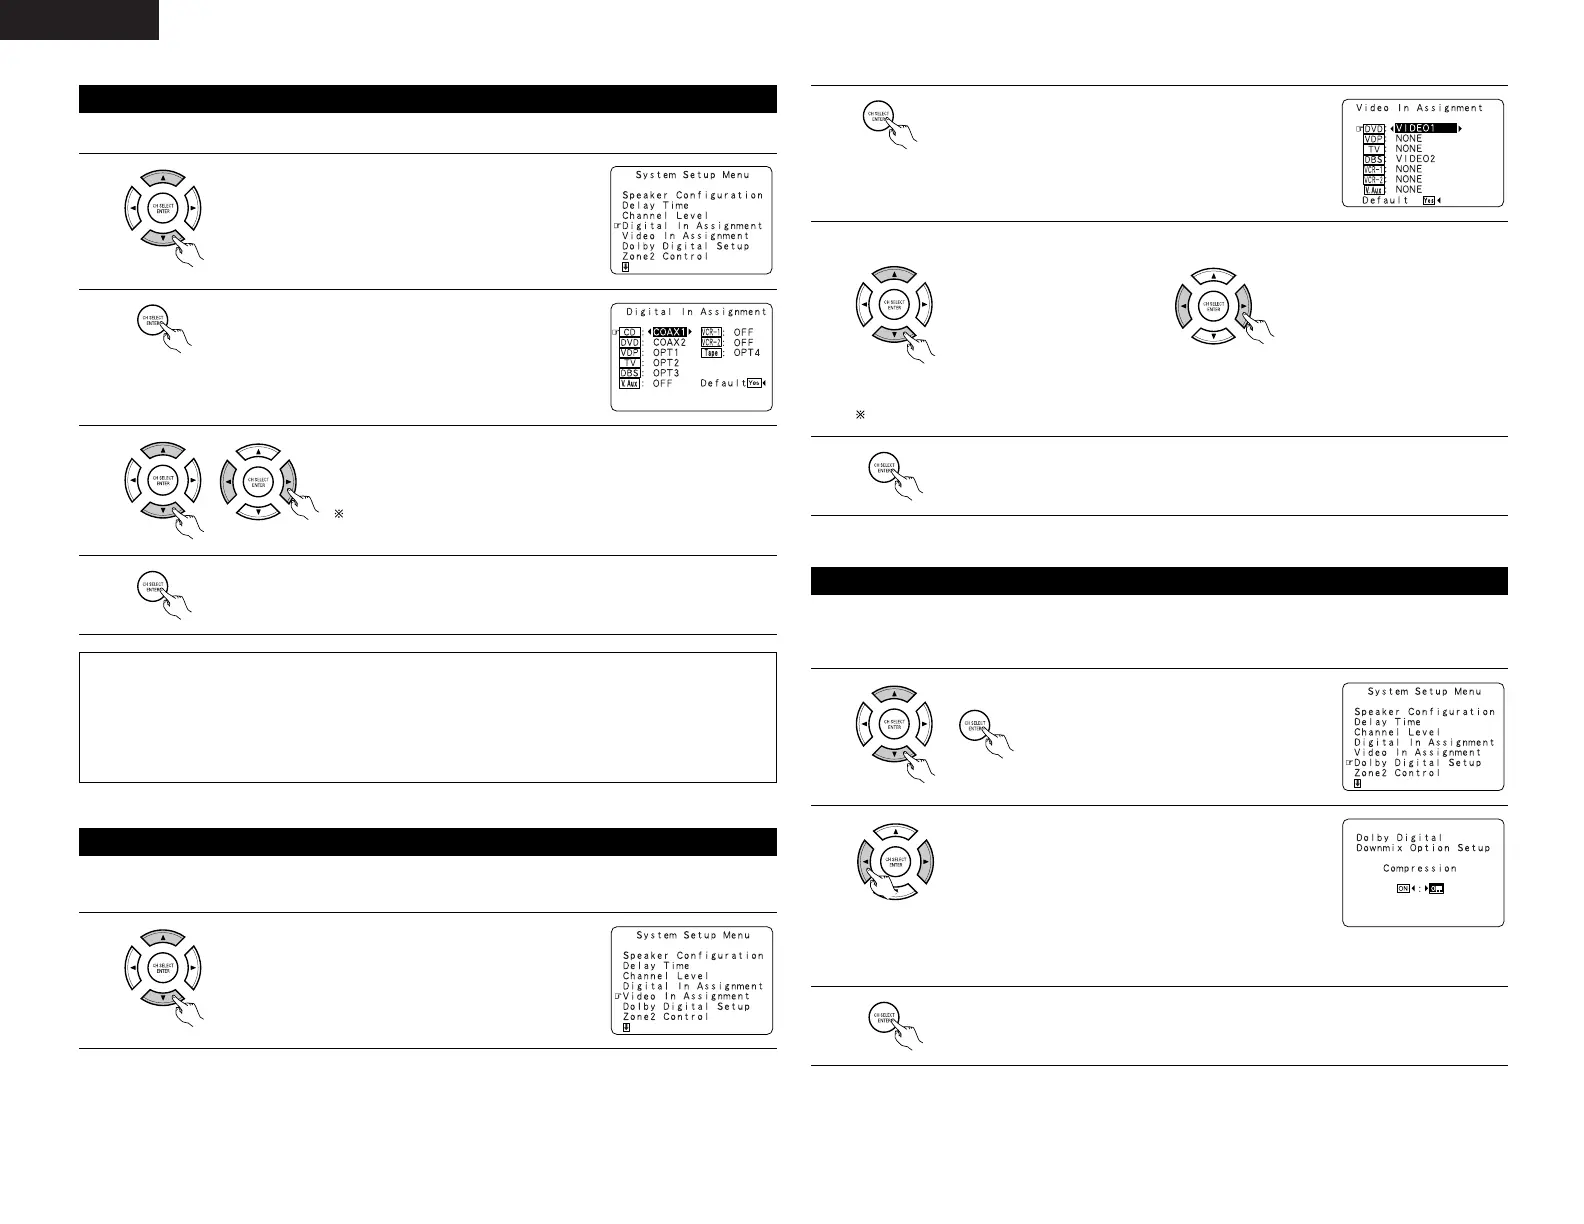
Setting the Digital In Assignment
1
At the System Setup Menu select “Digital In Assignment”.
2
Switch to the Digital In Assignment screen.
3
Select the digital input jack to be assigned to the input source.
•To select the input source
•To select the digital input jack
Select “OFF” for input sources for which no digital input jacks are used.
If “Yes” is selected for “Default”, the settings are automatically
reset to the default values.
NOTES:
• The OPTICAL 4 jacks on the AVR-2803’s rear panel are equipped with an optical digital output jack for
recording digital signals on a CD recorder, MD recorder or other digital recorder. Use this for digital recording
between a digital audio source (stereo - 2 channel) and a digital audio recorder.
• Do not connect the output of the component connected to the OPTICAL 4 OUT jack on the AVR-2803’s rear
panel to any jack other than the OPTICAL 4 IN jack.
• “PHONO” and “TUNER” cannot be selected on the Digital In Assignment screen.
4
Enter the setting.
The System Setup Menu reappears.
• This setting assigns the color difference (component) video input jacks of the AVR-2803 for the different input
sources.
Setting the Video In Assignment
1
At the System Setup Menu select “Video In Assignment”.
3
Select the component (Y, PB/CB and PR/CR) video input terminal to be assigned to the input source.
q Input source selection w Component video terminal
selection
Select “NONE” for sources for which the component (Y, P
B/CB and PR/CR) video input is not to be used.
When the default, “Yes”, is selected, the settings are reset to the factory defaults.
4
ENTER the setting.
The System Setup Menu reappears.
2
Switch to the Video In Assignment screen.
Sets the down-mixing method when not using a center speaker or surround speakers.
OFF: The dynamic range is not compressed.
ON: The dynamic range is compressed automatically according to the combination of speakers being used.
Setting the Dolby Digital Setup
1
At the System Setup Menu select “Dolby
Digital Setup” and press the ENTER button.
2
Select “ON” if you want to use the Compression, “OFF”
if you do not want to use it.
3
Enter the setting.
The System Setup Menu reappears.
NOTE:
When not using a center speaker or surround speakers,
the sound is played from the front speakers. If the sound
should seem distorted because the input level exceeds the
allowable input for the front speakers, set “Compression”
to “ON”.
 Loading...