EasyManua.ls Logo

Denon DR-M33HX - FL Meter Adjustment; Recording Section Adjustment

Denon DR-M33HX
48 pages
Print Icon
To Next Page IconTo Next Page
To Previous Page IconTo Previous Page
Loading...
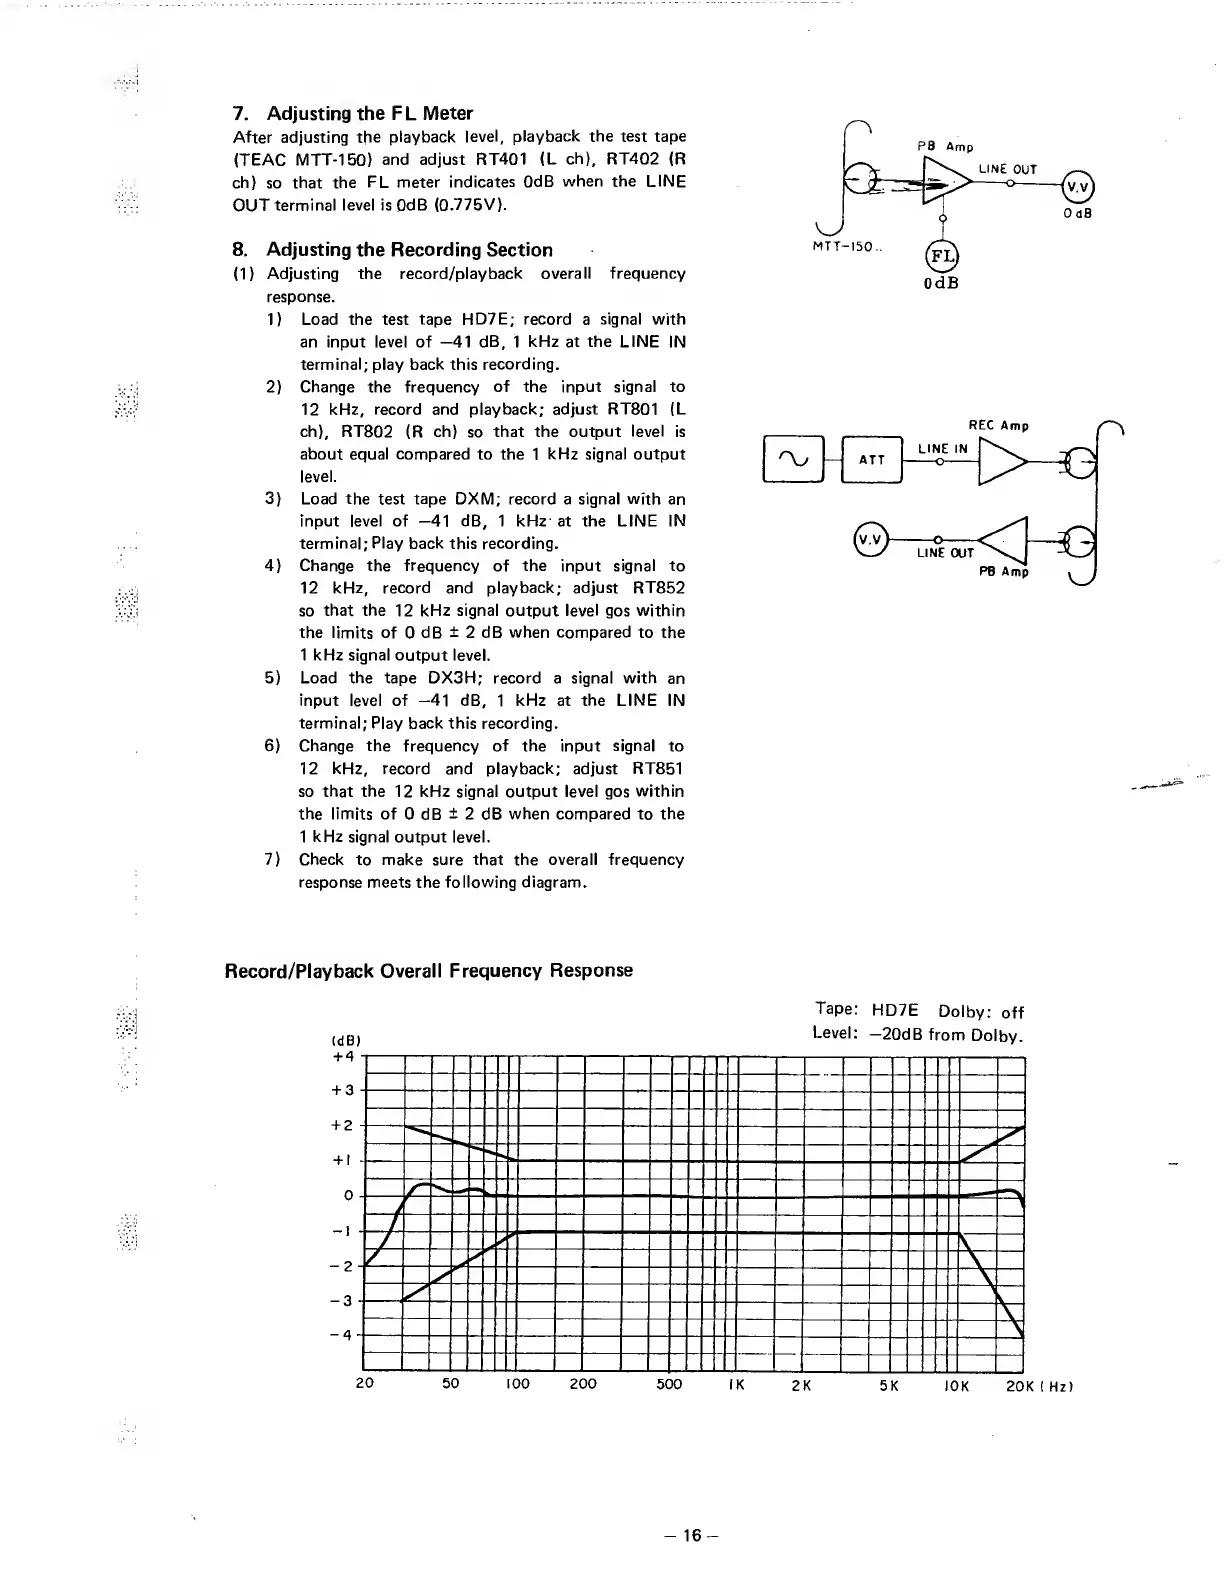
7.
Adjusting
the
FL
Meter
After
adjusting
the
playback
level,
playback
the
test
tape
(TEAC
MTT-150)
and
adjust
RT401
(L
ch),
RT402
(R
ch)
so
that
the
FL
meter
indicates
OdB
when
the
LINE
OUT
terminal
level
is
OdB
(0.775V).
8.
Adjusting
the
Recording
Section
(1)
Adjusting
the
record/playback
overall
frequency
response.
1)
Load
the
test
tape
HD7E;
record
a
signal
with
an
input
level
of
—41
dB,
1
kHz
at
the
LINE
IN
terminal;
play
back
this
recording.
2)
Change
the
frequency
of
the
input
signal
to
12
kHz,
record
and
playback;
adjust
RT801
(L
ch),
RT802
(R
ch)
so
that
the
output
level
is
about
equal
compared
to
the
1
kHz
signal
output
level.
3)
Load
the
test
tape
DXM;
record
a
signal
with
an
input
level
of
—41
dB,
1
kHz
at
the
LINE
IN
terminal;
Play
back
this
recording.
4)
Change
the
frequency
of
the
input
signal
to
12
kHz,
record
and
playback;
adjust
RT852
so
that
the
12
kHz
signal
output
level
gos
within
the
limits
of
0
dB
±
2
dB
when
compared
to
the
1
kHz
signal
output
level.
5)
Load
the
tape
DX3H;
record
a
signal
with
an
input
level
of
—41
dB,
1
kHz
at
the
LINE
IN
terminal;
Play
back
this
recording.
6)
Change
the
frequency
of
the
input
signal
to
12
kHz,
record
and
playback;
adjust
RT851
so
that
the
12
kHz
signal
output
level
gos
within
the
limits
of
0
dB
±
2
dB
when
compared
to
the
1
kHz
signal
output
level.
7)
Check
to
make
sure
that
the
overall
frequency
response
meets
the
following
diagram.
Record/Playback
Overall
Frequency
Response
Tape:
HD7E
Dolby;
off
Level:
—20dB
from
Dolby.
-
1
6
-

Table of Contents