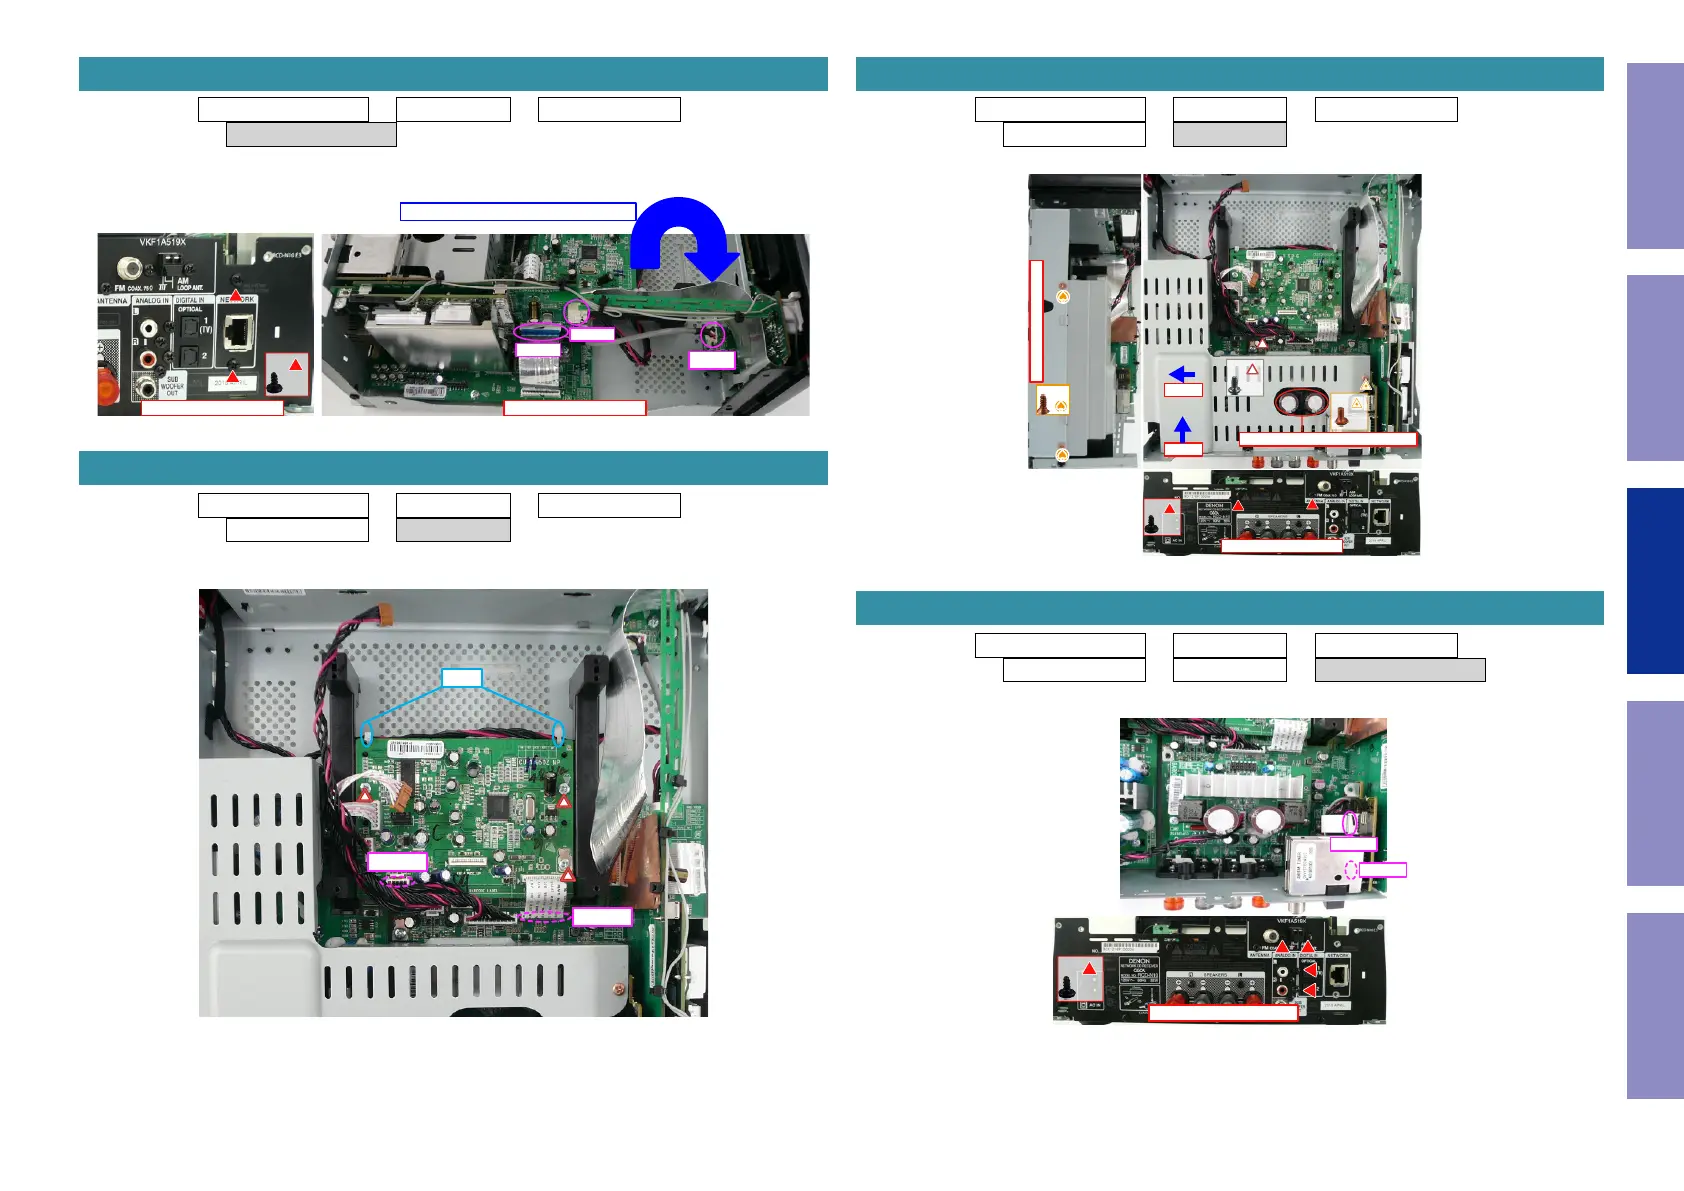
Proceeding : REAR MOLD PANEL → SIDE PANEL → TOP PANEL ASSY
→ NETWORK PCB ASSY
(1) Removethescrews.RemovetheconnectorwireandFFC.
Proceeding : REAR MOLD PANEL → SIDE PANEL → TOP PANEL ASSY
→ CD MECHA ASSY → CD PCB
(1) Cutthewireclamp,thenremovetheconnectorwireandFFC.
5. NETWORK PCB ASSY
↑Shooting direction: C↑↑Shooting direction: A↑
WF60
CN92
CN63
PCB Combination releasing direction.
x2
6. CD PCB
CN81
PF80
CUT
Proceeding : REAR MOLD PANEL → SIDE PANEL → TOP PANEL ASSY
→ CD MECHA ASSY → SHIELD COVER
(1) Removethescrews.
Proceeding : REAR MOLD PANEL → SIDE PANEL → TOP PANEL ASSY
→ CD MECHA ASSY → SHIELD COVER → OPTICAL PCB(TUNER)
(1) Removethescrews.RemovetheconnectorwireandFFC.
7. SHIELD COVER
↓Shooting direction: D↓
↑Shooting direction: A↑
STEP1
STEP2
Careful not to damage the Capacitors
x2
x1
x3
x2
8. OPTICAL PCB (TUNER)
↑Shooting direction: A↑
WF15
CN16
x3
Before Servicing
This Unit
Electrical Mechanical Repair Information Updating
41


 To Next Page