DFU Thermaprep Plus Oven – F1902115.X /04/2010 updated 10-2011 2 / 24
For dental use only
Directions for use
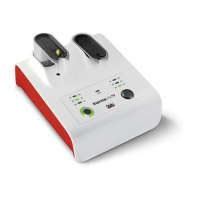
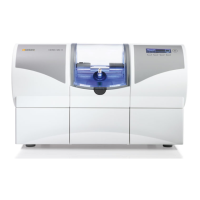
Thermaprep® 2 oven – Ref. A0176
1) INDICATIONS FOR USE
This product has to be used only in a clinical or hospital environment, by qualified users.
The Thermaprep
®
2 Obturator Oven has been specially developed for heating Dentsply Maillefer
endodontic obturators (GuttaCore
TM
, WaveOne
TM
, Thermafil
®
, Protaper
®
, GT Series X
®
) for use in root
canal therapy. Do not use this oven for any other purpose.
2) CONTRAINDICATIONS
There are none known
3) WARNING
To abort the cleaning mode without disconnecting the main plug and to enter the normal mode again
press either button for 2 seconds
4) PRECAUTIONS
1. To prevent fire or electric shock, do not expose this product to moisture.
2. Unplug the oven when not in use.
3. Do not remove the cover of the oven.
4. This oven is designed for use in the dental office. Do not use in any other environment
5. To reduce the risk of electric shock, do not remove cover; there are no user-serviceable parts inside
6. This oven is intended for use in heating gutta-percha coated obturators only. Do not insert anything
other than an obturator into the oven
7. Changes or modifications not expressly approved by DENTSPLY Tulsa Dental Specialties
could void the user
’
s authority to operate the equipment.
5) ADVERSE REACTIONS
In the present technical state, no adverse reaction has been reported so far.
6) STEP-BY-STEP INSTRUCTIONS
1. Turn the power on by plugging the oven into a 115 or 230 VAC outlet. Both indicator lights around
the buttons will light up. To wake-up the oven from stand-by mode, push and hold either one of the
buttons until the indicator light around the button is illuminated and two signals “beeps” are heard,
and release the button. A second, lower signal “beep” will sound. On both sides the smallest
obturator size is selected as shown by indicator lights. The oven is now ready for use. At any time
the oven can be turned off. Push and hold either one of the bottom buttons until the indicator light
around the button turns off.
2. Put both obturator holders in the upper position by pressing the back of the holder (marked area).
3. DISINFECT the obturator in a 5.25% sodium hypochlorite solution (bleach) for one minute. RINSE
the obturator in 70% alcohol. DRY the obturator for several seconds on a clean work surface to
allow evaporation of excess alcohol.