4
LT-2026
EN
C. Travel
The DeVilbiss DV54/DV53 PAP:
• Automatically adjusts for altitudes between sea level and
9000 ft (2750 m)
• Automatically accepts line voltages of 100-240 V, 50/60 Hz
• Needs power cord appropriate for area
o USA DV54/
DV53D-606
o Europe, except UK DV54/DV53D-607
o UK DV54/DV53D-608
o Australia DV54/DV53D-609
o Set of 3 (UK, Europe, Australia) DV54/DV53D-611
D. DC Power
The DeVilbiss DV54/DV53 PAP:
• Automatically accepts 12V DC power
• Operates on DC power only if AC power is not present
• Operates on AC power if both DC and AC power are pres-
ent
• Optional 12V, 60 amp hour, deep cycle marine battery
• Optional DC to AC inverter:
minimum 200 watts @ 100/120 VAC
minimum 400 watts @ 220 VAC
• Appropriate DC power cord
o DV54/DV53D-619 DC accessory cable for DC plug-in
adapters
o DV54/DV53D-696 DC battery clamp-on adaptor for
stand-alone battery
E. Setting Pressures and Features
Use the following steps to enter Clinical/SetUp mode:
1. Apply AC power to the unit
2. Verify that LCD displays OFF
3. Press and hold the Down Arrow key and the Delay key.
4. While holding two keys, press the ON/OFF key.
5. The blower will begin operating and the LCD will display
‘Clinical Menu’.
6. Use the Left and Right Arrow keys to scroll through the
options
7. Use the Up and Down Arrow keys to select the option’s
value.
8. Press the ON/OFF key at any time to exit Clinical Mode.
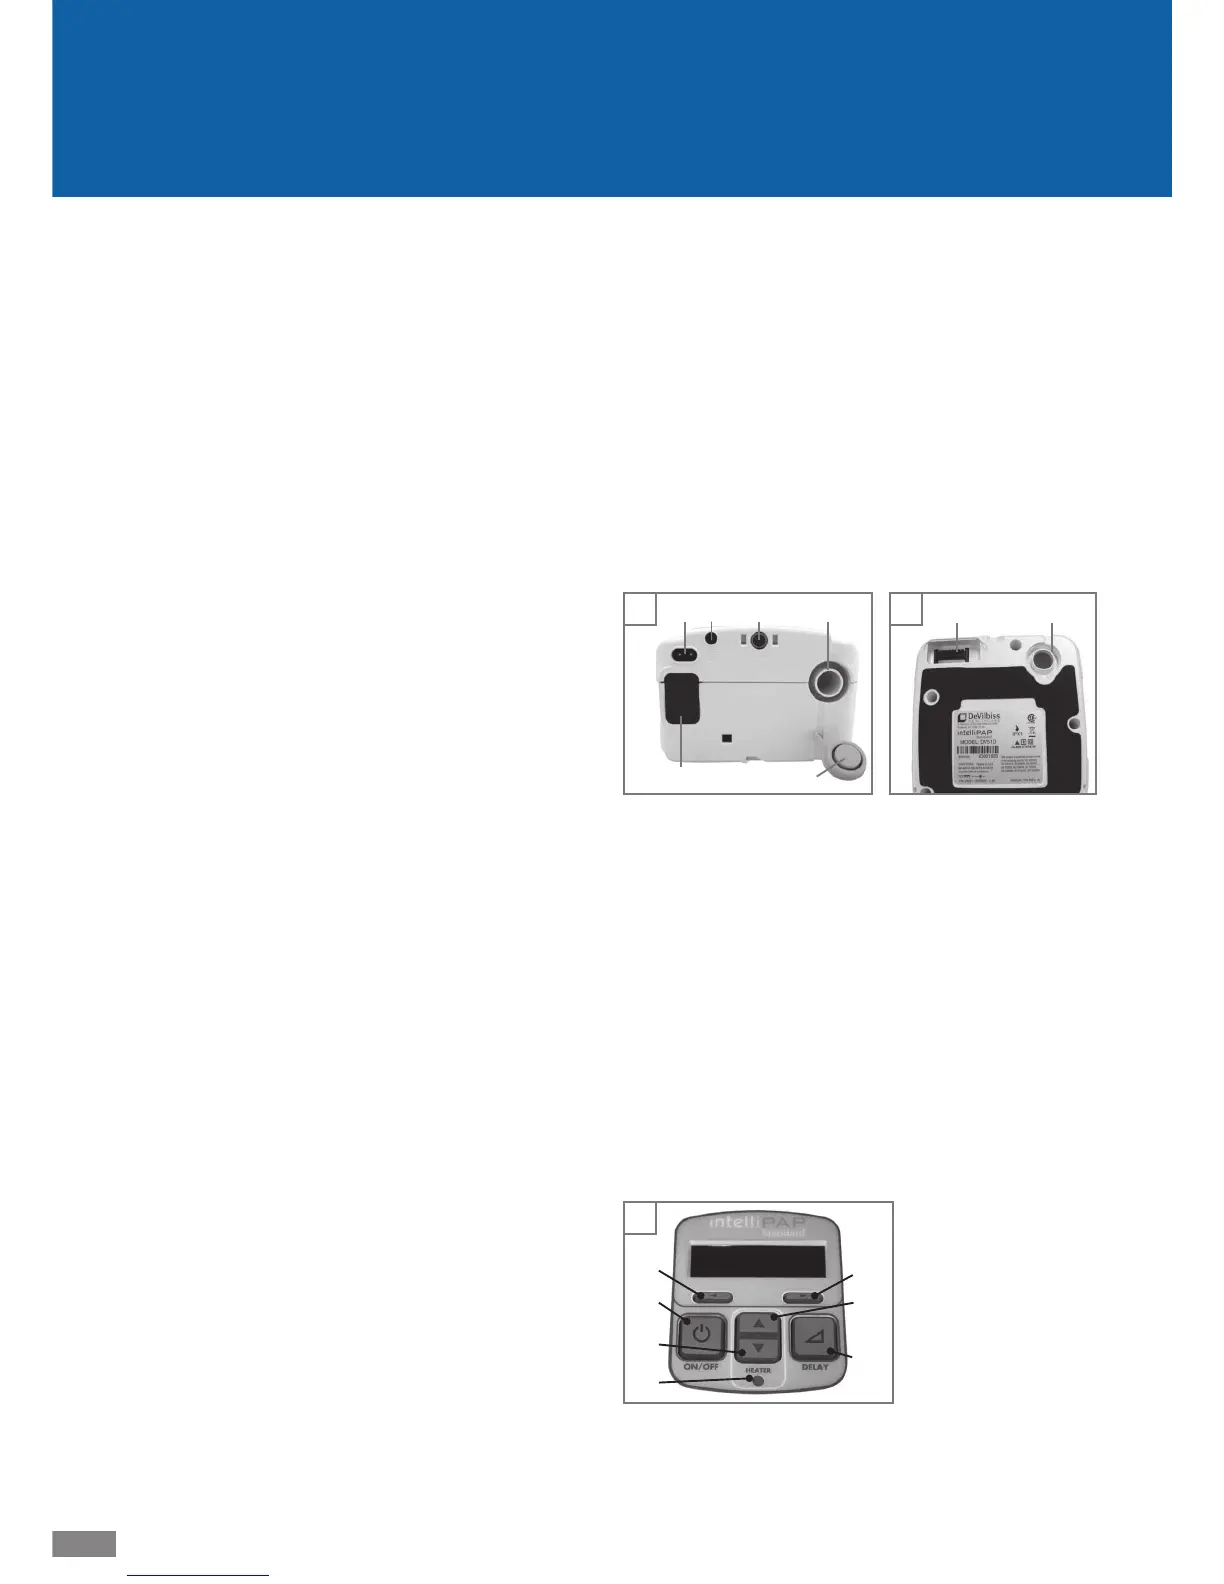
F. Images: DeVilbiss DV54/DV53 PAP
Figures A and B: DV54/DV53 Device Back and Bottom
1. Air supply port on back of device
2. Air supply port on bottom of device
(for optional humidifi er)
3. Air supply port plug
4. Heater power connector (for optional humidifi er)
5. AC power connector
6. DC power connector
7. Data por t
8. Air inlet fi lter opening
Figure C: Keypad
1. ON/OFF
2. Previous item
3. Next item
4. Delay
5. Decrease value
6. Increase value
7. Heater power LED
(for optional humidifi er)
C
5
1
2
4
6
3
7
B
2
4
A
1
3
56 7
8