13
ENGLISH
6. When finished, turn the dust extractor off by pressing the
three position switch to the Off (O)position.
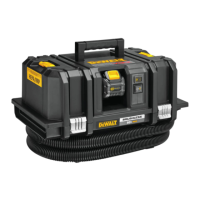
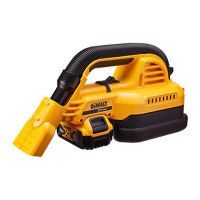
Wet Pick Up Applications (Fig.I)
WARNING: If foam or liquid escapes from the machine,
switch offimmediately.
CAUTION: Clean the water level sensors regularly and
examine it for signs ofdamage.
WARNING: Do not use the machine with this set up for
dust ClassM.
The dust extractor is designed to perform as a wet/dry
unit.Dedicated filters should be used for wet pick up
applications to avoid filterclogging.
• Make sure that the dust extractor is engaged in the
horizontalposition.
• Before wet pick up applications the dust bag must
beremoved.
• Water level sensors probes
25
will automatically shut off
the dust extractor when the maximum fill level has been
reached. Move the three position switch to the Off (O)
position, remove the battery, and empty the tank before
turning the dust extractor backon.
• To avoid syphoning, remove the dust extractor hose from
the source after the water sense probes shut down the
dustextractor.
• It is recommended that the tank be emptied of any dry
contents prior to being used for wet pick up to facilitate
tankcleaning.
• Allow filters to dry after wet pick upapplications.
To Empty Tank (Fig.A, E, F)
1. Press the three position switch
3
to the Off (O) position and
remove thebattery
7
.
2. Unlatch tank latches
4
and remove dust extractor head
6
.
3. Empty contents of tank
21
into an appropriate container
according to statutoryprovisions.
To Convert Back to Dry Vacuum Operation
(Fig.A, F)
1. Empty tank
21
, refer to Dust Extractor
Cleaninginstructions.
2. Place tank upside down position until dry. DO NOT use wet
tank for dry pickup.
3. Place dust extractor head
6
on a level surface untildry.
4. Reinstall filters when dust extractor head is dry. SeeFilters.
5. When canister is dry place the dust extractor head
6
onto
the tank and secure it by closing the tank latches
4
.
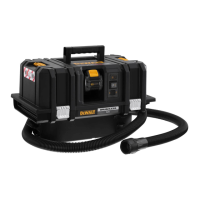
Connecting to Power Tools (Fig. A, G)
CAUTION: Follow all the requirements of the power tool
regarding connection of dustextractor.
1. Choose the correct power tool adaptor
19
to fit the power
tool connection on the tool to be used, refer to Optional
Accessories under Maintenance. Attach power tool
adaptor
19
to powertool.
2. Your DeWALT construction dust extractor is fitted with the
DeWALT AirLock connection system. The AirLock allows for a
fast, secure connection between the dust extractor hose
2
and power tool. The AirLock connector
18
connects
directly to DeWALT compatable tools or through the use
of an AirLock adaptor(available from your local DeWALT
supplier). Refer to the Optional Accessories section for
detail on availableadaptors.
NOTE: If using an adaptor, ensure it is firmly attached to the
tool outlet before following the stepsbelow.
a. Ensure the collar on the AirLock connector is in the
unlock position. (Refer to FigureG.) Align notches
20
on collar and AirLock connector as shown for unlock and
lockpositions.
b. Push the AirLock connector onto the adaptor
connectorpoint.
c. Rotate the collar to the lockedposition.
NOTE: The ball bearings inside collar lock into slot and
secure the connection.The power tool is now securely
connected to the dustextractor.
Pairing the Dust Extractor with a Tool using
Wireless Tool Control™ Mode (Fig. A, H, J)
CAUTION: When the dust extractor is being controlled
with the remote or paired power tool it may start or stop
withoutwarning.
WARNING: Do not attach the remote strap to
movingparts.
To Pair with a DeWALT Remote or Wireless Tool
Control™ Tool
1. Press the three position switch
3
to the Wireless Tool
Control™ ( )position.
2. Press and hold the Wireless Tool Control™ pairing
button
11
on the DCV586M and pull the trigger on
the Wireless Tool Control™ equipped tool or press the
button
33
on the remote
14
at the sametime.
3. The LED
30
will be steadily illuminated to indicate a
successfulpairing.
NOTE: Only one transmitter can be paired to the DCV586M
at a time. If the unit is already paired the previous
transmitter will beoverridden.
To Unpair with a Wireless Tool Control™ Tool or Remote
• Press and hold the Wireless Tool Control™ pairing
button
11
on the DCV586M and pull the trigger on the
Wireless Tool Control™ equipped tool or press the button on
the remote at the sametime.
• The LED
30
will flash slowly to indicate a
successfulunpairing.
LED FLASH PATTERN
In pairing mode
– – – – – – –
No device is paired
– – – –– – – –
Device is successfully paired
––––