DEWE-43A
TECHNICAL REFERENCE MANUAL
6.3.4 Measurement Mode
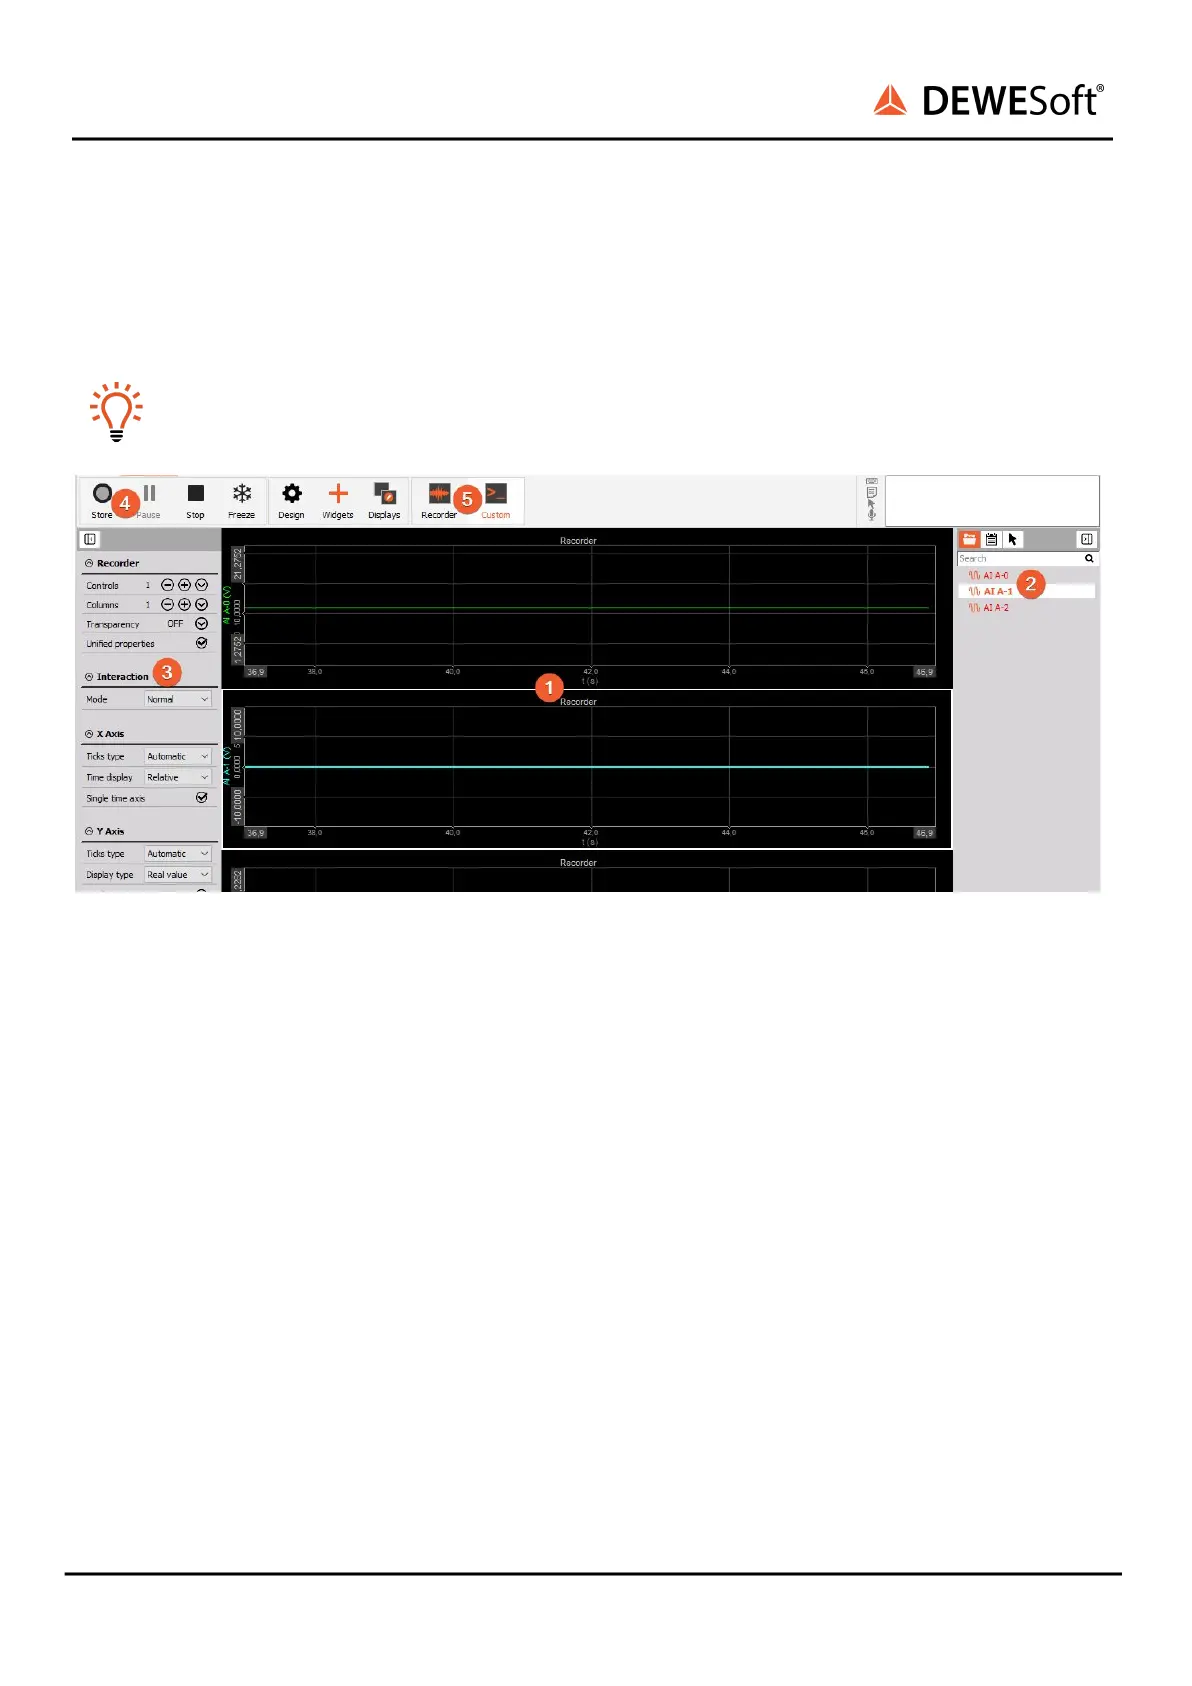
A click on Measure (at the right side of Ch. setup in image 36) will take you to the Recorder screen
measure mode where you can already see live data.
Hint
When switching to Measure mode the data will not be stored automatically.
Image 36: Measure mode
In measure mode you can have several measurement screens (5). DewesoftX® will create 2 default
displays: Recorder and Custom but you can also create new displays or change the widgets on existing
displays as you like.
The most important sections of the Measure mode are highlighted in screen-shot (Image 36):
(1) shows the live measurement data in different widgets which are depending on the selected
measurement screen. In this case we see a simple recorder widget where data is presented in time
domain. You can use the channel-selector list (2) to assign measurement channels to the widgets. Each
widget has different settings, (3) shows the settings of the currently selected recorder widget.
To start storing the data, press the Store button (4). When you are done with recording, press the Stop
button.
Now DewesoftX® has created a datafile with all the data that you have seen during the recording
session. You can now click the Analyse button (on the left-top of the screen to the right of the Measure
button) to go to Analyse mode.
6.3.5. Analyse Mode
When you have just stopped a measurement, DewesoftX® will automatically open the last recorded
data file in Review mode, so that you can start the analysis right away.
DEWE-43A V20-2 29/38