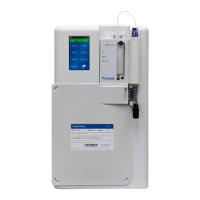
PROLYTE ANALYZER
3.i CPU Board Removal
1. Remove the display cable from the top of the CPU board shown in Figure P9.
2. Disconnect the electrode jacks from behind the CPU board. See figure below for the location of
the electrode jacks. To disconnect, gently pull electrode jack straight away from the connector pin
of the CPU board.
▲ The connector pins are extremely delicate. Avoid pin breakage when removing the electrode jacks,
gently pull the electrode jacks straight away from the pins. If a pin breaks the entire CPU board will
require replacement.
3. Disengage the CPU board from the four plastic mounting posts as shown.
4. Slide the CPU board off the mounting posts. See Figure P9.
3.j CPU Board Installation
1. Align the CPU board with the plastic mounting posts. Snap the right side mounting posts of the
CPU board into place.
2. Connect the electrode jacks to the back of the CPU board. To connect, gently push the electrode
jack straight into the connector pin. See figure below to determine the proper connector pin
position on the CPU board and the recommended installation order.
▲ Do not bend the connector pin when installing the electrode jack. If a pin breaks the
entire CPU board will require replacement.
3. Snap the left and center mounting posts of the CPU board into place.
4. Attach the display cable to the CPU board. Push the display cable tabs to the front to secure cable
in place. See Figure P9.
5. Connect the probe motor, sensor, pump motor, power supply and printer cables to the CPU
board, see Figure P9.
25