21
mark should be visible along the edge of the forward capstan guard.
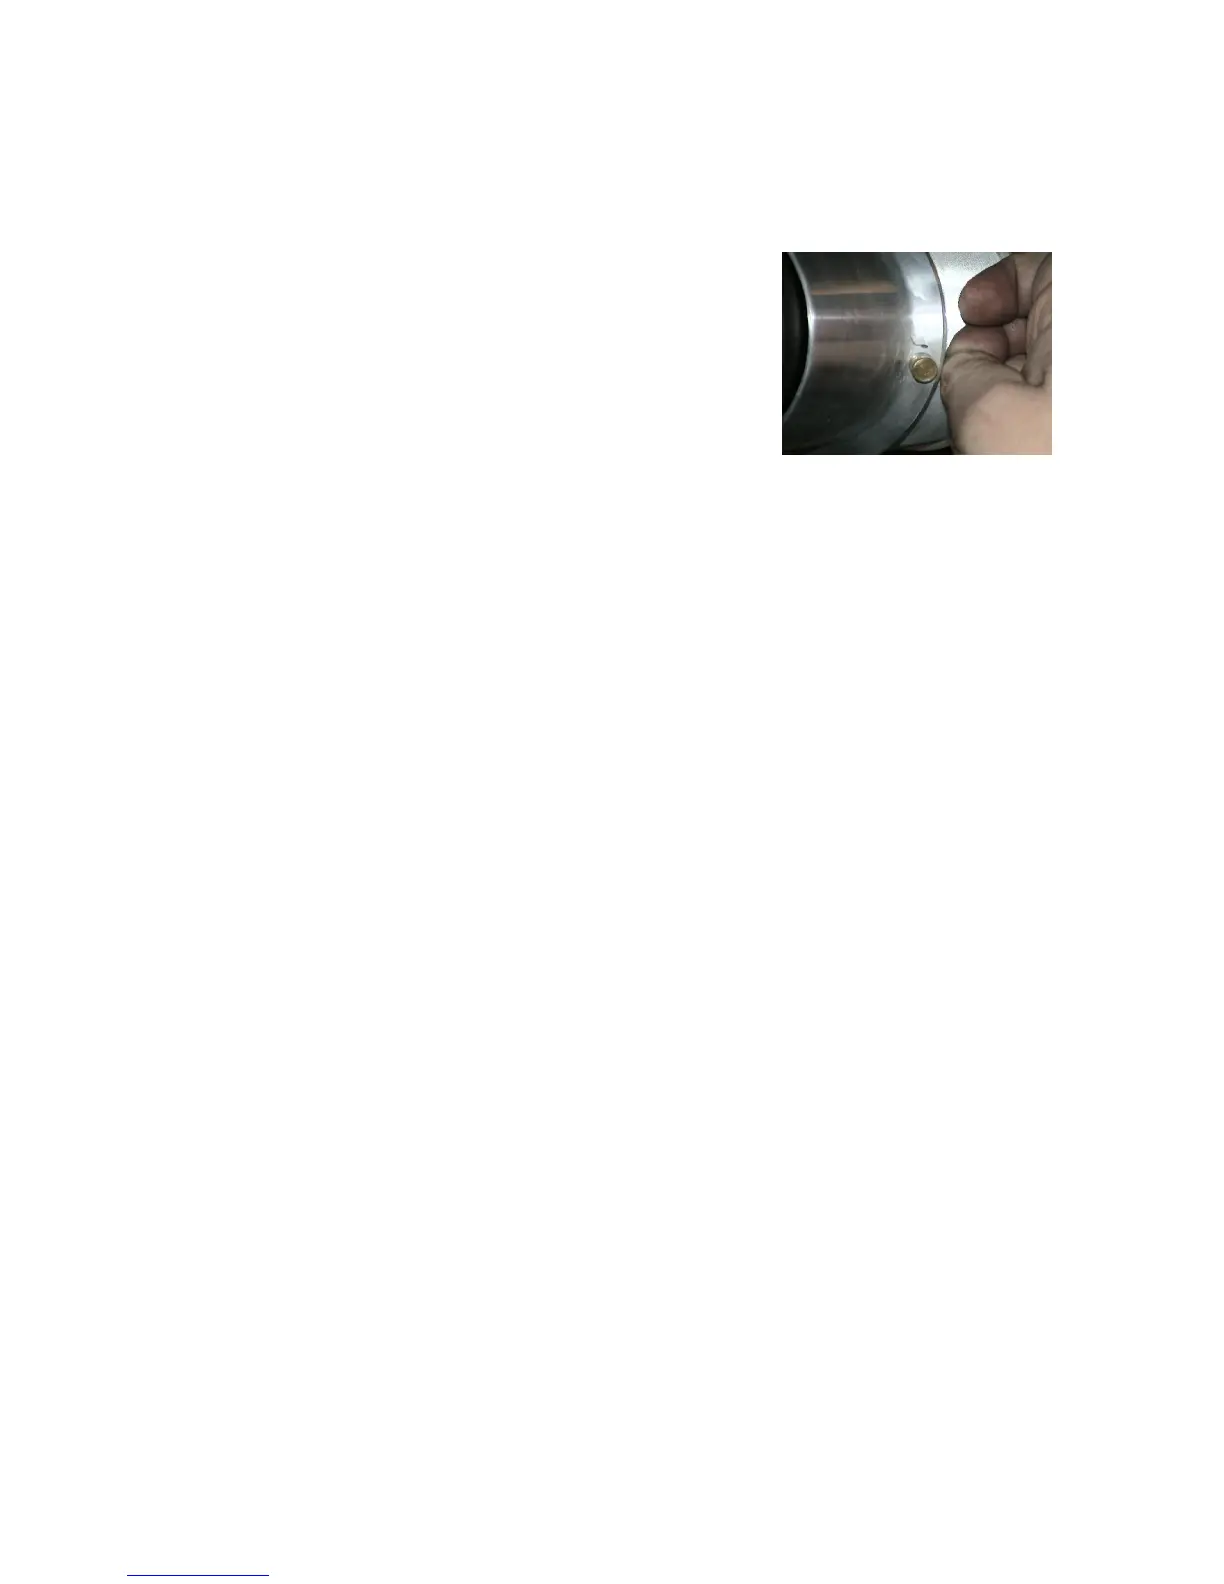
10. Slip the wire end through the retaining hole from behind. It should come through the outside
flange of the capstan near the thumbscrew.
11. Loosen the thumbscrew and wind the wire back around its
shaft one-half a turn. Do not wind the wire around so that it
crosses itself. This overlap creates a pinch point that could
cut the wire when you tighten the thumbscrew.
12. Tighten the thumbscrew, securing the wire. Rotate the feed
spool back, if necessary, so that the wire is taut.
13. Use your left hand to maintain a firm tension on the feed spool. Rotate the capstan
counterclockwise so that the wire winds over the capstan. Look closely to see that the wire lays
in the groove right next to the flange.
14. Continue to wind the capstan by hand one or two revolutions. Observe that the wire is tightly
seated in the capstan spiral; there is no crossover, nor does the wire skip a groove.
15. Check again to verify that the wire Speed control is at or below 20%.
16. As you maintain firm tension on the feed spool, press the RESET button and turn up the wire
Speed control if necessary so that the capstan rotates at a slow and steady rate. wire is pulled
from the supply spool and onto the capstan. When the capstan reaches the far end of its
counterclockwise rotation and has traveled fully forward away from the motor, it stops
automatically.
17. Using your right hand, pull a little more than one foot of excess wire from the supply spool.
18. Tape the wire to the edge of the spool and cut the wire near the spool.
19. With your left hand, pass the wire over the left tension pulley and toward the rear flange of the
capstan.
20. Keep the wire taut so that it does not jump out of any pulley, yet do not pull so hard as to cause
the capstan to rotate. You want to leave all the wire currently wound onto the capstan in place.
21. Using your right hand, rotate the capstan up to one-half revolution further counterclockwise
until a retaining hole is visible on the left side of the rear capstan flange. Verify that the capstan
stopped in the proper position. A thin score mark should be visible along the edge of the
forward capstan guard.
22. Slip the wire end into the retaining hole. It should come through the outside flange of the
capstan near the thumbscrew.
23. Loosen the thumbscrew and wind the wire back around its shaft one-half a turn. Nudge the wire
against the flange. Gently pull the wire as you rotate the capstan clockwise up to one-quarter