Appendix A: Card Removal and Replacement 13
Replacing an I/O Card
To replace a card:
1 Power off and disconnect the 96 I/O from
your Pro Tools|HD system.
2 Make sure that the 96 I/O AC cord remains
plugged in so that it is grounded.
3 Remove all 16 of the small Phillips-head
screws around the edges of the top cover. Put the
screws in a safe place.
4 Lift off the top of the 96 I/O and set it aside.
5 If the card you are replacing is still connected
to the 96 I/O, see “Removing an I/O Card” on
page 11.
6 To discharge any static electricity, touch the
power supply casing. It is a good idea to do this
often, throughout the process.
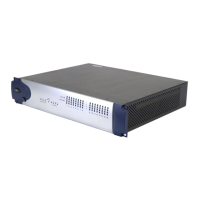
7 Look into the empty bay to locate the guide
rails for the card
8 Slide the edges of the card into the guide rails
on each side of the bay. Push the card all the way
in until the card’s faceplate is nearly flush with
the rear panel of the 96 I/O.
9 Screw the card’s faceplate onto the rear panel
surface of the 96 I/O with the same screws you
removed from the empty bay cover.
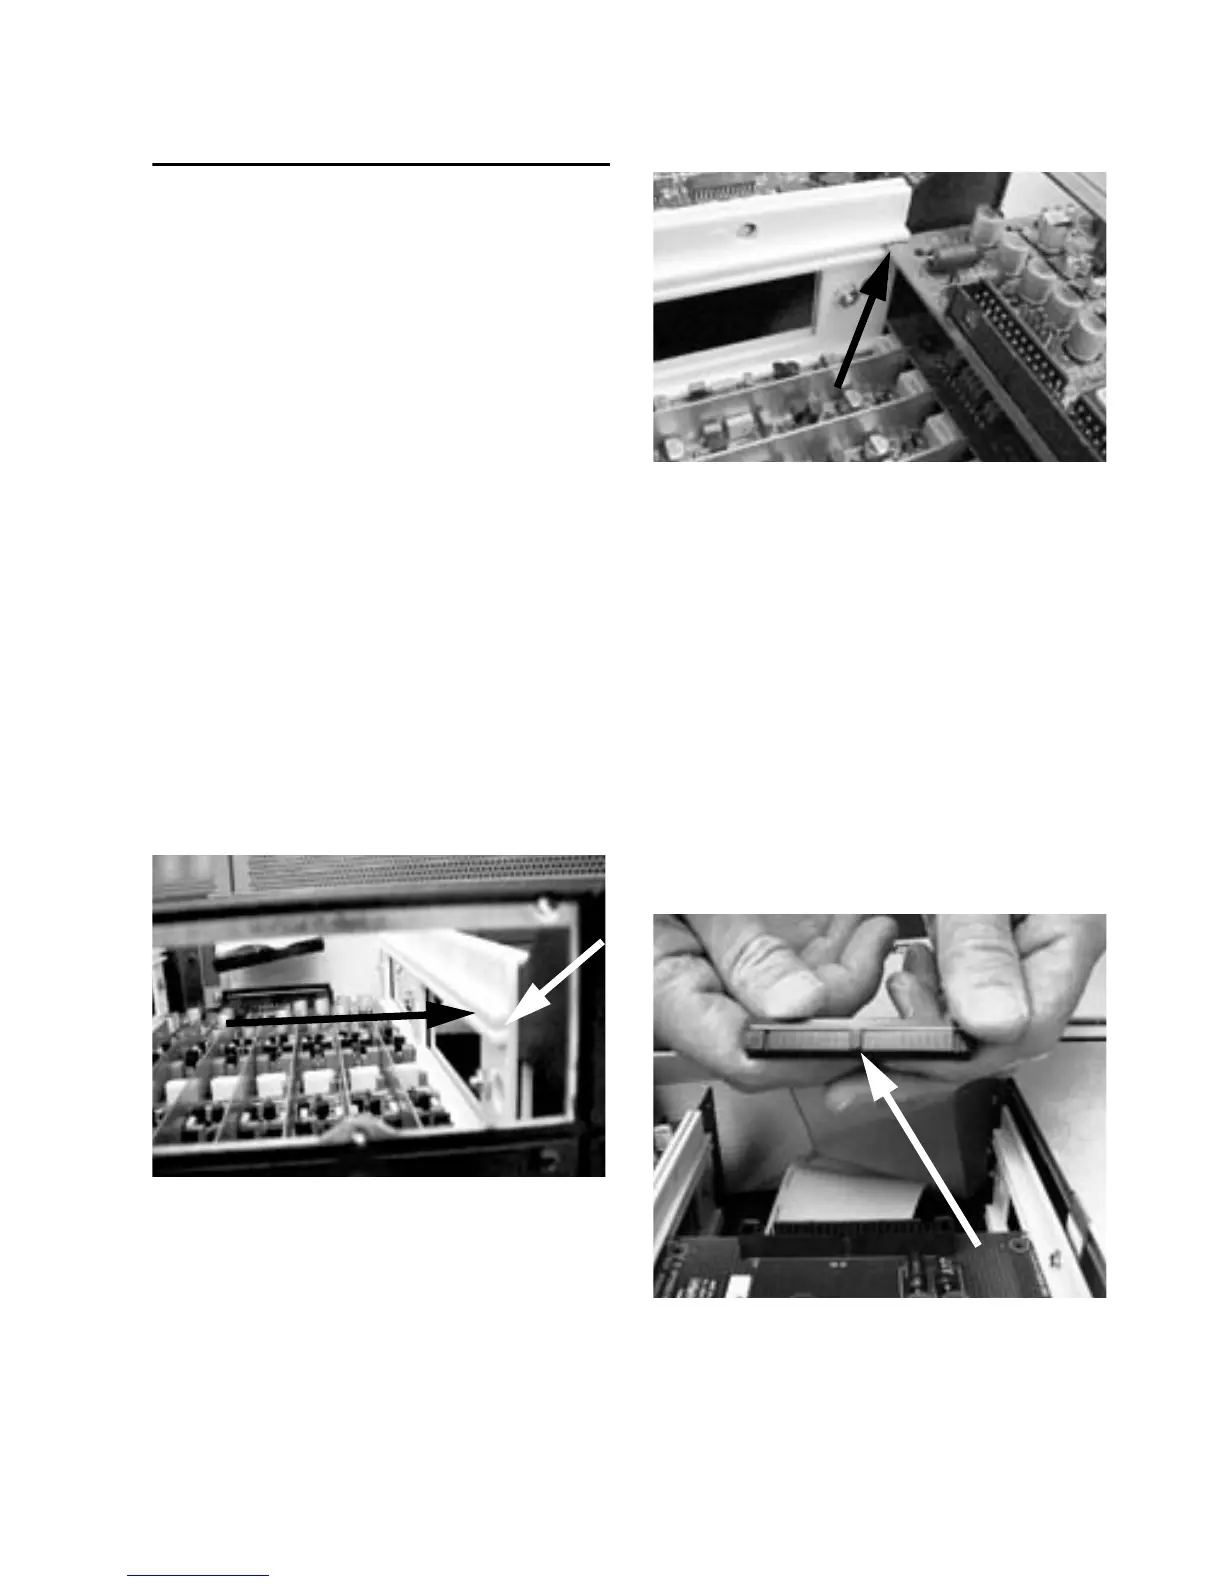
10 Locate the raised ridge in the middle of the
50-pin cable which connects to the 96 I/O chas-
sis. This ridge is only on one side of the connec-
tor, and there is a matching groove on only one
side of the 50-pin connector on the card.
Example of an empty bay. Note guide rails along the
inside edge
Placing the edge of the card into the guide rails
Locating the ridge on the 50-pin cable and the matching
groove on the 50-pin connectors on the card