Digital Ally, Inc. | FirstVu HD Operation
5-1
FirstVu HD Operation Guide | 860-00177-00 Rev J
Go Back To Table of Contents
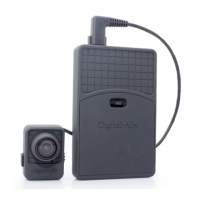
5.1 Powering On/O
To power on, connect the camera to the camera port on top of
the unit. Then slide the power switch up to the ‘ON’ position.
The blue and yellow LED’s will ash alternately and the device
will vibrate once to indicate that it is powering on.
Once powered on, the unit is ready to start a recording.
To turn the unit o, rst stop any active recording and slide
the power switch down to the OFF position. The blue LED will
ash several times as the unit is shutting down.
The camera port can only be used with an approved
Digital Ally camera or extension cable. Never plug any
other device or cable into the camera port. Doing so may
cause permanent internal damage to your FirstVu HD and
will void your warranty.
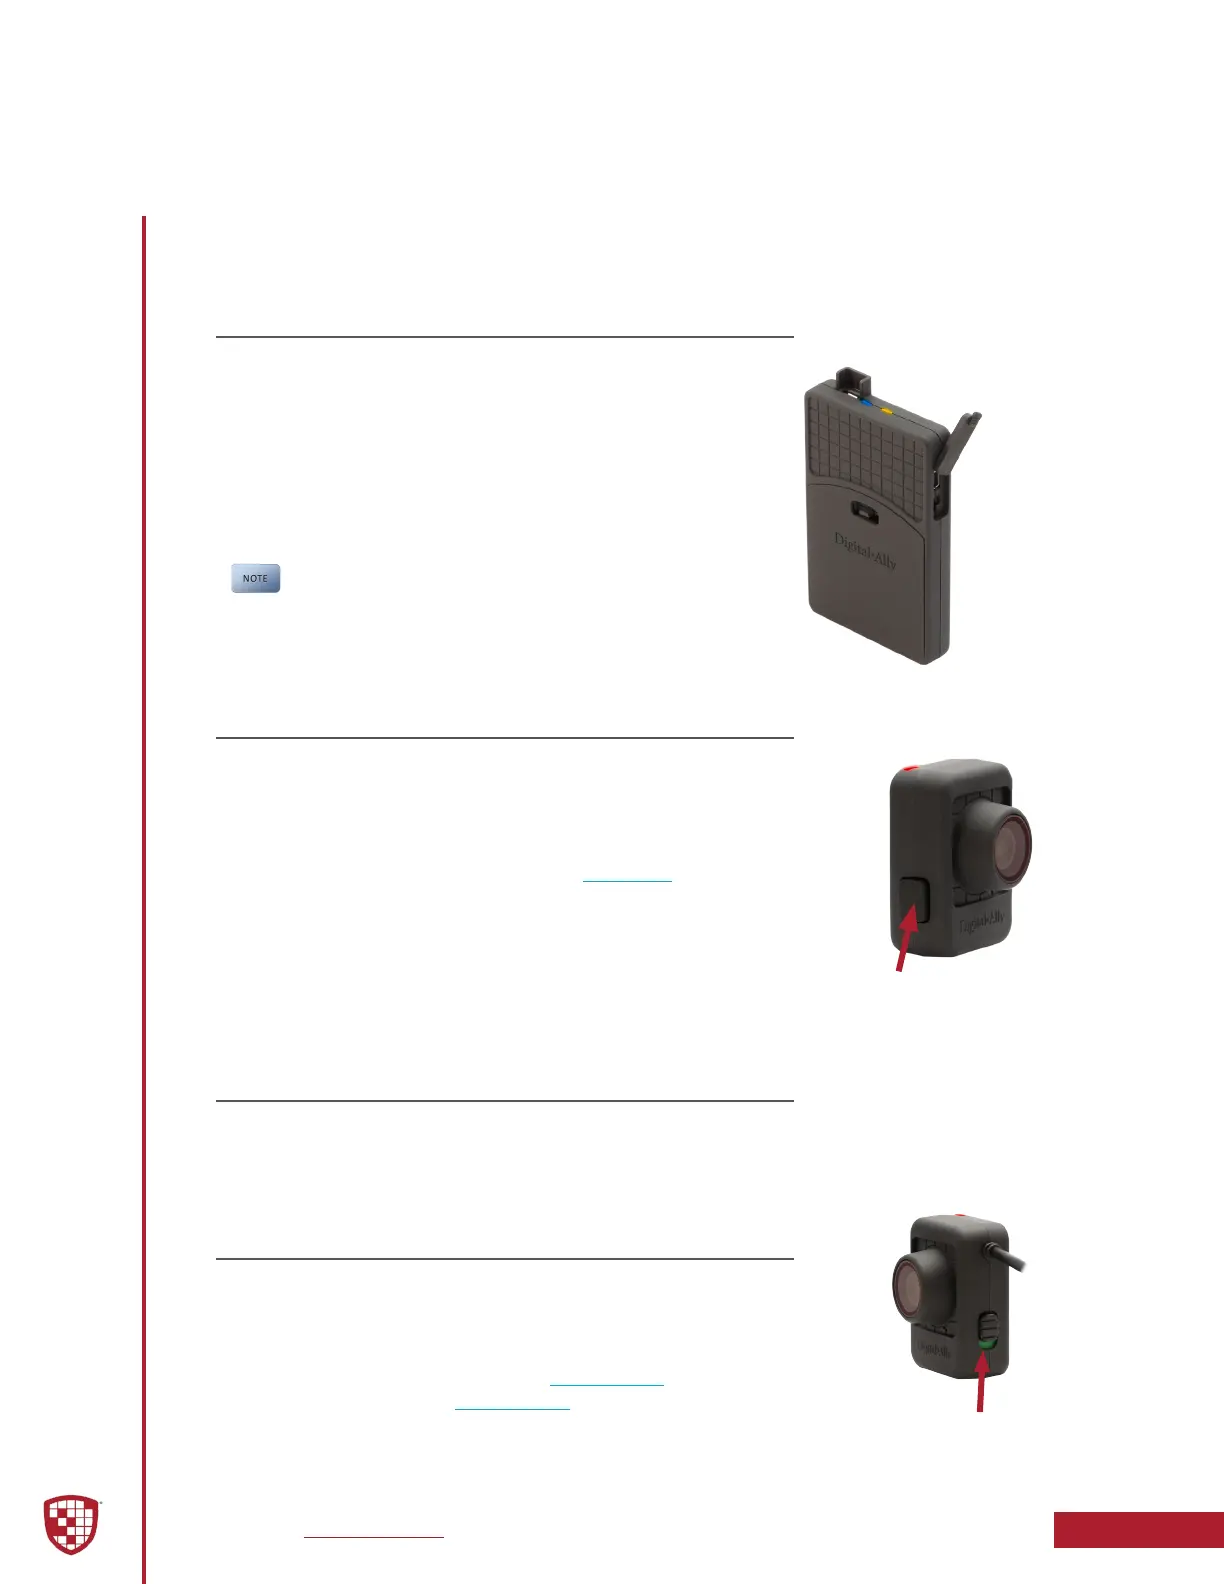
5.2 Recording a Video
Start Recording
Once the FirstVu HD is powered on, press and release the Record
button on the camera at any time. The DVR will emit a vibration pulse,
and, if congured, the Red LED status indicator on the camera will be
lit continuously during the recording. If Pre-Event has been enabled
through the device conguration, the unit will automatically include up
to 60 seconds of video and audio prior to the event record trigger.
End Recording
Press and hold the Record Button for approximately 3 seconds to stop an active
recording. The DVR will emit a vibration pulse and the Red LED will turn o.
5.3 Marking Events
Once a recording has been initiated, markers can be placed in the recording to indicate
when important events take place. This is done by momentarily pressing the Record
button, taking care to not hold the button down long enough to stop the recording.
Additional marks can be placed at any time during the recording.
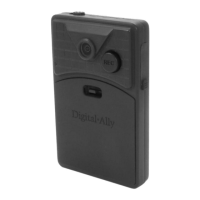
5.4 Audio Recording
The FirstVu HD contains a microphone built into the face of the camera
module. The position of the Mute Switch determines whether audio
is enabled or muted. Audio is enabled when the switch is in the UP
position. Audio is muted when the switch is in the DOWN position. To
allow any audio to be recorded, the Audio Mode must be enabled in the
device conguration. The Mute Switch may be disabled by the Administrator.
Section 5
FirstVu HD Operation
Camera
Port
Power
Switch
Record Button
Mute
Switch