Digital Ally, Inc. | FirstVu HD Operation
5-2
FirstVu HD Operation Guide | 860-00177-00 Rev J
Go Back To Table of Contents
5.5 Uploading Files
Uploading directly to a computer
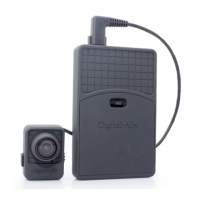
Using the supplied USB cable, connect the FirstVu HD
to a computer using the USB port next to the power
switch. Power the unit ON and the FirstVu HD will
appear on the computer as a removable storage drive.
Open this drive and the video le folders will be listed.
You may then drag and drop the les to your PC or
open a selected folder to play back a video le using
Windows Media Player.
To play back your videos and metadata using VuVault
®
or the Digital Ally Viewer, go to Section 6.
The FirstVu HD is capable of advanced security features which may restrict a user’s
access to recorded event les. These restrictions can be implemented by a system
administrator only if using the VuVault
®
back oce software. If the Secure USB Port
feature has been enabled in the VuVault
®
FirstVu HD settings, video and metadata les
will not be accessible through the USB port and can only be uploaded using VuVault
®
.
Additionally, each user must have Upload New Videos permissions within VuVault
®
to
transfer les from the FirstVu HD.
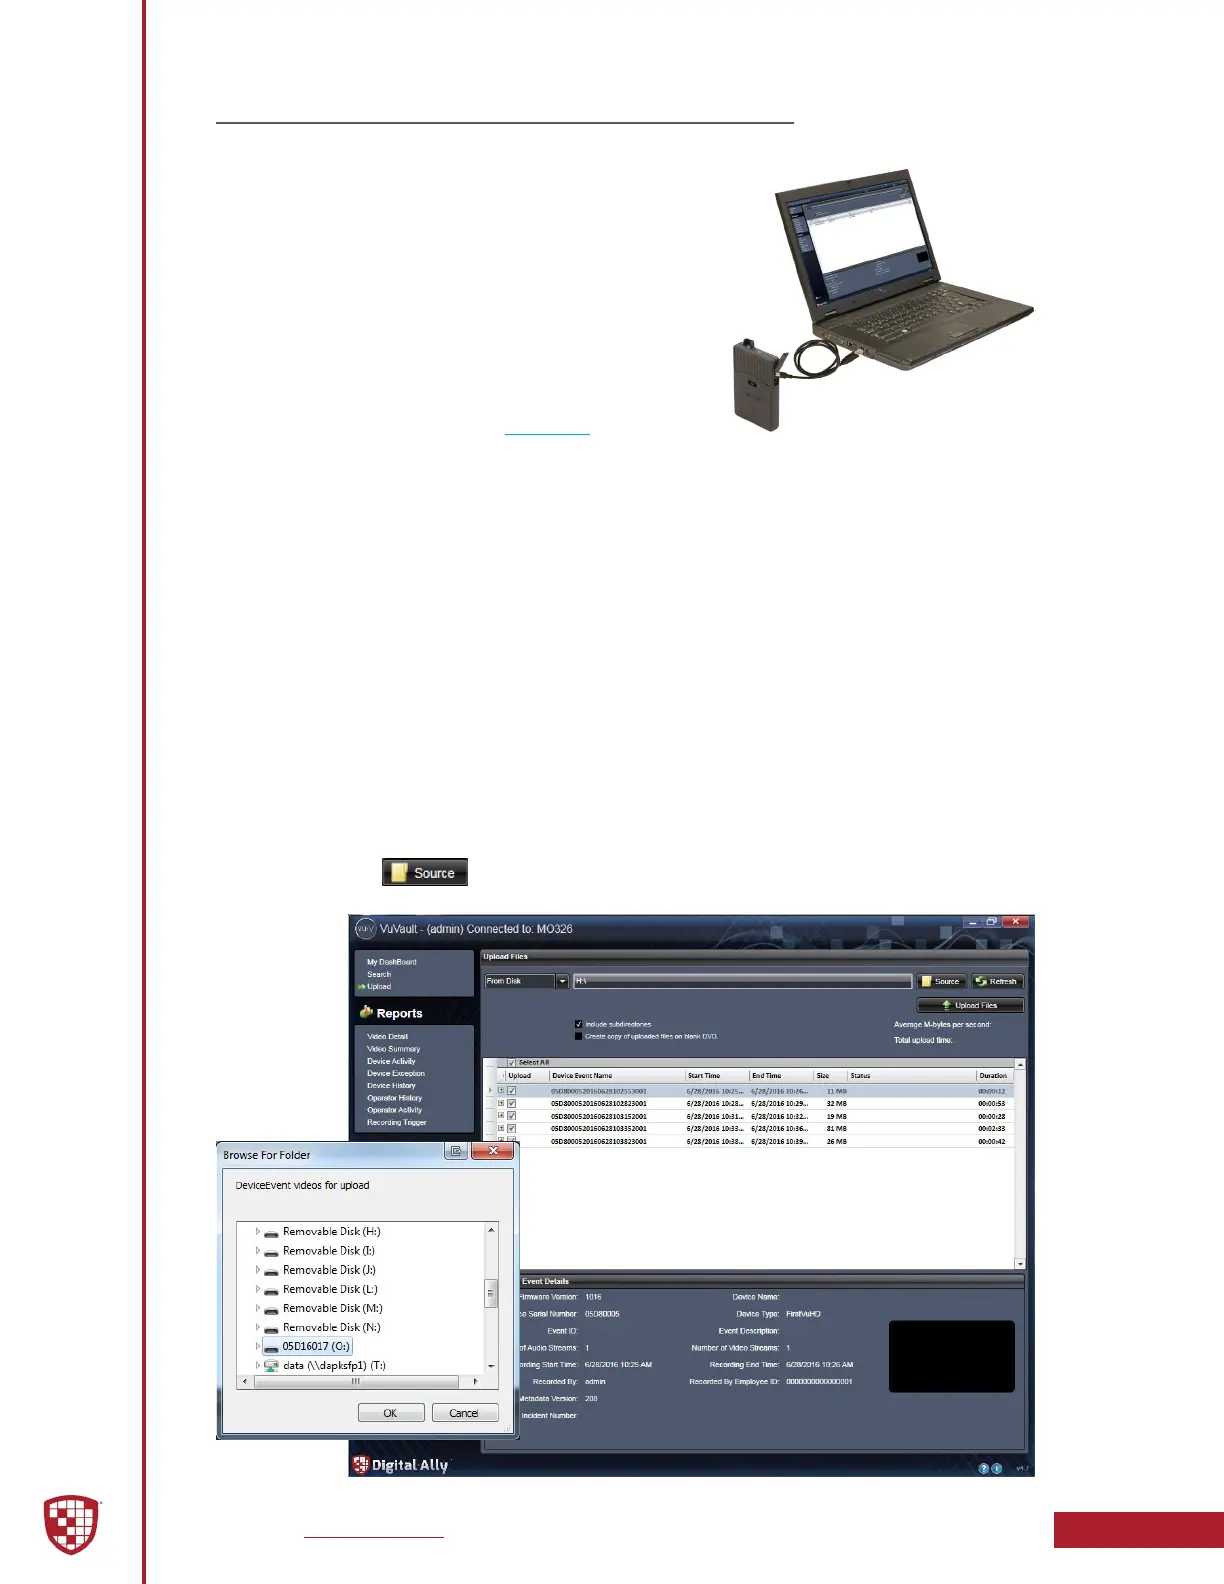
Uploading Files using VuVault
Non-Secure USB Port Method
To upload video les from the FirstVu HD when the Secure USB Port is not enabled, plug
the supplied USB cable into the computer USB port and insert the other end of the
cable into the FirstVu HD USB port. Make sure your device is powered on.
1. Select Upload from the Main navigation bar. If the Secure USB Port
feature has not been enabled, select From Disk.
2. Click the button. A dialogue box will appear allowing you to
select the location of your FirstVu HD.
USB
Cable