SmartSource Elite Series - Installation & Operations Guide
January 2017 8227 4907-003 Page 11 of 32
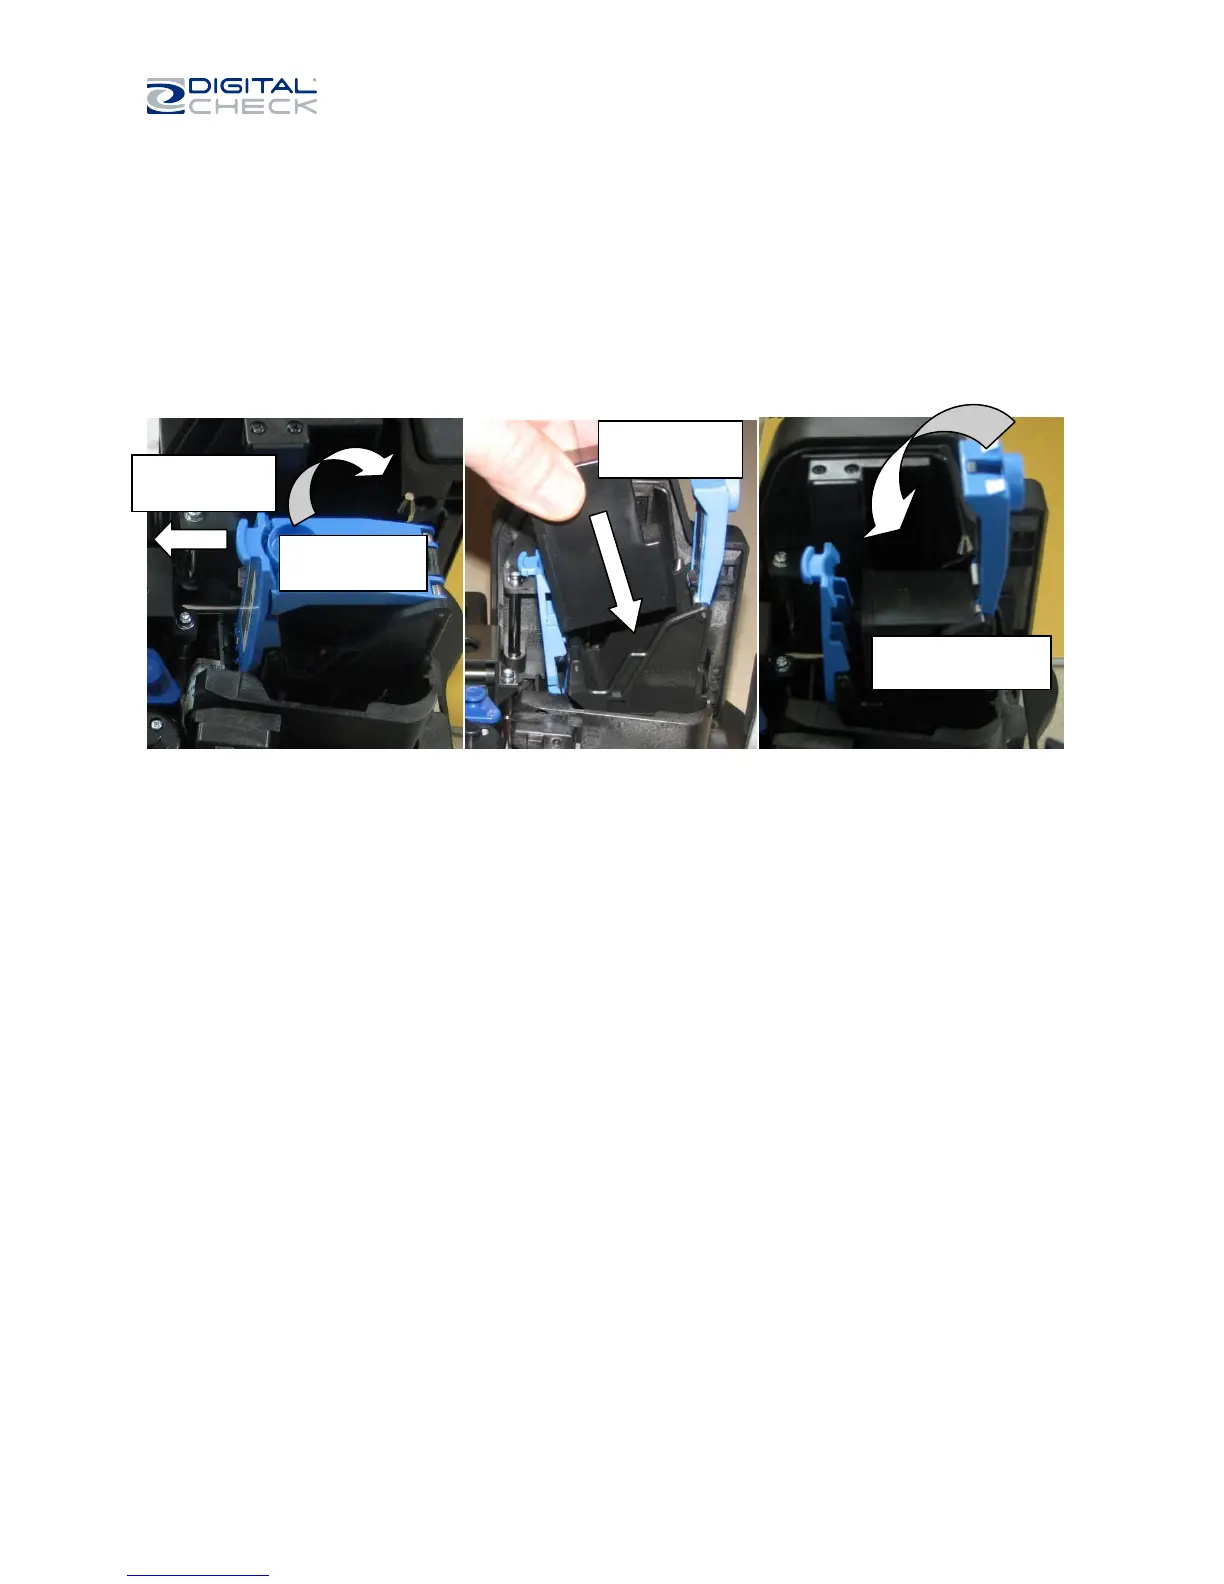
Installing the Inkjet Cartridge (Professional Elite and Ultraviolet Elite Only)
1. Lift off the endorser cover. The endorser housing is visible.
2. The housing may have packing tape on it to hold it closed during shipping. Remove this tape
carefully.
3. Open the housing by pressing on the blue latch as shown. The cover of the housing will pop open.
4. Open the sealed package containing the inkjet cartridge and remove the sealing tape as shown on
the cartridge.
5. Insert the cartridge into the housing as shown. There is no need to press down on the cartridge.
6. Once the cartridge is in place, press the top of the housing down until the housing latches shut.
Insert cartridge
like this…
…then press down
cover to close.
 Loading...