5
50 feet (15.25 m). It does not have to be pointed at the
replace and can pass through most obstacles (including
walls). It is supplied with one of 2,178 independent
frequencies to prevent interference with other units. The
frequency designation is indicated on the back of the
remote control.
Remote Control Initialization/Reprogramming
Follow steps 1 through 6 to initialize your replace for the
rst time. This procedure is also required every time there
is a loss of power to the remote control or the replace (i.e.
power failure, breaker tripped, main On/Off switch is turned
off).
Ensure that power is supplied through the main service 1.
panel.
Access the manual controls, (remove glass doors or 2.
pull grille down if applicable) pull the right side steel
curtain to the outside of the unit (if applicable).
Locate manual controls.3.
Activate the Main On/Off switch.4.
Press and hold the ON switch marked “ 5.
” for ve (5)
seconds (red indicator light will ash). (Figure 1A)
Press the ON button located on the remote control.6.
This will synchronize the remote control and remote control
receiver.
Remote Control Usage
The remote control operates the replace levels
sequentially. The level is increased every time the ON
button, on the remote control, is pressed.
The replace can be turned off at any point by pressing the
OFF button on the remote control.
Level 1
: The ame effect is turned on and the rst red
indicator light illuminates.
Level 2
: The ame effect remains on, the heater is
activated to the low heat setting, and the rst and
second red indicator lights illuminate.
Level 3
: The ame effect remains on, the heater is
set to the high heat setting, and all three red indicators
illuminate.
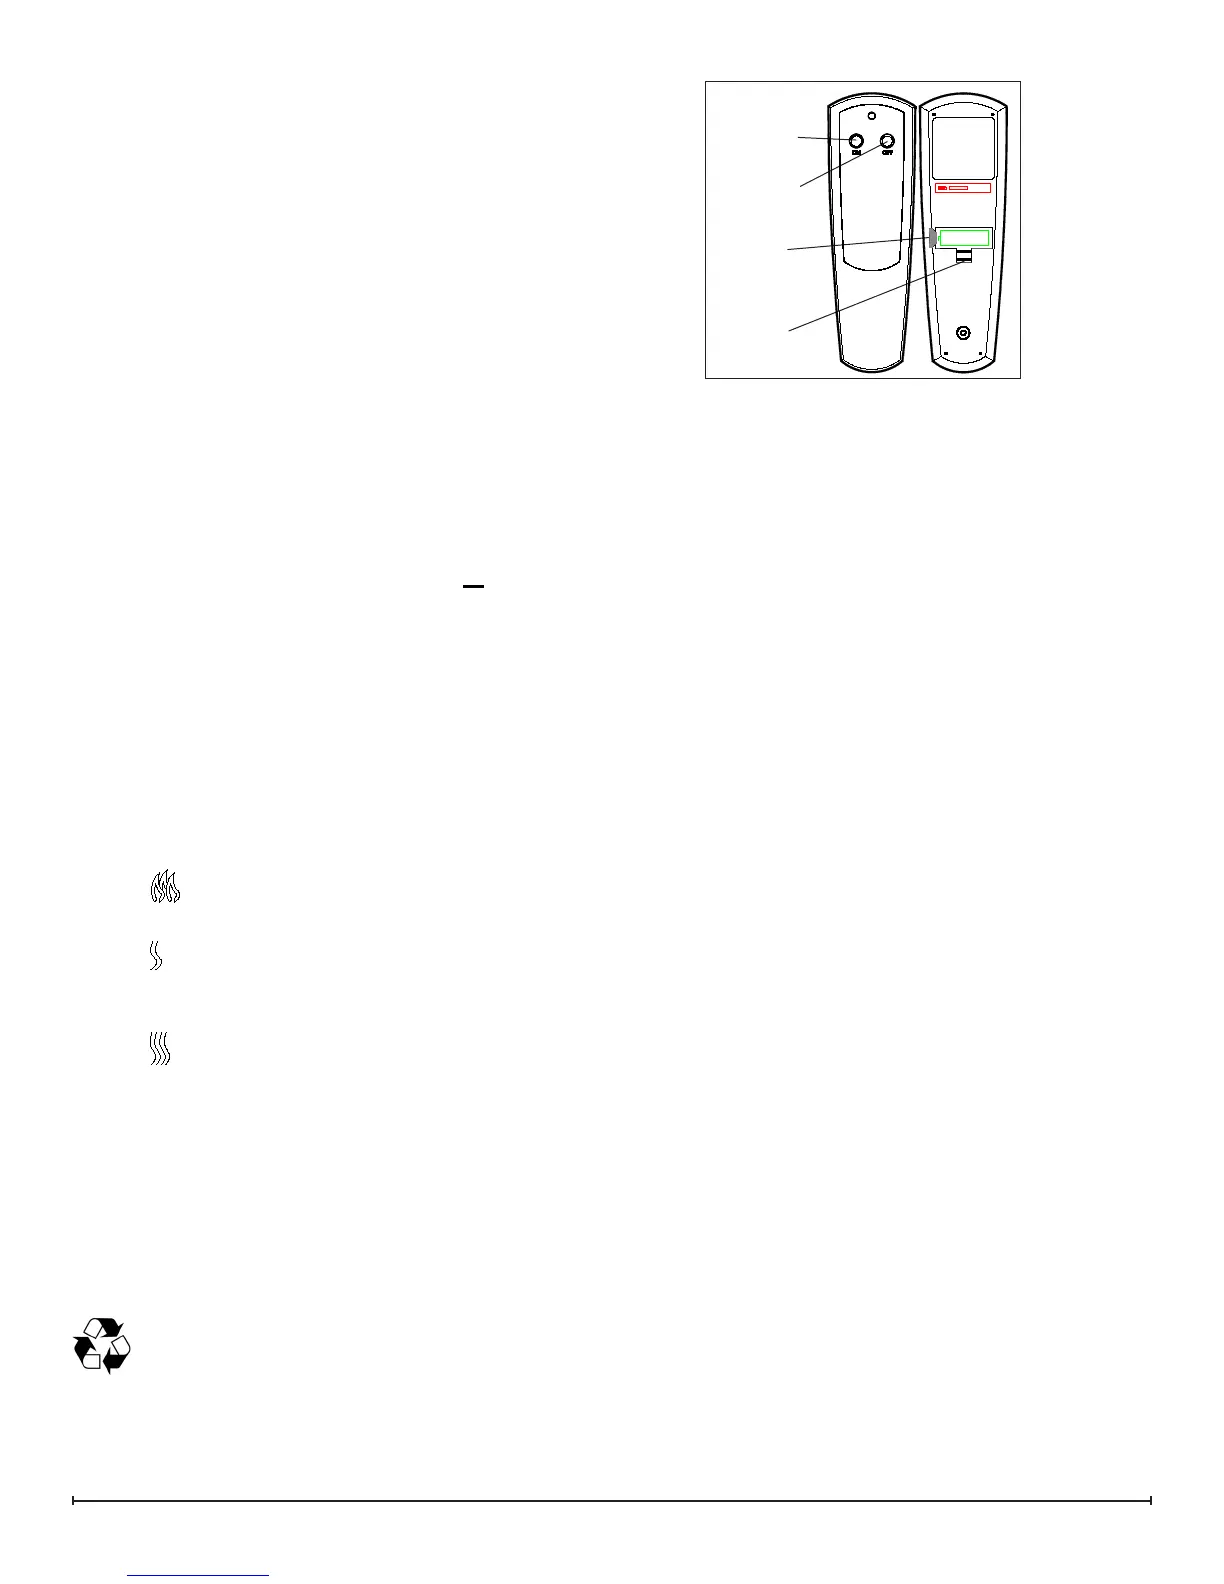
Battery Replacement (Figure 4)
To replace the battery:
Slide battery cover open on the remote control. 1.
Correctly install one (1) 12 Volt (A23) battery in the 2.
battery holder.
Close the battery cover.3.
Battery must be recycled or disposed of properly.
Check with your Local Authority or Retailer for
recycling advice in your area.
Figure 4
Off Button
On
Button
Plastic
Strip
Battery
Cover