26 27
Using Timelapse
Continuous mode
The Timelapse Continuous mode allows for contin-
uous motion and exposure control of the camera.
The camera shutter may be triggered either using
the OmniSlider™ Controller (if you are using a
compatible DSLR camera) or your own external
intervalometer.
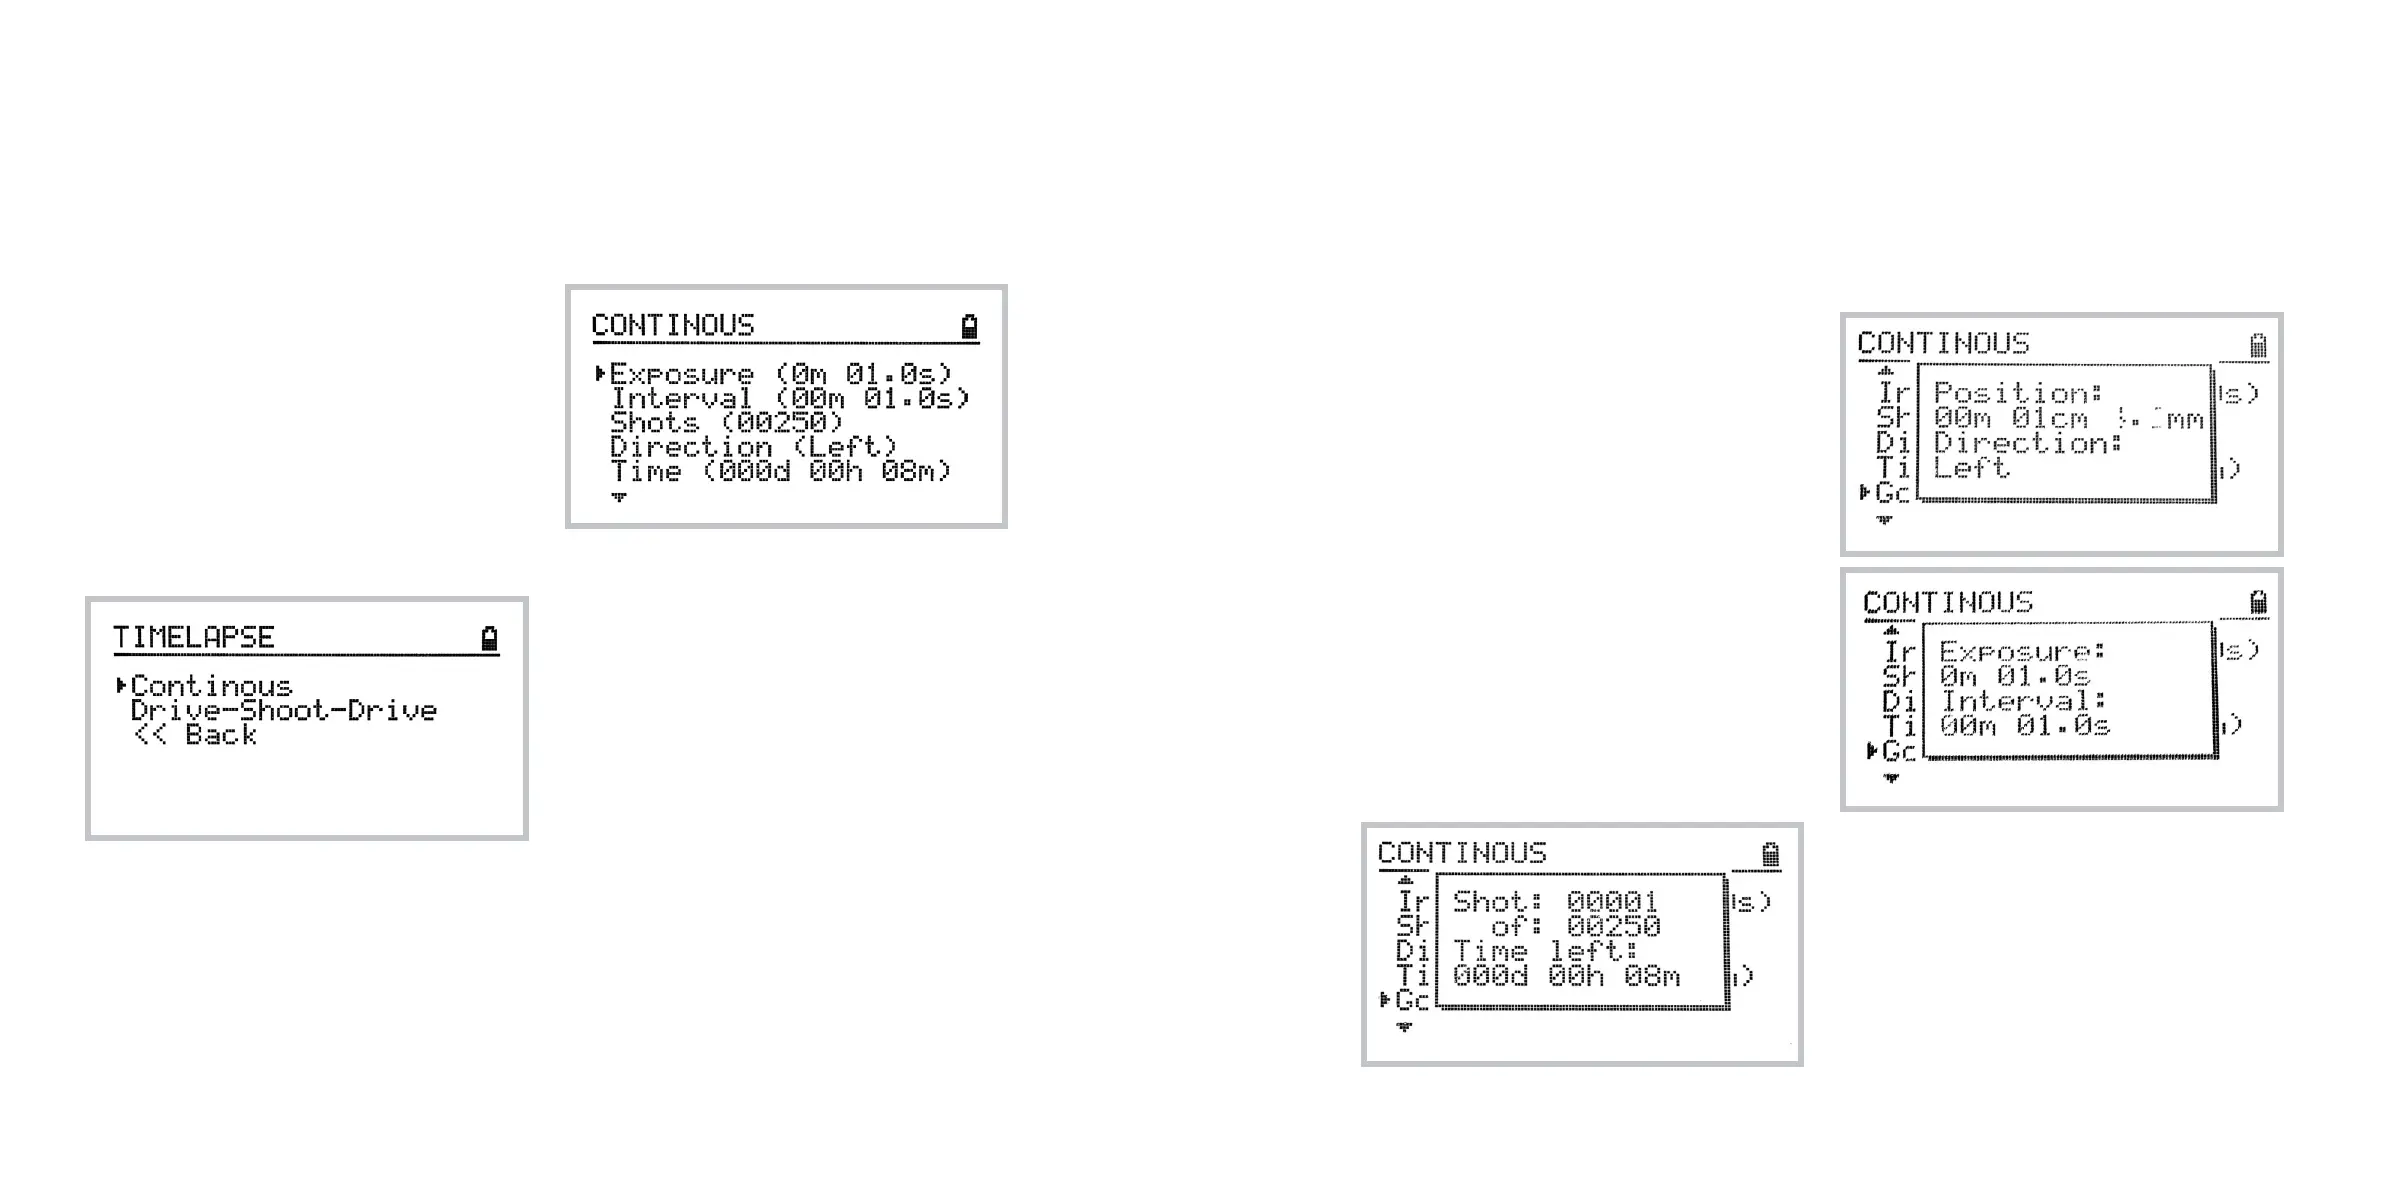
Accessing Timelapse Continuous mode
To access basic timelapse features navigate to:
Home » Timelapse » Continuous.
Understanding timelapse mode
In timelapse mode you may control the exposure
time, interval, number of shots, direction and total
travel time.
Note: the interval refers to the time between the end
of one exposure and the start of the next. It is not
the time between the start of one exposure and the
start of the next.
Controlling the exposure time
The exposure time only works eectively if the cam-
era is set to Bulb exposure mode.
If you prefer that the exposure parameters be con-
trolled by the camera, please set the exposure time
of the OmniSlider to 0.1s and set your camera to
Manual or another non-bulb mode.
Setting up a continuous timelapse sequence
To set up a timelapse sequence, do the following:
1 Move the trolley to the starting position
at the desired end of the track.
2 Navigate to the Timelapse Continuous
menu as described above.
3 Select the exposure time, interval
and number of shots.
4 Set the desired direction of the slide.
5 Optionally readjust the total time of the
sequence. The number of shots will be
adjusted to match your setting.
6 Select Go!
After starting the program you can track the
progress on the following screen (similar to drive-
shoot-drive timelapse mode):
If you move the joystick up or down during the
progress of the timelapse sequence, the additional
parameters are displayed:
UP: displays current position and direction
DOWN: displays exposure and interval