28 29
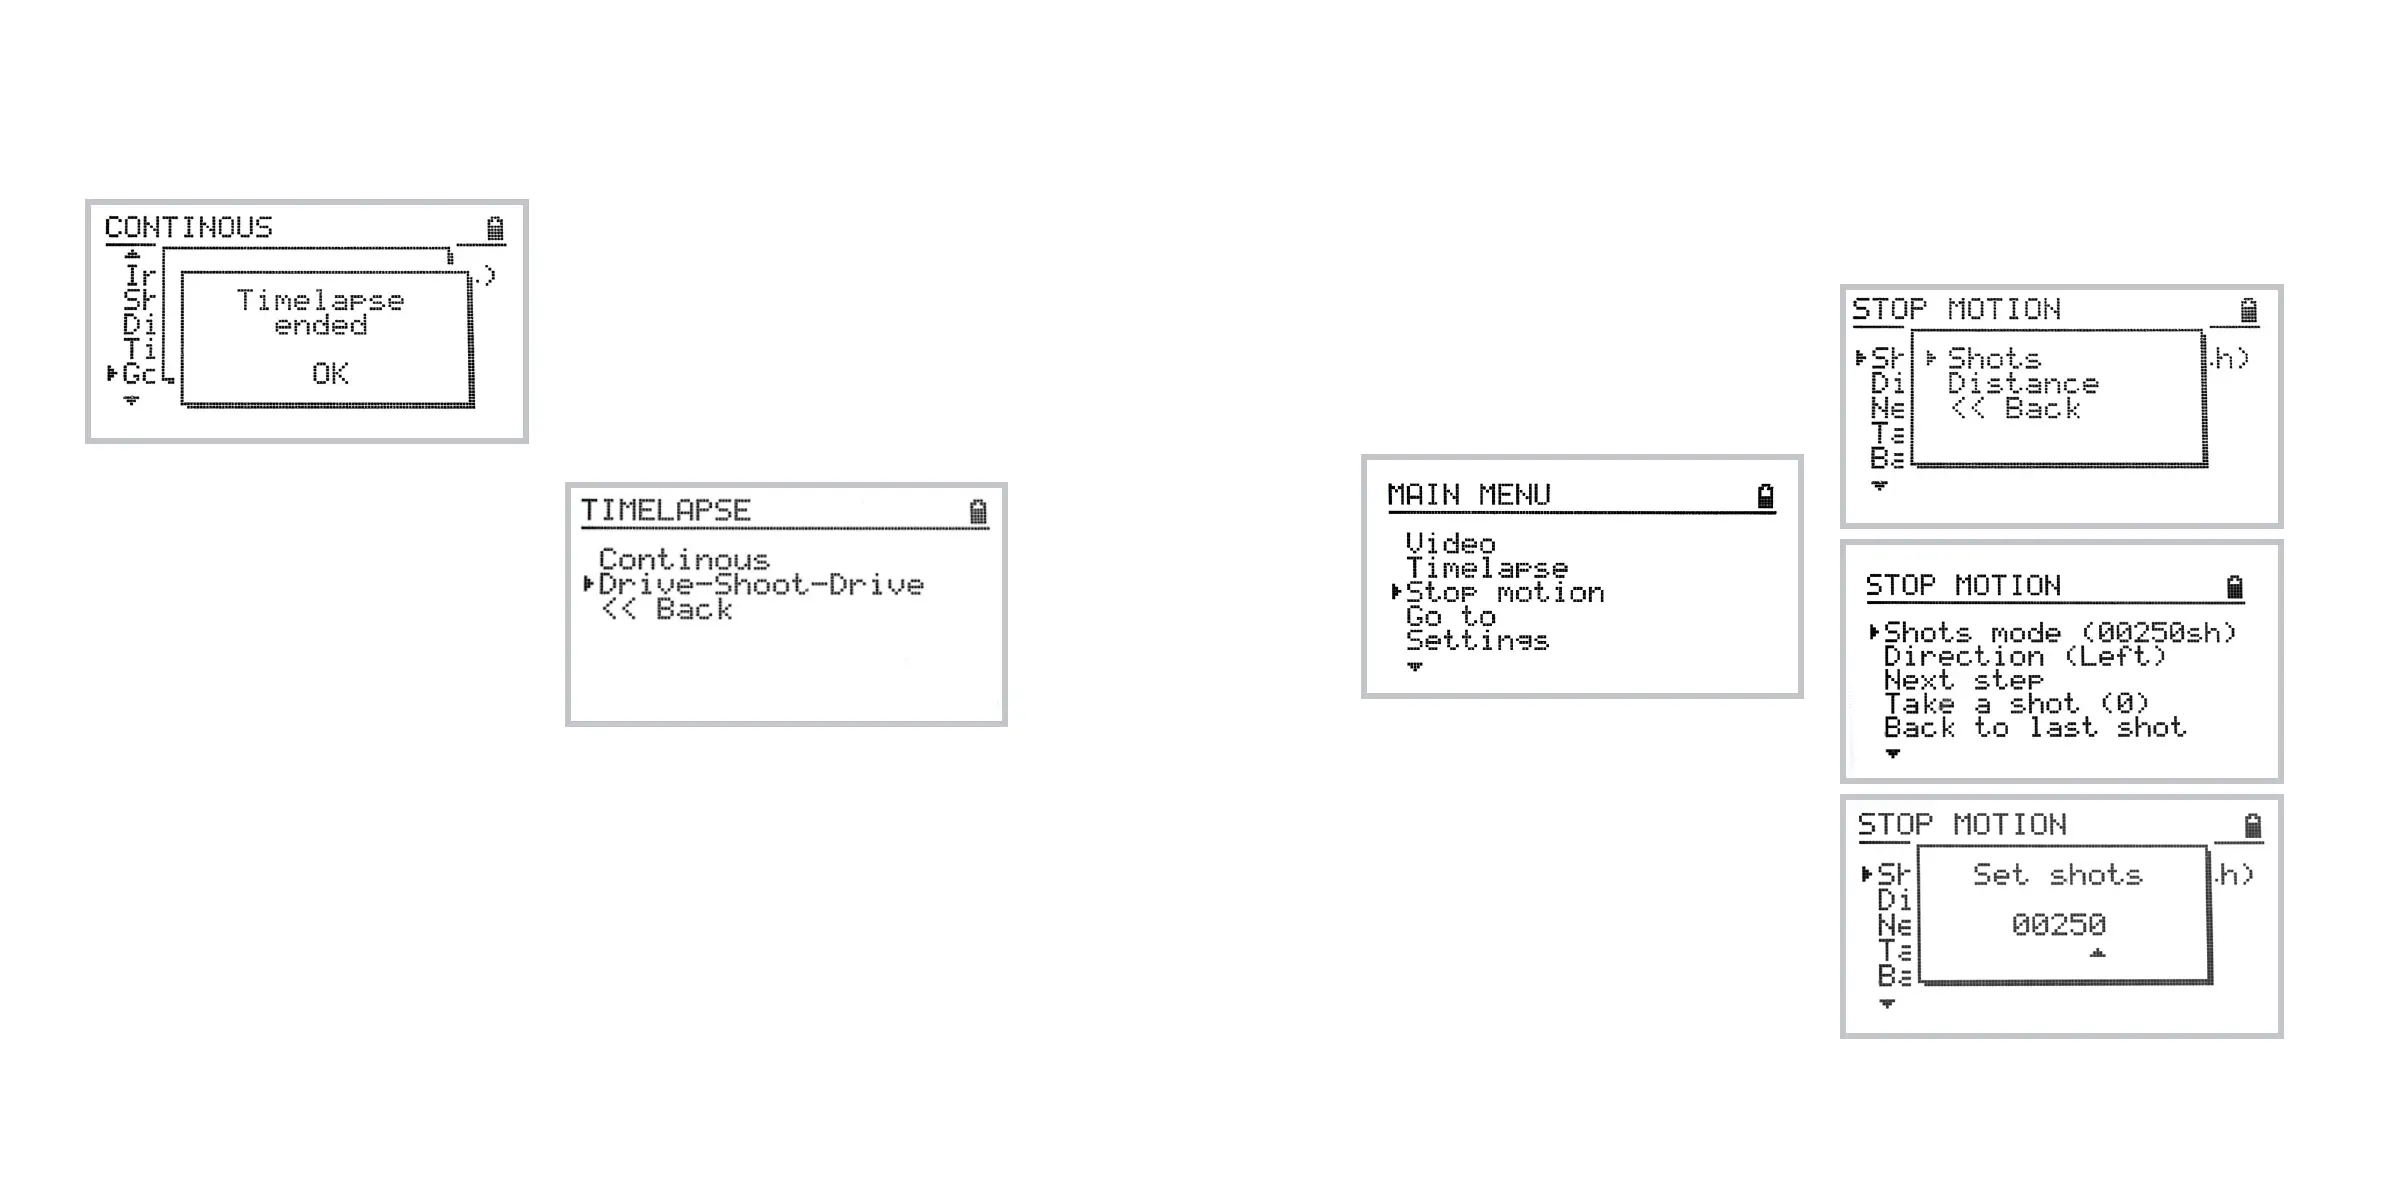
As soon as the timelapse program is finished the fol-
lowing information screen appears:
Multiple exposures
It is also possible to trigger multiple image sequences
from the OmniSlider Controller. This may be use-
ful either for shooting HDR, exposure-bracketed
timelapse or multiple constant-exposure shots for
noise reduction in post production.
To do so, set your camera to continuous shooting
mode and set the exposure bracketing as desired.
In the OmniSlider Controller set the total exposure
time to exceed slightly the total time of 3 exposures
(or another number if your camera is capable of
shooting more than 3 bracketed images in a row).
Note: if timelapse is started from the middle of the
track and the trolley is about to move past the lim-
its set by the calibration, the timelapse program will
be aborted.
Using drive-shoot-drive
timelapse mode
The drive-shoot-drive timelapse mode (DSD) works
similarly to the basic timelapse mode, but the cam-
era stops for each of shots.
Accessing drive-shoot-drive timelapse mode
To access drive-shoot-drive timelapse features
select Home » Timelapse » Drive-shoot-drive
Using the DSD mode
For instructions please refer to continuous timelapse
mode documentation above in the manual.
The only important note here is that the minimal inter-
val between shots must be greater than or equal to 0.5s.
Using Stop motion mode
The DitoGear™ OmniSlider is also capable of Stop
motion operation. This mode allows you to control
shots independently and move the trolley after each
shot (or a series of shots) upon confirmation.
Accessing Stop motion mode
To access stop motion features navigate to:
Home » Stop Motion
There are 2 operation modes: Shots and Distance.
You may toggle stop motion modes by clicking on
the first item of Stop motion menu.
Using Shots Stop motion mode
The Shots Stop motion mode allows for manual
control over the number of shots across the cali-
brated track length. The calibrated track length will
be divided into even steps depending on the number
of shots entered.
Setting up the number of shots
To set the number of shots select the first item in
the Stop Motion menu, select Shots and enter the
desired number of shots.