30 31
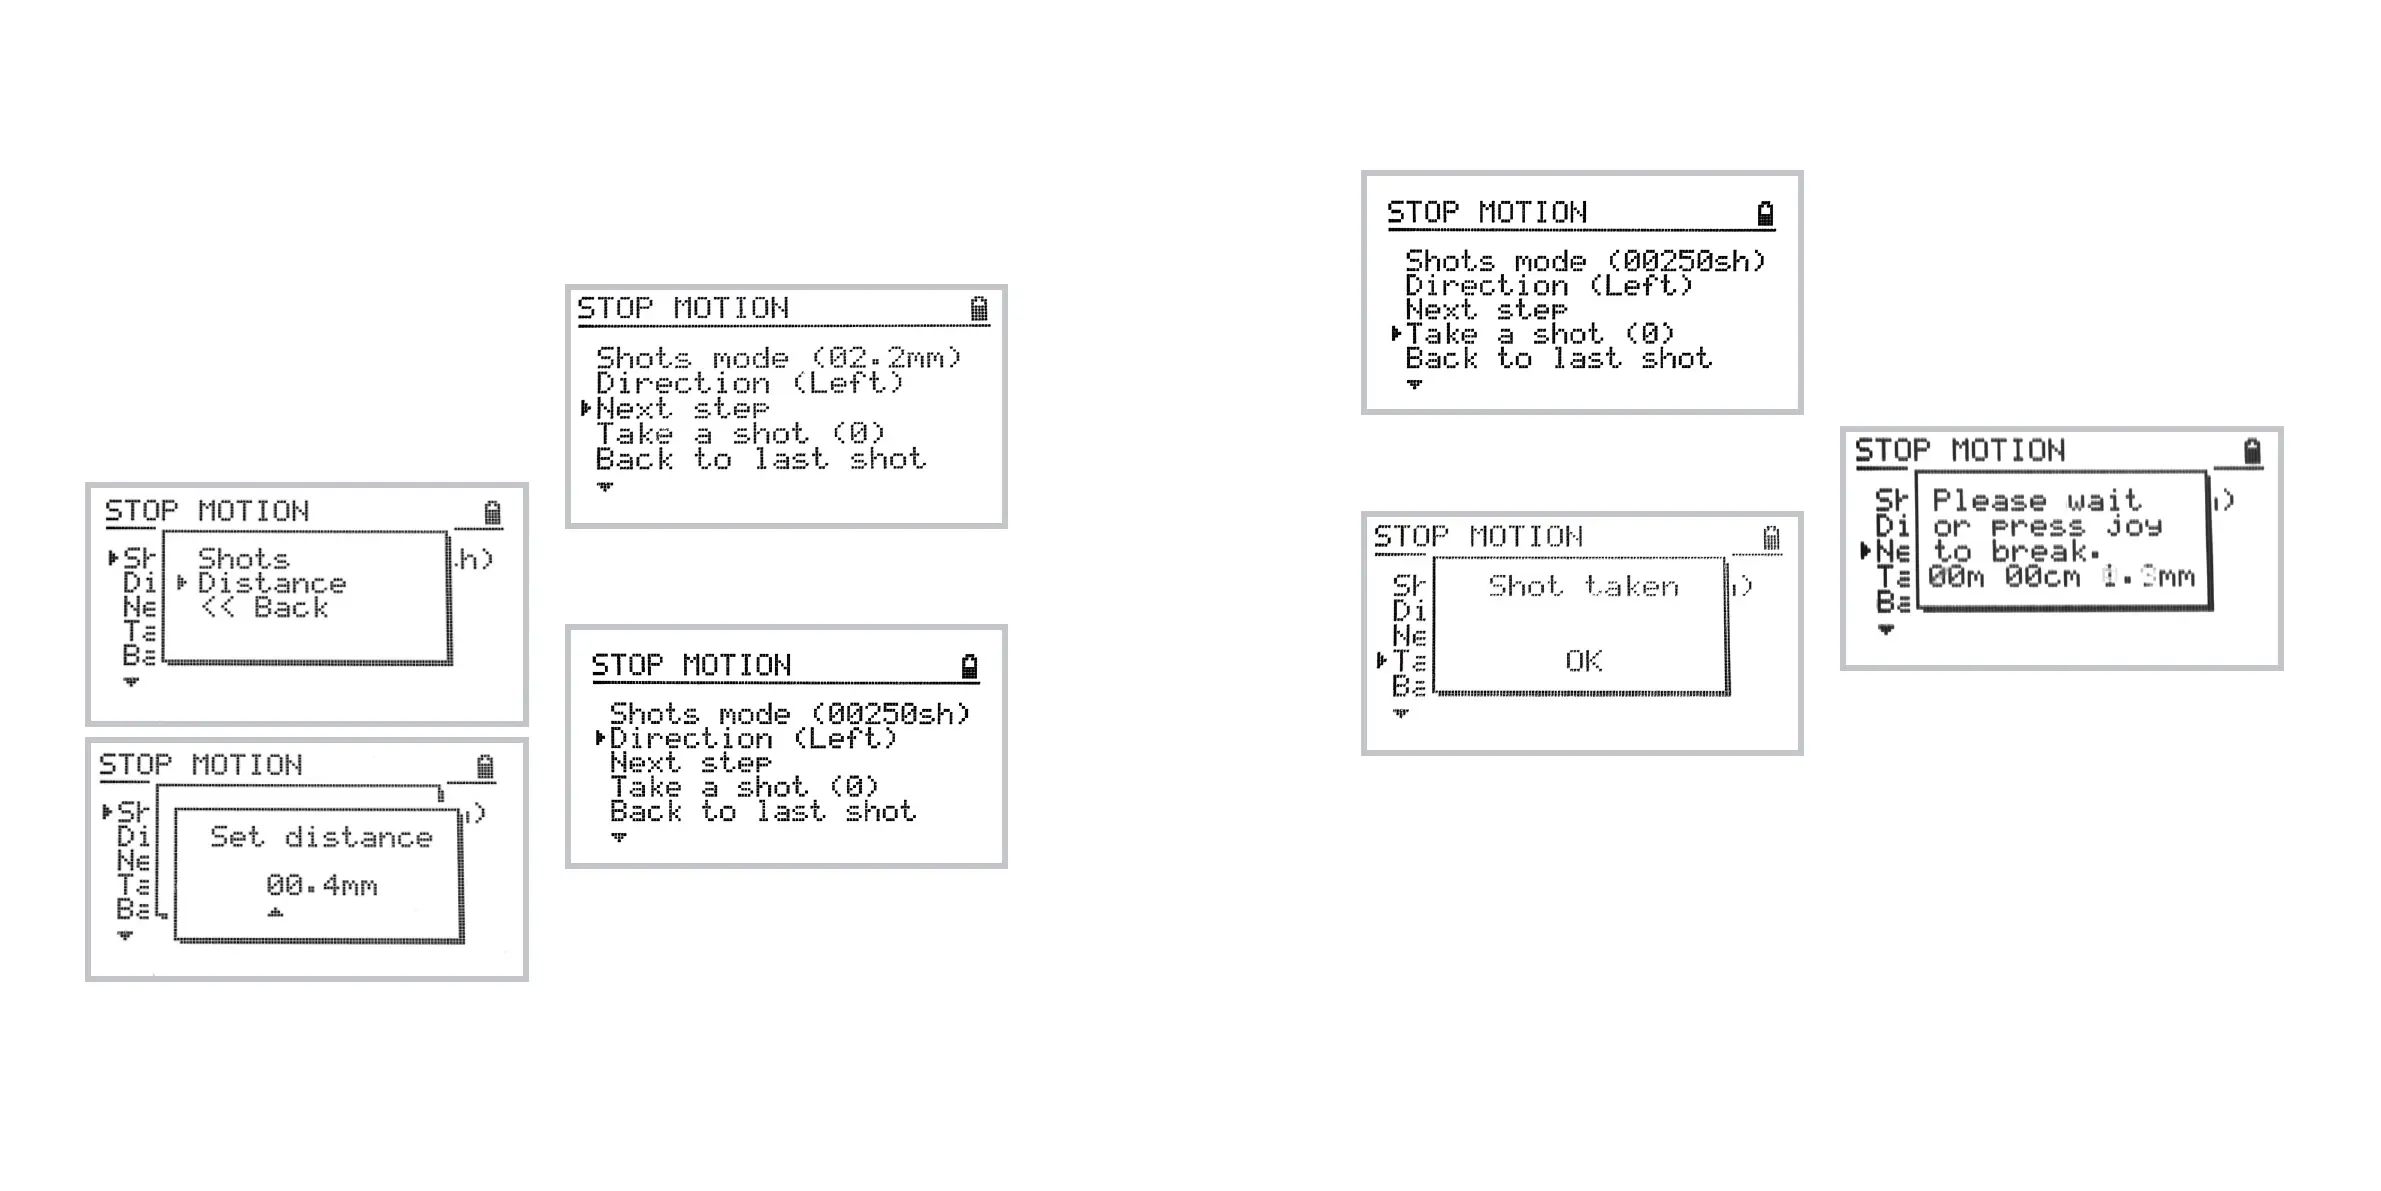
Using Distance Stop motion mode
The Distance Stop motion mode allows for man-
ual control over the travel distance of the trolley
between each shot.
Setting up the travel distance
You may control the step distance with 0.1mm accu-
racy. To set the distance select the first item in the
Stop Motion menu, select Distance and enter the
desired distance value.
After setting the step distance to desired value, the
number next to the Next Step item will be updated
showing the absolute position of next step.
Setting up the direction
To toggle the direction of motion select
Home » Stop motion » Direction
The current direction is displayed in the parentheses..
Taking a shot
Once your scene is set up properly, you are ready
to take a shot.
To do so, select Home » Stop Motion » Take a shot.
The following screen confirms that the shot has
been taken.
You may also want to take multiple exposures per
step. To do so, simply press the Take a shot menu
option again.
The number in parentheses indicates the number of shots
taken since the trolley moved to the current position.
Moving to next position
When you’re done shooting it’s time to move to the
next position.
You can optionally change the distance and then
select Next Step to advance to next position.
The following screen is displayed while the trolley
moves to the next position.