CAUTION: If malfunctions occur while using the device or if you wish to immediately
stop the application, press and hold the key ( ) (Fig. 3). Every time a key is pressed,
an acoustic signal (beep) is generated.
Fig. 4
4
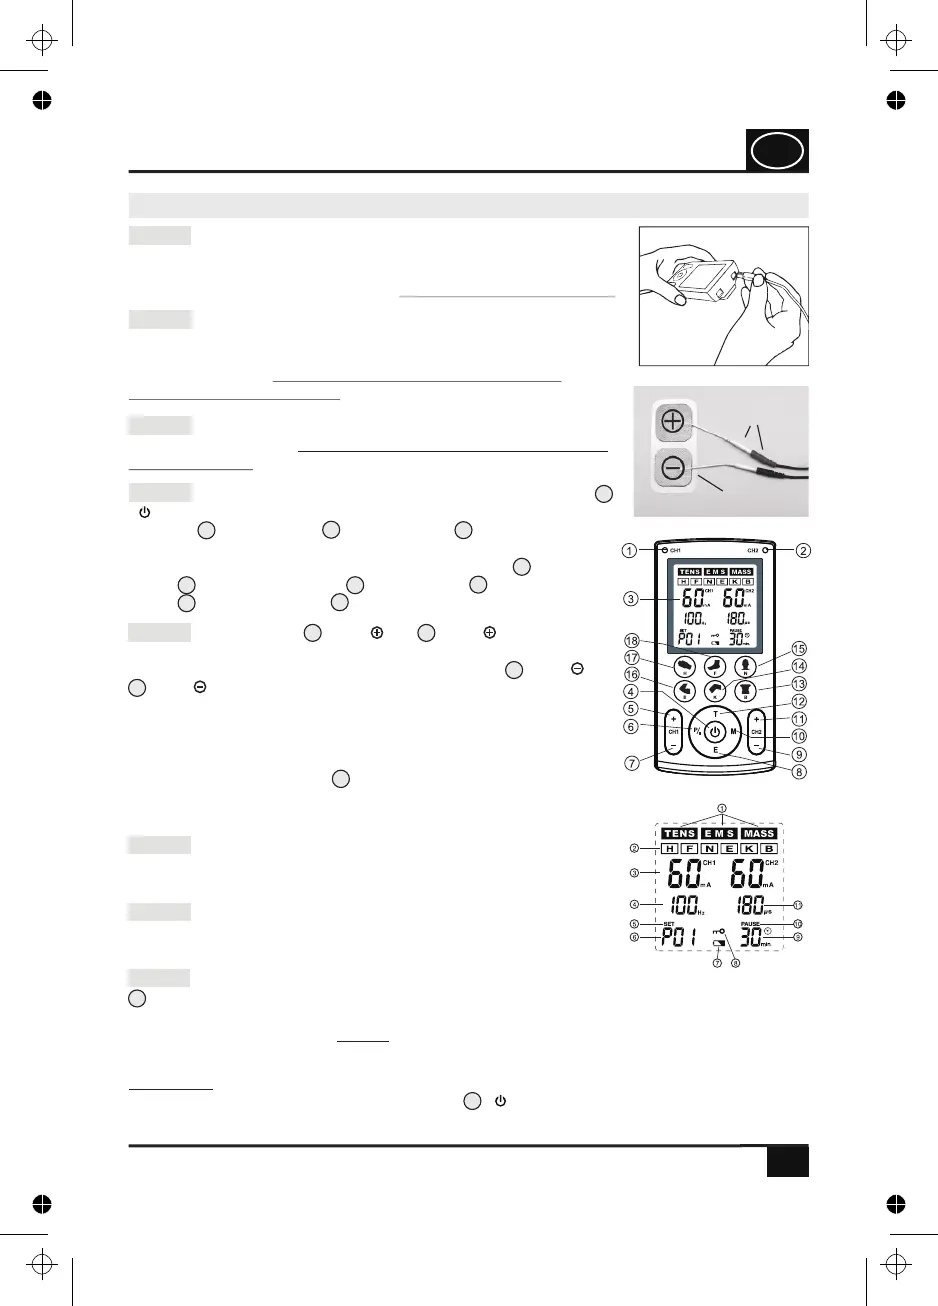
Step 2: Insert one or two connecting cable(s) in the connector
socket(s) of the device (see Fig. 1). Afterwards, connect the
adhesive electrodes to the device by means of the plug connec-
tions (see Fig. 2). The device must be switched off when
establishing the connection!
15
Step 3: Remove the adhesive electrodes from the protective
foil and position them according to the application examples on
the pages 27-33. Warning! Observe the safety instructions!
Fig. 2
protection film
plug
connection
Fig. 1
Fig. 3
4
Step 7: If you wish to reposition the adhesive electrodes, make
sure that you switch off the device first and repeat the steps 3
to 5.
Step 6: The application time can only be adjusted for the U
programmes. For the P programmes, the application time is 30
minutes.
Step 1: Insert 4 batteries (type AAA) observing the polarity
marking of the batteries (see section 7.0 on page 12). When
inserting the batteries in the device, observe the correct polarity
(+(positive) and –(negative) pole). Do not switch on the device!
10.0 Quick overview for commissioning
QUICK OVERVIEW
12
8
10
13
14
15
16
18
17
4
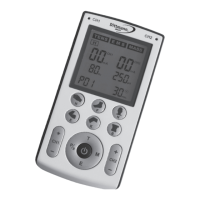
Step 4: In order to switch on the device, press the start key
( ) (Fig. 3). Set the desired application programme by using
the keys (T) = TENS, (E) = EMS or (M) = MASSAGE.
Furthermore, you can select special programmes for the indica-
ted parts of the body by using the one-touch keys (B) =
back, (K) = knee joint, (N) = neck, (E) = elbow
joint, (H) = hand and (F) = foot.
5
11
7
9
3
Step 8: In order to switch off the device, press and hold the key
(Fig. 3) Remove the plug of the connecting cable from the device and the adhesive
electrodes. Then, remove the adhesive electrodes from the body and stick them back on
the protective foil (Fig. 2). NOTE: If none of the keys is pressed, the device switches off
automatically after three minutes provided that it is not in the operating state.
Step 5: Press the key (CH1 ) or (CH2 ) in order to
increase the output intensity of channel 1 (CH1) or channel
(CH2) and to start the application. Press the key (CH1 ) or
(CH2 ), in order to reduce the output intensity of channel 1
(CH1) or channel 2 (CH2). On the display of the device, the
selected output intensity as well as the remaining application
duration will be shown. Each application starts from the intensity
level 1 for each channel. You can read the current intensity
setting on the display (see , Fig. 4: Information about the
output intensity (here, e. g. 60 mA) in mA (milliampere) for
channel CH1 (left) und CH2 (right).
GB
4. PJN157-14_GA-GB_HHD_TEN250_31.03.14
Montag, 31. Mrz 2014 12:10:41