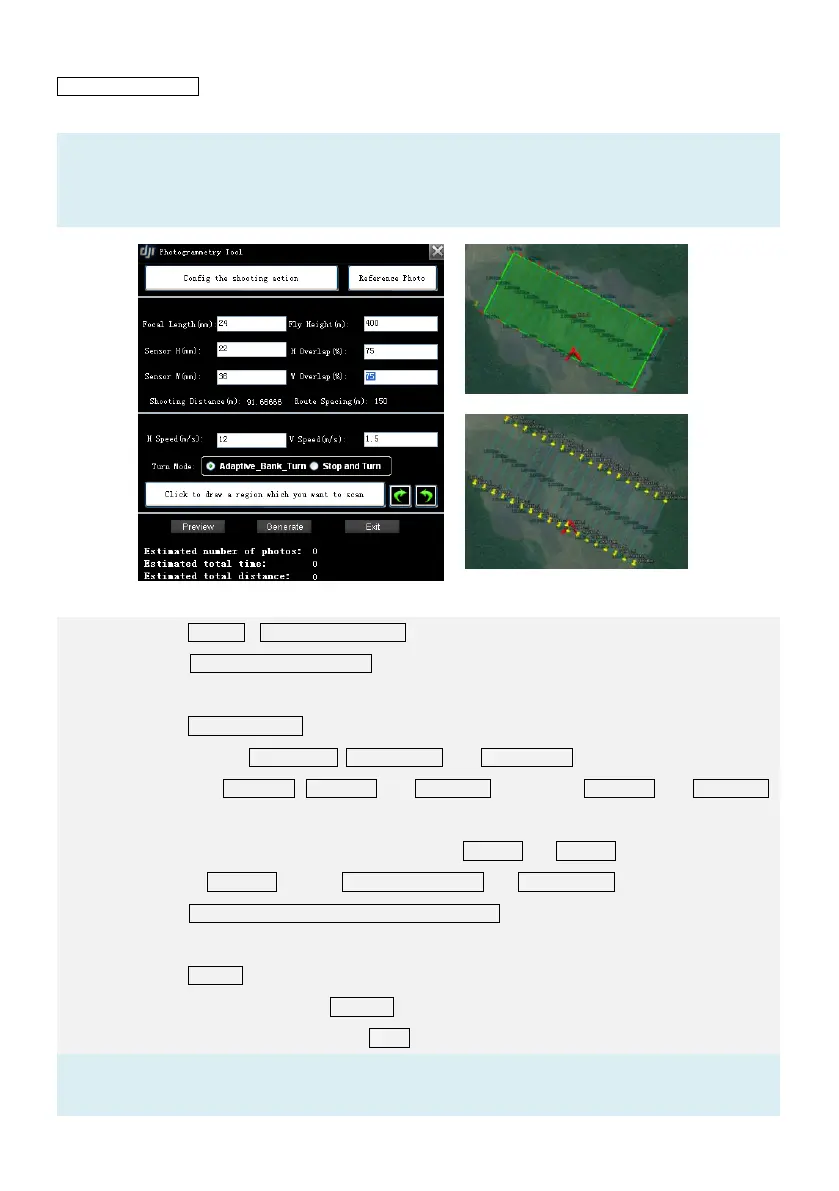
STEP1: Click ToolBoxPhotogrammetry Tool to open the setting window, shown as Fig.①.
STEP2: Click Config the shooting action to setup the servo action for the camera shooting action,
reference to section 4.4.
STEP3: Click Reference Photo to see if the camera is working as you want.
STEP4: Fill in the right Focal Length, Sensor Height, and Sensor Width according to the camera.
STEP5: Fill in the Fly Height, H Overlap and W Overlap as you like. H Overlap and W Overlap
represent the overlap percentage across the sensor height and width.
STEP6: Fill in the flight horizontal and vertical speed in H Speed and V Speed separately.
STEP7: Choose turn mode between Adaptive_Bank_Turn and Stop and Turn.
STEP8: Click Click to draw a region which you want to scan to choose an area, reference to section
4.5 to change the area.
STEP9: Click Preview to preview the mission plan, shown as Fig.②.
STEP10: If everything is OK, click Generate to generate all waypoints. Now you will have a flight
mission generated automatically in the Editor, shown as Fig. ③.