CREATE A SCHEDULE
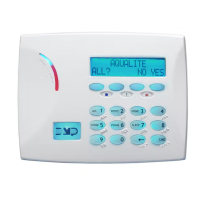
1. At the keypad, press CMD until the USER MENU?
prompt displays
2. Select YES and enter 99+CMD to enter the USER
MENU
3. Using CMD, navigate to SCHEDULES? and press a
top-row select area
4. Select TIMES
5. To create a time schedule, select ADD
6. Press 1 to create Schedule 1
7. Press a top row area to name the schedule ACCESS
8. Press CMD and select a day of the week.
9. Enter the BEGIN and END times for the chosen day
10. Set times for each day of the week
11. Create another schedule named LIGHTS
CREATE A PROFILE
1. At the keypad, press CMD until the USER MENU?
prompt displays
2. Select YES and enter 99+CMD to enter the USER
MENU
3. Using CMD, navigate to PROFILES? and press a top-
row select area
4. Select ADD and enter 11 to create Profile 11
5. Press a top row area to name the profile ACCESS
6. Assign ARM/DISARM AREA 2 and press CMD
7. Assign ACCESS AREA 2 and press CMD
8. Press CMD until DISARM? displays and select YES
9. Navigate to DOOR ACCESS and confirm it is set to
YES
10. Navigate to FIRST ACCESS SCHEDULE and press the
third select area to enter the schedule number for the
access schedule
11. LIST will show the schedule names
12. Press CMD until PROFILE 11 ADDED is displayed
13. Create another profile named MANAGEMENT using
Profile 12
ê The instructor will provide settings for this profile
ADD A USER CODE WITH PIN
14. Enter the USER MENU and navigate to the USER
CODES? prompt
15. Press a top-row select area to add a USER CODE
16. Select ADD
17. Select the USER NUMBER and press CMD
ê The fourth top row select area will display the lowest available user number
18. Enter in a 5-digit user code and press CMD
19. Press a top-row select area to add a USER NAME and
press CMD
20. Press a top row select area enter 12 to assign
PROFILE 12 to this user
ê LIST will display the profile names
21. Press CMD until USER ADDED displays
ADD A USER CODE WITH CARD
1. Enter the USER MENU and go to USER CODES?
2. Press a top-row select area to add a USER CODE
3. Select ADD
4. Select the USER NUMBER and press CMD
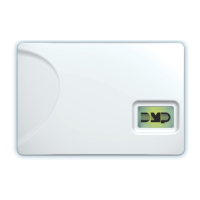
5. Scan card by waving it over the blue status LED
6. Press a top-row select area and add a USER NAME
and press CMD
7. Press a top-row select area and enter 11 to assign
PROFILE 11 to this user.
8. Press CMD until USER ADDED displays
PROGRAM AN ANNUNCIATOR OUTPUT
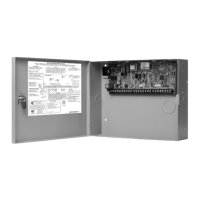
1. Remove all power from the panel
2. Connect a 4-wire harness to the OUTPUTS header on
the panel
3. Connect the POSITIVE leg of the LED to the RED
terminal on the panel
4. Connect the other leg of the LED to OUTPUT 3 on the
panel
5. Power the panel back up
6. Enter the Programmer by entering 6653 (PROG) at
the keypad
7. Navigate to AREA INFORMATION and press a top-
row select area
8. Navigate to settings for AREA 1
9. Navigate to ARMED OUTPUT and press a select area
to clear the current setting
10. Set the output to 3
11. Navigate to STOP to save changes and exit the
Programmer
12. Arm AREA 1 to confirm the output is working
PROGRAM A RELAY
1. Remove all power from the panel
2. Plug a MODEL 305 relay into the socket for OUTPUT 1
ê Make sure the relay is oriented correctly
3. Connect the MODEL 431 harness to the header
between the output sockets
XR150/550 LAB GUIDE
 Loading...

